


You know those days? The ones where your throat feels like sandpaper and a persistent tickle just won’t quit? Yeah, me too. It’s usually when I’m juggling a million things – work deadlines, school pickups, maybe even a surprise visit from unexpected guests – that the dreaded cough decides to settle in. For years, I’d reach for the syrupy stuff from the pharmacy, the one that tastes vaguely of artificial cherry and leaves a weird film. But honestly? It never felt like *real* relief. Then, one particularly rough winter, my grandma shared her secret weapon, a truly wonderful homemade cough syrup recipe that changed everything. It’s so simple, so soothing, and uses ingredients you probably already have in your pantry. It’s become my go-to, a little jar of liquid gold that calms my cough and warms my soul. Forget those artificial flavors; this is pure, unadulterated comfort in a spoonful.
What is home made cough syrup?
So, what exactly is this magical concoction I’m raving about? Think of it as a deeply comforting, all-natural elixir designed to soothe a sore throat and quieten that annoying cough. It’s essentially a potent blend of natural sweeteners and powerful herbal ingredients, simmered down to a thick, luscious syrup. It’s not a medicine in the pharmaceutical sense, but more of a traditional remedy passed down through generations, harnessing the inherent healing properties of simple, wholesome ingredients. It’s the kind of thing you’d find in a cozy apothecary, except you can whip it up right in your own kitchen. My grandma always called it “nature’s hug,” and honestly, that’s exactly how it feels when you take a spoonful.
Why you’ll love this recipe?
Let’s get down to why this homemade cough syrup is an absolute game-changer. First off, the flavor. Oh, the flavor! It’s a gentle sweetness with a hint of warmth that’s incredibly pleasant, even for fussy eaters (my kids actually ask for it!). Unlike store-bought versions, there’s no artificial aftertaste, just pure, natural goodness. It’s also ridiculously easy to make. Seriously, if you can boil water, you can make this. The ingredients are super budget-friendly too – think honey, ginger, lemon – items you likely already have on hand. This means you can whip up a batch whenever that cough starts creeping in, without a special trip to the store. What I love most is its versatility. While it’s fantastic for coughs, it’s also a delightful little treat when you’re craving something sweet and comforting. I’ve even drizzled it over yogurt! It stands out because it’s crafted with love and intention, and you can truly taste the difference. It’s a hug in a jar, and who doesn’t need more of that?
How do I make homemade cough syrup?
Quick Overview
Making this homemade cough syrup is incredibly straightforward. You’ll essentially simmer a few key ingredients – think honey, fresh ginger, and lemon – to create a potent, soothing liquid. It’s a gentle process that coaxes out the best flavors and properties of each component. The beauty lies in its simplicity; there’s no complicated technique, just patience and a little bit of simmering. It’s a lifesaver on busy nights when you need something effective but can’t be bothered with complex preparations.
Ingredients
For the Soothing Base:
This is where the magic happens! We’re focusing on natural goodness that calms and comforts.
Local Honey: About 2 cups. Using local honey is fantastic because it can help with seasonal allergies and it has wonderful antibacterial properties. If you can’t find local, any good quality, raw honey will do. Avoid pasteurized honey if possible, as some of the beneficial enzymes might be compromised.
Fresh Ginger: A generous knob, about 3-4 inches, peeled and thinly sliced. Ginger is a powerhouse for its anti-inflammatory and antioxidant properties. It also adds a lovely warmth. Don’t be shy with the ginger; it’s what gives this syrup its kick!
Lemon: 1 whole organic lemon, thinly sliced (rind and all). Lemon is packed with Vitamin C and helps to cut through the sweetness, adding a bright, fresh note. Make sure it’s organic so you don’t have to worry about the peel.
Water: 1/2 cup. Just enough to get things started and help extract the flavors.
Optional Boosters (for extra oomph!):
These can be added for specific benefits or just to customize the flavor.
Cinnamon Stick: 1 stick. Adds a lovely warmth and has its own antimicrobial properties.
Cloves: 3-4 whole cloves. They have a strong flavor and are known for their antiseptic qualities.
Elderberries (dried): 1 tablespoon. If you have them, they are fantastic for immune support.
Step-by-Step Instructions
Step 1: Prepare Your Ingredients
Wash your lemon thoroughly. Peel the ginger (I find a spoon works best for this!) and slice it thinly. Slice the lemon thinly, rind and all. You want to make sure everything is ready to go before you start simmering, so you can add it all in smoothly.
Step 2: Combine in a Pot
Grab a medium saucepan. Add the sliced ginger, sliced lemon, and water. If you’re using any of the optional boosters like cinnamon or cloves, toss them in now too. Give it a gentle stir.
Step 3: Simmer and Infuse
Place the saucepan over medium heat and bring the mixture to a gentle simmer. Once it’s simmering, reduce the heat to low, cover the pot, and let it infuse for about 20-30 minutes. You want the ginger and lemon to really release their flavors and essences into the water. The kitchen will start smelling amazing!
Step 4: Strain the Infusion
Once the simmering time is up, carefully strain the liquid into a heatproof bowl or a large measuring cup. Use a fine-mesh sieve to catch all the ginger slices, lemon slices, and any spices. Discard the solids. You should have a fragrant, golden liquid.
Step 5: Add the Honey
Now for the star ingredient! Pour your beautiful, warm (but not boiling!) infusion back into the clean saucepan. Add the honey. Stir gently over low heat until the honey is completely dissolved and incorporated into the liquid. You don’t want to boil the honey, as this can diminish its beneficial properties. Just warm it through until it’s fully blended.
Step 6: Cool Slightly
Remove the saucepan from the heat. Let the syrup cool for about 10-15 minutes. It should still be warm, but not too hot to handle or store.
Step 7: Transfer to a Jar
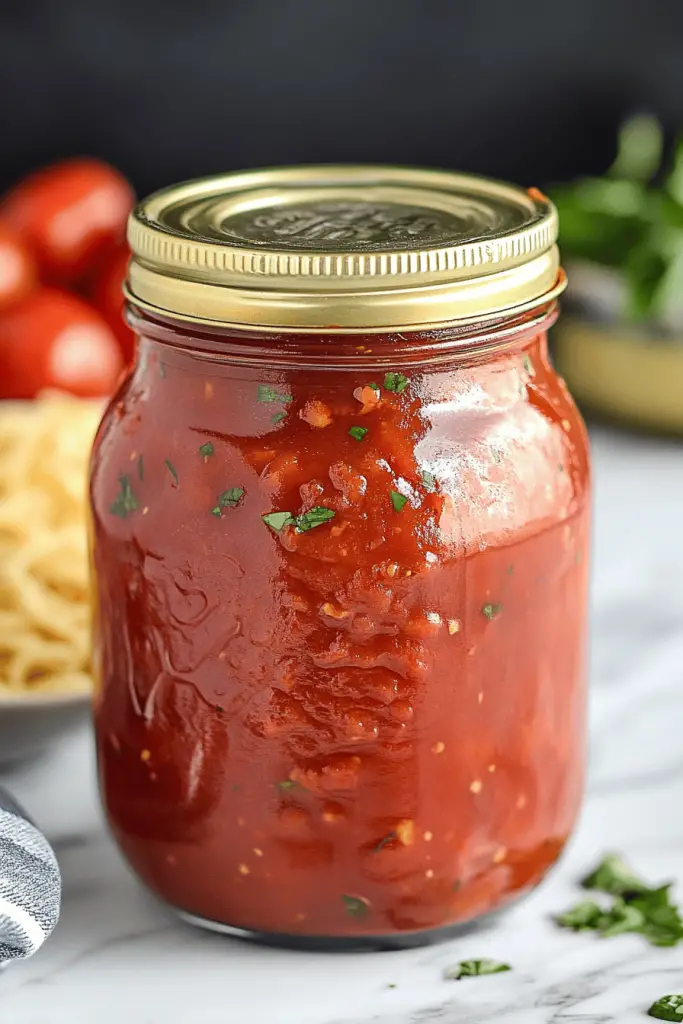
Carefully pour your freshly made homemade cough syrup into a clean, sterilized glass jar or bottle. A mason jar works perfectly. Make sure the lid is on tightly.
Step 8: Store and Use
Let the syrup cool completely before storing it in the refrigerator. Once it’s chilled, it’s ready to use! This recipe makes a decent batch, perfect for keeping on hand throughout the cold and flu season.
Step 9: Taking Your Syrup
When that tickle starts, take 1-2 teaspoons of the syrup. You can take it straight, or mix it into a warm cup of herbal tea or even just warm water. It’s wonderfully soothing and you can take it as needed.
What to Serve It With
While this homemade cough syrup is a star on its own, it pairs beautifully with a few things, especially when you’re feeling under the weather. For those early mornings when you’re still battling a lingering cough, a teaspoon stirred into a warm cup of chamomile or peppermint tea is pure bliss. The warmth of the tea combined with the soothing syrup feels like a gentle hug from the inside out. If you’re feeling a bit peckish but don’t have much appetite, a simple slice of lightly toasted whole-wheat bread, perhaps with a thin layer of butter, and a small spoonful of this syrup on the side can be surprisingly comforting. It’s not a meal, but it’s a moment of gentle nourishment. Sometimes, if the cough is particularly stubborn at night, I’ll even just take a teaspoon straight before bed, and the warmth it brings is incredibly calming. It’s not about elaborate pairings here; it’s about simple, comforting moments that help you heal.
Top Tips for Perfecting Your Homemade Cough Syrup
I’ve made this homemade cough syrup more times than I can count, especially during those never-ending winter months. Over the years, I’ve picked up a few tricks that I think make it even better. First off, when it comes to the ginger, don’t bother with fancy grating or mincing. Just a good, honest slice works wonders for infusing. I’ve learned that using a spoon to peel the ginger is much easier than a peeler and it avoids wasting any of that precious ginger flesh. For the lemon, make sure it’s well-washed, especially if you’re not using organic. The rind has a lot of beneficial oils, so slicing it thinly and leaving it in is key. When you’re simmering, keep an eye on it; you don’t want it to boil vigorously, just a gentle, lazy simmer. That’s how you coax out all the goodness without scorching anything. And the honey! This is super important. Always add the honey to the warmed infusion, never directly to the boiling mixture, and stir until it’s fully dissolved. If you add it when it’s too hot, you can actually destroy some of its natural benefits. I once tried using maple syrup instead of honey when I ran out, and while it was still good, the texture and flavor profile were quite different – honey really is the best for this specific recipe. I also found that if I strain the mixture really well after simmering the ginger and lemon, the final syrup is smoother and easier to take, without any bits of ginger or lemon peel getting stuck. And for storage, a truly clean, sterilized jar is non-negotiable to ensure it lasts as long as possible in the fridge. Trust me on these little details; they really do make a difference in the final outcome!
Storing and Reheating Tips
Storing this homemade cough syrup is pretty straightforward, and it’s key to keeping it fresh and potent. Once it’s completely cooled down, transfer it into an airtight glass jar or bottle and pop it straight into the refrigerator. It should last quite well in the fridge for about 3-4 weeks. I know that sounds like a long time, but if you’re using it regularly during cold season, you’ll go through it faster than you think! I always keep a label on the jar with the date I made it, just so I have a good idea of how long it’s been in there. If for some reason it starts to look cloudy or develops any off-smell, it’s best to discard it. As for reheating, you generally don’t need to! It’s lovely served at room temperature or slightly chilled straight from the fridge. If you prefer it warmer, you can gently warm a spoonful in a mug with some warm water or herbal tea, but again, avoid boiling it. The goal is just to take the chill off, not to cook it. The beauty of this syrup is that it’s ready to go when you need it, no reheating required most of the time.
Frequently Asked Questions
Final Thoughts
There you have it – my treasured recipe for homemade cough syrup. It’s more than just a remedy; it’s a little jar of comfort that I can rely on when I need it most. I really hope you give this a try. It’s so rewarding to make something so beneficial with just a few simple, natural ingredients. The warmth of the ginger, the brightness of the lemon, and the soothing sweetness of the honey just work wonders. It’s proof that nature really does have the best solutions, doesn’t it? If you find yourself battling a cough or sore throat, reach for this instead of the artificial stuff. I can’t wait to hear how yours turns out! Please leave a comment below and let me know if you tried it, or if you have any of your own family’s favorite remedies. Happy healing!
Homemade Cough Syrup
Ingredients
Main Ingredients
- 2 tablespoons Apple Cider Vinegar preferably Bragg's, if available
- 2 tablespoons Honey locally produced raw honey is best, if available
- 2 tablespoons Water
- 0.25 teaspoon Cayenne Pepper
- 0.25 teaspoon Ground Ginger
Instructions
Preparation Steps
- Place all the ingredients in a small jar and shake to combine.
- Leave at room temperature for a few days or place in the refrigerator for longer storage.
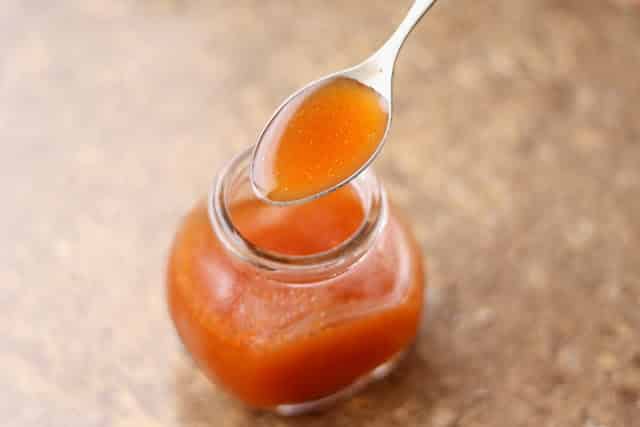
- Shake well each time, before using. The spices will not dissolve into the liquid. It will not be a thick syrup, it should remain watery.
- Take as needed and have a happy and healthy new year!


