


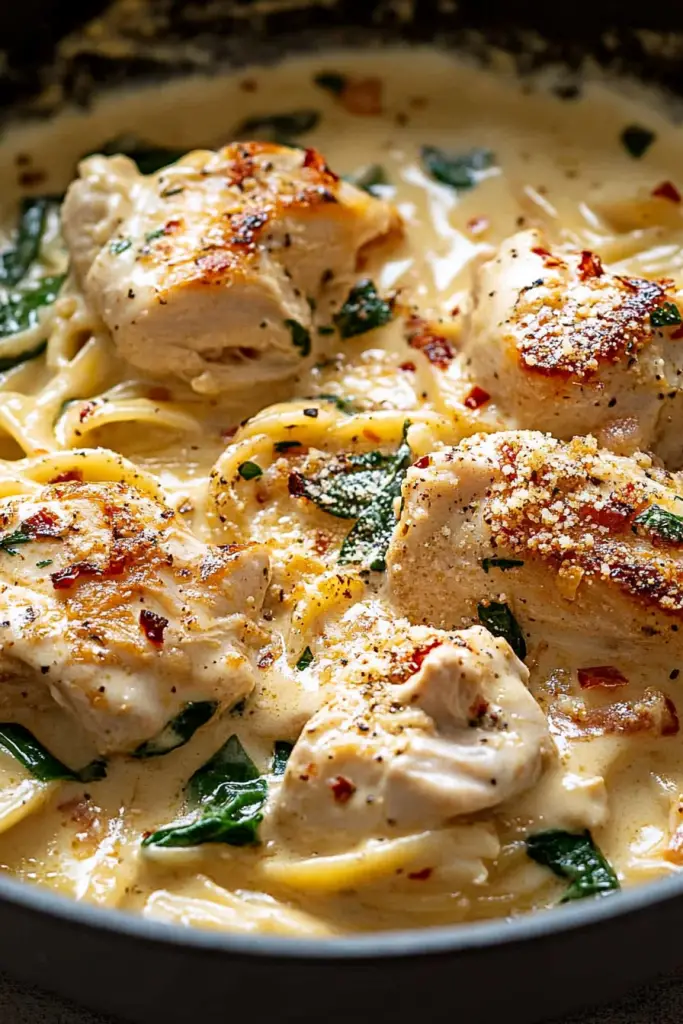
Okay, so confession time. I’ve always had a soft spot for Comfort Food that’s a little bit unexpected. You know, the kind of dish that makes you tilt your head for a second, then say, “Wait, what *is* this magic?” That’s exactly what happened the first time I tasted a truly phenomenal creamy pasta pudding. It’s not quite a cake, not quite a casserole, but something wonderfully in between. Imagine the silkiest, most luscious custard you can think of, studded with tender pasta that just melts in your mouth, all baked into a golden-brown delight. It’s the kind of dessert that feels both incredibly indulgent and surprisingly simple. For years, I’d see hints of it, maybe a mention in an old cookbook or a whispered family secret, but I never quite cracked the code. Then, one rainy afternoon, inspired by a craving for something sweet but not *too* heavy, and armed with a handful of leftover pasta, I started tinkering. The result? This absolutely divine creamy pasta pudding. It’s become my go-to when I want something a little special, a little nostalgic, and a whole lot delicious. Honestly, it’s a total game-changer for dessert and a fantastic way to use up any cooked pasta you might have hanging around.
What is creamy pasta pudding?
So, what exactly *is* this delightful concoction? Think of it as a sweet, baked custard that’s been given a delightful twist with the addition of cooked pasta. It’s essentially a baked pudding, but instead of bread or rice, we’re using pasta! It sounds a little unusual, I know, but trust me on this one. The pasta, when baked in the creamy custard base, becomes incredibly tender and takes on a wonderful, slightly chewy texture that’s just *chef’s kiss*. It’s not like eating a bowl of spaghetti with sugar; it’s more about how the pasta absorbs the rich, sweet flavors and adds a unique body to the pudding. The name itself, “Creamy Pasta pudding,” really says it all. It highlights the two key components: the luxurious, smooth creaminess of the custard and the star ingredient, pasta. It’s a humble dish at heart, born from a desire to create something satisfying and delicious with simple, readily available ingredients. It’s the kind of dessert that feels both old-fashioned and brand new, all at once.
Why you’ll love this recipe?
Honestly, there are so many reasons why this creamy pasta pudding has earned a permanent spot in my recipe repertoire. First off, the FLAVOR. Oh, the flavor! It’s this delicate balance of sweet, creamy, and slightly vanilla-y goodness. The pasta doesn’t overpower; it just adds this incredible texture and a comforting warmth that you just can’t get from a regular pudding. It’s like a hug in a bowl, but fancier. And speaking of fancy, the SIMPLICITY of this recipe is another huge win. Even if you’re not a seasoned baker, you can totally nail this. The steps are straightforward, and you likely already have most of the ingredients in your pantry. This pudding is also surprisingly COST-EFFECTIVE. Pasta is super affordable, and the other ingredients are pantry staples. You can whip up this impressive dessert without breaking the bank, which is always a bonus in my book. And let’s talk about VERSATILITY! This pudding is fantastic on its own, but it’s also a blank canvas for so many delicious additions. I love adding a swirl of fruit puree, some chocolate chips, or even a sprinkle of cinnamon. It’s a recipe I’ve adapted for different moods and occasions. What I love most about this is that it always feels a little bit magical. It’s a reminder that sometimes, the most delightful creations come from the simplest ideas and the most unexpected combinations. It’s a far cry from a complex layer cake, but it’s just as rewarding, if not more so, because it’s so darn easy and consistently delicious.
How do I make creamy Pasta Pudding?
Quick Overview
Making this creamy pasta pudding is surprisingly straightforward and comes together faster than you might think, especially if you have some pre-cooked pasta on hand. The process involves whisking together a rich custard base, gently folding in cooked pasta, and then baking it until it’s set and golden. It’s a method that ensures every bite is infused with creamy goodness and that delightful pasta texture. It’s really about creating a simple, comforting dessert that feels like a special treat without all the fuss. You’ll be amazed at how quickly you can go from pantry staples to a delicious, crowd-pleasing dessert.
Ingredients
For the Main Batter:
* 4 large eggs: These are the backbone of our custard, giving it that rich, creamy texture and helping it set beautifully. Make sure they’re at room temperature so they incorporate smoothly.
* 2 cups whole milk: Whole milk is key here for that luxurious creaminess. You *can* use 2%, but it won’t be quite as decadent.
* 1 cup heavy cream: A little extra richness goes a long way! This is what truly elevates our creamy pasta pudding.
* 3/4 cup granulated sugar: For sweetness, of course! You can adjust this slightly depending on your preference.
* 1 teaspoon vanilla extract: The classic flavor enhancer that makes everything taste better. Good quality vanilla makes a difference!
* 1/4 teaspoon salt: Balances the sweetness and brings out all the other flavors. Don’t skip it!
* 2 cups cooked pasta: This is the star! Small shapes like ditalini, orzo, or even broken spaghetti work wonderfully. Make sure it’s cooked al dente, as it will continue to soften in the oven. You want it slightly tender, not mushy.
For the Optional Filling (for extra decadence!):
* 1/2 cup dried cranberries or chocolate chips: These add little bursts of flavor and texture throughout the pudding. I love using dried cranberries for a bit of tartness, but chocolate chips are always a crowd-pleaser!
* 1/4 cup finely chopped nuts (walnuts or pecans): For a lovely crunch. Make sure they’re toasted for an even better flavor.
For the Simple Glaze:
* 1/4 cup powdered sugar: For a lightly sweet finish.
* 1-2 tablespoons milk or cream: To get the perfect drizzling consistency. Add it a little at a time.
* A tiny splash of vanilla extract: To complement the pudding.
Step-by-Step Instructions
Step 1: Preheat & Prep Pan
First things first, let’s get our oven ready. Preheat it to 350°F (175°C). Now, grab a medium-sized baking dish – something around 8×8 inches or a similar oval casserole dish works perfectly. You don’t need to grease it if you’re using a non-stick dish, but if yours tends to stick, a light coating of butter or cooking spray will do the trick. This step is super simple, but it’s important to get your oven nice and hot so the pudding bakes evenly.
Step 2: Mix Dry Ingredients
In a large mixing bowl, we’re going to combine our sugar and salt. These are the dry elements that will form the sweet foundation of our custard. Just give them a quick whisk to make sure they’re evenly distributed. This seems so basic, but it’s one of those small steps that ensures everything dissolves nicely later on and prevents any weird pockets of salt or sugar in your finished pudding.
Step 3: Mix Wet Ingredients
Now, let’s bring in the wet ingredients. In a separate, larger bowl, whisk your room temperature eggs until they’re nicely blended. Then, pour in the whole milk and the heavy cream. Add the vanilla extract. Whisk everything together until it’s smooth and well combined. You want to see a nice, uniform color with no streaks of egg yolk or white. Getting these wet ingredients perfectly combined is crucial for a smooth, silky custard texture.
Step 4: Combine
This is where the magic starts to happen! Pour the wet ingredients into the bowl with the sugar and salt. Whisk gently until everything is fully incorporated and you have a smooth, luscious liquid. Now, gently fold in your cooked pasta. Be careful not to overmix at this stage; we just want to distribute the pasta evenly throughout the custard mixture. If you’re adding dried cranberries, chocolate chips, or nuts, now’s the time to gently stir them in too!
Step 5: Prepare Filling
If you’re going the extra mile with a filling swirl, now’s the time! For things like dried fruit or chocolate chips, we already stirred them into the main batter in the previous step. If you were planning a different kind of swirl, like a fruit puree or a jam, you’d prepare that separately. For this recipe, the added fruit/chocolate/nuts are mixed directly into the pudding base itself, making each bite a delightful surprise.
Step 6: Layer & Swirl
Pour the entire mixture into your prepared baking dish. If you’re doing a specific swirl with something like a jam, you’d dollop spoonfuls on top and then gently swirl with a knife. In this case, since we’ve already incorporated our add-ins, we just want to make sure the batter is evenly distributed in the dish. Give the dish a gentle tap on the counter to release any large air bubbles. This will help create that beautiful, even surface.
Step 7: Bake
Pop that beautiful dish into your preheated oven. Bake for about 40-50 minutes. You’ll know it’s ready when the edges are set and slightly golden brown, and the center is mostly firm but might have a slight wobble. A toothpick inserted near the center should come out mostly clean, with maybe a few moist crumbs attached. Ovens can be finicky, so keep an eye on it and adjust the time as needed. Don’t overbake, or it can become a little too firm.
Step 8: Cool & Glaze
Once it’s out of the oven, let your creamy pasta pudding cool on a wire rack for at least 15-20 minutes. This is super important for it to set up properly. While it’s cooling, whisk together the powdered sugar, a tablespoon of milk, and the vanilla extract for the glaze. Add more milk, a tiny bit at a time, until you get a smooth, drizzle-able consistency. Once the pudding has cooled slightly, drizzle the glaze all over the top. It’s optional, but it adds a lovely touch!
Step 9: Slice & Serve
You can serve your creamy pasta pudding warm or at room temperature. I actually think it’s even better the next day! Cut it into squares or scoop it out with a spoon. It’s wonderful on its own, but a dollop of whipped cream or a scoop of vanilla Ice Cream takes it to another level. Enjoy that comforting, sweet, and utterly delicious bite!
What to Serve It With
This creamy pasta pudding is so wonderfully versatile; it really shines in a few different settings. For a simple, comforting BREAKFAST, I love serving a small portion warm, perhaps with a sprinkle of cinnamon or a few extra fresh berries if I have them. It’s a bit more substantial than a bowl of cereal and feels like a real treat to start the day. A nice, hot cup of coffee is the perfect companion. When it comes to BRUNCH, this pudding can be dressed up a bit. Imagine it in individual ramekins, perhaps with a more elaborate fruit topping like a compote, or alongside some crispy bacon and fresh fruit salad. It adds that element of sweet indulgence to the spread. As a DESSERT, it’s a dream. Serve it slightly warm with a scoop of Vanilla Bean ice cream, a drizzle of chocolate sauce, or even a dollop of fresh whipped cream. It’s a comforting finish to any meal. And for those late-night COZY SNACKS when you’re craving something sweet but don’t want the effort of baking a whole cake, this is your answer. A small slice, maybe with a glass of milk, feels like a delightful little indulgence. My family has a tradition of having it on movie nights; it’s so easy to share and always a hit.
Top Tips for Perfecting Your Creamy Pasta Pudding
I’ve made this creamy pasta pudding more times than I can count, and over the years, I’ve picked up a few tricks that I think make all the difference. First, when it comes to the pasta itself, don’t overcook it! You want it to be al dente when you drain it because it will continue to soften and cook in the oven. Using small pasta shapes like orzo, ditalini, or even broken vermicelli is usually best, as they distribute more evenly and create a lovely texture without being too much. If you’re using a shape like spaghetti, just break it into smaller pieces before cooking. For the MIXING ADVICE, be gentle when you combine the wet and dry ingredients and especially when folding in the pasta. Overmixing can make the pudding tough. You’re just looking for everything to be combined and the pasta to be coated in that lovely custard. My biggest revelation came with the SWIRL CUSTOMIZATION – while the basic version is fantastic, adding things like dried cranberries, chocolate chips, or even a swirl of good quality jam can elevate it. Just be sure to fold them in gently so you don’t break the pasta. When it comes to INGREDIENT SWAPS, I’ve found that you can experiment a bit. While whole milk and heavy cream give the richest result, I’ve successfully used half-and-half for a slightly lighter but still creamy pudding. For the sugar, you can reduce it slightly if you prefer less sweetness, or even try a mix of granulated and Brown Sugar for a slightly deeper flavor. Baking is usually straightforward, but my BAKING TIPS involve trusting your senses. Ovens vary, so use the time as a guideline and look for those golden edges and a set center. Don’t be afraid to give it a little jiggle. And for the GLAZE VARIATIONS, the simple powdered sugar drizzle is lovely, but you can also make a lemon glaze for a bit of zing, or even just dust it with powdered sugar after it cools. The key is a thick but drizzly consistency so it doesn’t soak in too much or slide off.
Storing and Reheating Tips
One of the things I adore about this creamy pasta pudding is how well it keeps, making it perfect for making ahead. At ROOM TEMPERATURE, it will stay fresh for about 2-3 hours. If you’re serving it a bit later, it’s best to cover it loosely with plastic wrap or foil once it’s cooled down a bit from baking. For REFRIGERATOR STORAGE, allow the pudding to cool completely before covering it tightly with plastic wrap or transferring it to an airtight container. It will stay delicious for a good 3-4 days. The texture might change ever so slightly, becoming a little firmer, but it’s still wonderfully creamy and flavorful. When it comes to FREEZER INSTRUCTIONS, this pudding freezes surprisingly well! Let it cool completely, then wrap it tightly in a double layer of plastic wrap, followed by a layer of aluminum foil. You can freeze individual portions or the whole dish. It should last for up to 2 months in the freezer. To thaw, transfer it to the refrigerator overnight. For reheating, you can gently warm individual slices in the microwave for about 30-60 seconds, or bake the entire dish (or portions) in a 300°F (150°C) oven until warmed through, usually about 15-20 minutes. The GLAZE TIMING ADVICE is important here. I always recommend adding the glaze *after* the pudding has cooled and *before* serving. If you’re refrigerating or freezing, it’s often best to store the glaze separately and drizzle it on just before serving to keep it fresh and appealing.
Frequently Asked Questions
Final Thoughts
So there you have it – my absolute favorite recipe for a creamy pasta pudding. It’s a dish that always brings a smile to my face, and more importantly, to the faces of everyone I share it with. It’s proof that simple ingredients can create something truly magical, and that sometimes, the most comforting desserts come from the most unexpected places. If you’re looking for a dessert that’s a little bit different, wonderfully creamy, and incredibly satisfying, I really hope you’ll give this one a try. It’s the perfect treat for a cozy night in, a delightful addition to a brunch spread, or even a surprisingly elegant dessert for company. If you love this recipe, you might also enjoy my {link to another creamy dessert recipe} or my {link to a pasta bake recipe} for more comforting dishes. I can’t wait to hear what you think! Let me know in the comments below how yours turns out and if you try any fun variations. Happy baking, and enjoy every delicious bite!
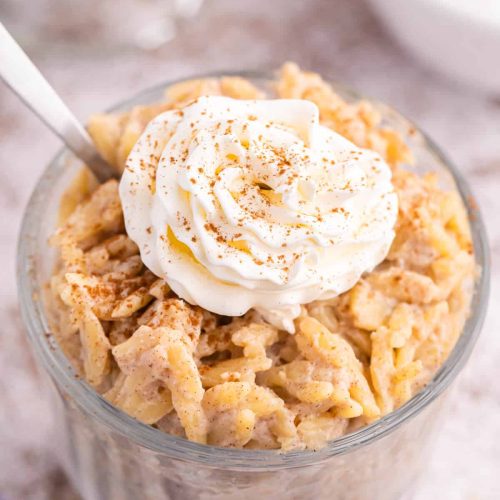
Creamy Orzo Pudding
Ingredients
Main Ingredients
- 1 cup orzo (uncooked)
- 3.5 cups milk
- 1 large egg yolk egg yolk
- 1 large egg egg
- 0.5 cup granulated sugar
- 0.25 tsp salt
- 1 tsp cinnamon plus extra for garnish
- 1.5 tsp vanilla extract
Instructions
Preparation Steps
- Heat orzo and milk in a medium saucepan over medium-high heat, stirring constantly.
- Once simmering, reduce heat to medium-low and stir occasionally for 15 minutes, or until orzo is cooked.
- In a bowl, whisk the egg yolk, egg, sugar and salt.
- Slowly whisk the egg mixture into the orzo mixture and heat over medium-low stirring constantly until the mixture starts to thicken.
- Remove from heat and stir in vanilla extract and cinnamon.
- Can be served warm or chilled.


