


Oh, where do I even begin with this Raspberry Tiramisu? It’s one of those recipes that feels like a warm hug on a plate, and honestly, it’s my absolute go-to when I want something that feels incredibly special without actually having to stress myself out in the kitchen. You know how some desserts just *sound* complicated? Tiramisu often falls into that category for people. But let me tell you, this version is my little secret weapon. It’s lighter and brighter than the traditional coffee-soaked version, thanks to the burst of tart raspberries that cut through the creamy mascarpone. It’s honestly a game-changer for potlucks, holidays, or even just a spontaneous craving for something sweet after dinner. I remember the first time I served this at a summer barbecue, and people were practically fighting over the last piece! It’s that good, and it looks so elegant, but shhh, we’ll keep our little secret about how easy it truly is.
What is a Raspberry Tiramisu?
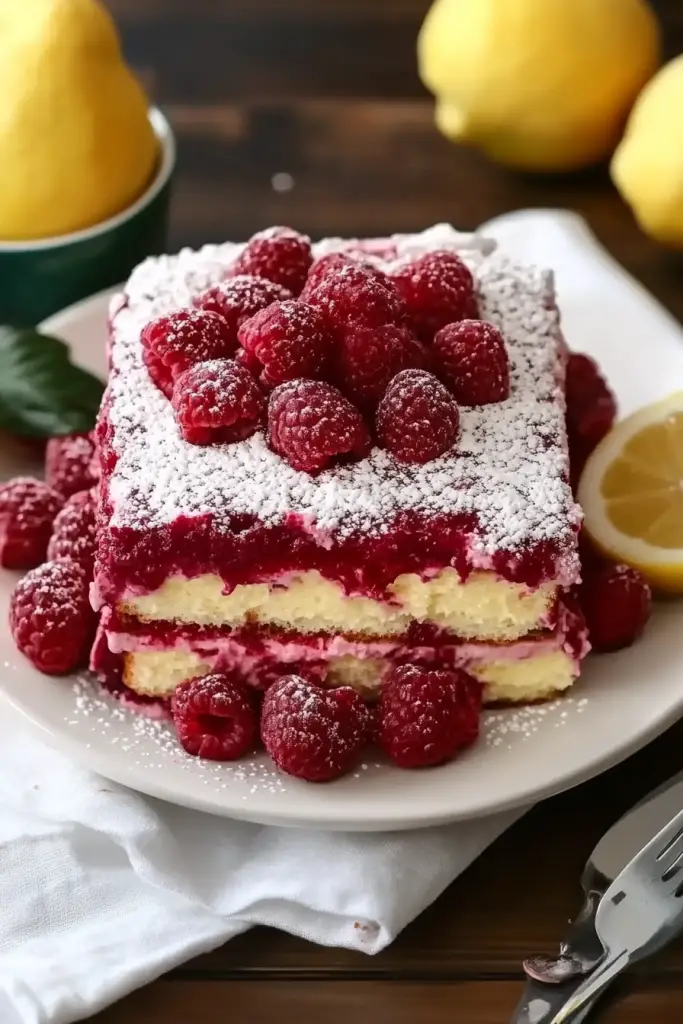
So, what exactly *is* this magical dessert I keep raving about? Think of classic tiramisu – that dreamy Italian layered dessert with coffee-soaked ladyfingers and a rich mascarpone cream. Now, imagine swapping out the strong coffee for the vibrant, slightly tart goodness of fresh raspberries, maybe with a hint of raspberry liqueur if you’re feeling fancy. That’s pretty much it! It’s essentially a no-bake wonder that relies on good quality ingredients and a bit of patient layering. Instead of being heavy and coffee-forward, this raspberry tiramisu is light, fruity, and utterly decadent. It’s like the sophisticated cousin of a fruit trifle, but with that undeniable Italian elegance. The name “tiramisu” itself means “pick me up” in Italian, and believe me, this version is a delicious way to lift your spirits after a long day.
Why you’ll love this recipe?
There are so many reasons why I’ve fallen head over heels for this Raspberry Tiramisu, and I just know you will too! First and foremost, the *flavor* is just out of this world. You get that luscious, creamy sweetness from the mascarpone filling, perfectly balanced by the slightly tart, juicy burst of fresh raspberries. It’s not too sweet, which is a huge win in my book. Then there’s the *simplicity*. Seriously, this is a no-bake miracle. No complicated custards, no fussy meringues. It’s all about whipping, layering, and chilling. This makes it a lifesaver on busy weeknights or when you’re hosting and don’t want to spend hours in the kitchen. And let’s talk about *cost-efficiency*. While it feels fancy, the ingredients are pretty standard, and you don’t need a ton of them. Plus, you can often find raspberries on sale, making this an affordable indulgence. The *versatility* is another big draw. You can easily adapt it! Don’t have fresh raspberries? Frozen ones work in a pinch, you just might need to thaw them slightly. Want a stronger raspberry punch? Add a splash of raspberry liqueur or a touch of raspberry extract to the cream. This recipe is also fantastic because it’s so forgiving. Even if your ladyfingers get a little too soaked, it still works out beautifully once it’s chilled. I’ve made this countless times, and it always disappears in minutes. It’s perfect for birthdays, anniversaries, or honestly, just because you deserve a treat. What I love most about this specific raspberry tiramisu recipe is that it feels like a special occasion dessert but is surprisingly approachable for even beginner bakers. It’s truly a crowd-pleaser that never fails to impress.
How do I make a Raspberry Tiramisu?
Quick Overview
Making this Raspberry Tiramisu is wonderfully straightforward. You’ll gently whip up a creamy mascarpone filling, quickly dip ladyfingers into a raspberry liquid, and then layer everything together with fresh raspberries. The magic really happens in the fridge as it chills and the flavors meld. It’s a process that requires minimal active time but yields maximum deliciousness. The beauty is in its simplicity, allowing the fresh fruit and creamy filling to really shine. You’ll be amazed at how something so easy can taste so incredibly gourmet.
Ingredients
For the Raspberry Dipping Liquid: For the Raspberry Dipping Liquid: For the Raspberry Dipping Liquid: For the Raspberry Di
2 cups fresh or frozen raspberries (if frozen, thaw slightly)
1/4 cup water
2 tablespoons granulated sugar (or to taste)
1 tablespoon raspberry liqueur (optional, but highly recommended for extra flavor!)
For the ladyfingers, you’ll need about 24-30 savoiardi ladyfingers (the crisp, dry kind). Make sure you have enough to create two layers in your dish!
For the Mascarpone Cream Filling:
16 ounces (2 blocks) mascarpone cheese, softened at room temperature for about 30 minutes (this is key for a smooth cream!)
1/2 cup granulated sugar
4 large eggs, separated (use pasteurized eggs if you’re concerned about raw eggs)
1 teaspoon vanilla extract
A pinch of salt
For Assembly and Garnish:
1.5 cups fresh raspberries, plus more for topping
Optional: Powdered sugar for dusting, fresh mint sprigs for decoration
Step-by-Step Instructions
Step 1: Prepare the Raspberry Dipping Liquid
In a small saucepan, combine the 2 cups of raspberries, 1/4 cup water, and 2 tablespoons of sugar. Heat over medium heat, stirring occasionally, until the raspberries break down and release their juices, about 5-7 minutes. Strain the mixture through a fine-mesh sieve into a shallow bowl, pressing gently on the solids to extract as much liquid as possible. Discard the solids. Stir in the raspberry liqueur, if using. Let this mixture cool completely. It’s important that it’s not warm when you dip the ladyfingers, or they’ll get too soggy. This liquid is the base of our flavor, so make sure it tastes good!
Step 2: Whip the Egg Yolks and Sugar
In a medium heatproof bowl, whisk together the 4 egg yolks and 1/2 cup sugar. Place this bowl over a saucepan of simmering water (making sure the bottom of the bowl doesn’t touch the water). Whisk constantly for about 5-7 minutes, until the mixture is pale yellow, thick, and has doubled in volume. This process, called a zabaglione, gently cooks the yolks and creates a beautiful, stable base for our cream. Remove the bowl from the heat and stir in the vanilla extract. Let it cool slightly.
Step 3: Whip the Mascarpone
In a separate large bowl, beat the softened mascarpone cheese with an electric mixer on medium speed until it’s smooth and creamy. Be careful not to overmix mascarpone, as it can sometimes curdle if you beat it too vigorously. Just aim for a nice, smooth consistency.
Step 4: Combine Yolks and Mascarpone
Gently fold the cooled egg yolk mixture into the whipped mascarpone cheese. Use a spatula and fold until just combined. You want to maintain as much airiness as possible. It should be a lovely, pale, creamy mixture.
Step 5: Whip the Egg Whites
In a clean, dry bowl (make sure there’s absolutely no grease or yolk in it, or they won’t whip!), beat the 4 egg whites with a pinch of salt using an electric mixer on high speed until stiff peaks form. Stiff peaks mean that when you lift the beaters, the egg whites stand up straight without drooping.
Step 6: Fold in Egg Whites
Gently fold the whipped egg whites into the mascarpone and egg yolk mixture in two additions. Be careful not to deflate the egg whites; this is what gives the tiramisu its light and airy texture. Fold until no white streaks remain, but don’t overmix. The result should be a luscious, cloud-like cream.
Step 7: Assemble the Tiramisu
Now for the fun part! Take your chosen serving dish (an 8×8 inch square dish or a similar-sized rectangular one works well). Quickly dip each ladyfinger, one at a time, into the cooled raspberry liquid. Don’t let them soak for too long – just a quick dip on each side is enough. They should absorb some liquid but not become mushy. Arrange a single layer of dipped ladyfingers on the bottom of your dish. Scatter about half of the fresh raspberries over the ladyfingers. Then, spread half of the mascarpone cream evenly over the raspberries. Repeat with another layer of dipped ladyfingers, the remaining fresh raspberries, and finally, the rest of the mascarpone cream. Smooth the top layer of cream with your spatula.
Step 8: Chill
Cover the dish tightly with plastic wrap and refrigerate for at least 6 hours, or preferably overnight. This chilling time is crucial for the flavors to meld and for the tiramisu to set properly. It’s what makes it sliceable!
Step 9: Garnish and Serve
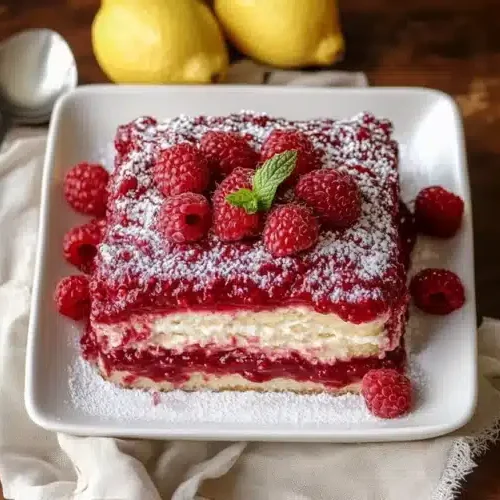
Before serving, sprinkle the top generously with a few extra fresh raspberries. You can also dust it lightly with powdered sugar if you like, or add a few fresh mint sprigs for a pop of color. Slice into squares and serve chilled. Get ready for the compliments!
What to Serve It With
This Raspberry Tiramisu is so versatile, it’s a fantastic addition to almost any meal or occasion. It truly shines when served on its own as a show-stopping dessert, but here are a few ideas:
For Breakfast: While it might seem a bit decadent for breakfast, a small slice with a good cup of coffee can be an amazing start to a special day, especially on a weekend. It’s not overly sweet, so it won’t give you that sugar crash later. Imagine a leisurely morning with this light, fruity treat – pure bliss!
For Brunch: This is where it *really* shines! Serve it as part of a brunch spread alongside pastries, fruit salads, and maybe some quiche. Its bright flavor makes it a perfect palate cleanser after richer brunch dishes. Pair it with a sparkling rosé or a mimosa for a celebratory touch. The visual appeal of the pink hues also makes it a lovely addition to a brunch table.
As Dessert: Of course, this is its natural habitat! It’s the perfect end to a lovely dinner party. Serve it with a small glass of dessert wine, like a Moscato d’Asti, or even a simple espresso. For a more elegant presentation, serve individual portions in pretty glasses or ramekins. The creamy, fruity combination is always a winner.
For Cozy Snacks: Sometimes, you just need a little something sweet to lift your spirits. This Raspberry Tiramisu is perfect for that! Enjoy a slice with a cup of herbal tea or even a glass of cold milk. It’s comforting, satisfying, and feels like a real treat without being too heavy. My kids love having a small piece after school when we have leftovers – it’s their favorite “special snack.”
Honestly, the best thing to serve it with is good company and a smile. It’s a dessert that sparks conversation and brings people together. My family tradition is to make this whenever we have a special occasion, and it’s always the first thing to be finished!
Top Tips for Perfecting Your Raspberry Tiramisu
I’ve made this Raspberry Tiramisu more times than I can count, and along the way, I’ve picked up a few tricks that really help ensure it turns out perfectly every time. These little bits of wisdom come from trial and error, and I’m happy to share them with you!
Raspberry Liquid Prep: Don’t skip straining the raspberry liquid! This is crucial for a smooth, non-seedy consistency. Also, make sure it’s completely cool before dipping the ladyfingers. If it’s too warm, they’ll turn to mush instantly. I’ve learned the hard way that a soggy ladyfinger is the enemy of a well-structured tiramisu. If you want an extra punch of raspberry flavor, consider simmering the raspberries with a tablespoon of good quality raspberry jam for a richer taste.
Mascarpone Cream Consistency: Softened mascarpone is key. If it’s too cold, it will be lumpy, and if it’s too warm, it can become watery. Aim for “room temperature but still firm.” When you fold in the egg whites, be gentle! This is what creates that incredible lightness. Think of it as folding air into the mixture. Overmixing will deflate those precious bubbles, and your tiramisu will be denser than you want.
Ladyfinger Dipping Technique: This is where a lot of people get nervous. The goal is for the ladyfingers to absorb enough liquid to become tender and moist, but not so much that they disintegrate. A quick dip on each side is usually enough. They should feel saturated but still hold their shape. If you’re using slightly thicker ladyfingers, you might need a fraction longer, but err on the side of caution. It’s better to have them slightly too firm than too mushy.
Layering for Visual Appeal: When you’re assembling, try to get an even layer of ladyfingers and cream. For the raspberries, scatter them evenly between the layers. If you want a really beautiful marbled effect, you can dollop some of the mascarpone cream and some raspberries directly onto the ladyfingers, then swirl gently with a knife or skewer. However, for this recipe, simply layering them works beautifully and is much easier. The fresh raspberries add pops of color and flavor throughout.
The Chilling Factor is Non-Negotiable: I know it’s tempting to dig in right away, but please, please give it at least 6 hours, and ideally overnight, to chill. This is when all those beautiful flavors marry and the dessert truly sets. It transforms from a jumble of ingredients into a cohesive, sliceable masterpiece. Trust me on this one; the patience is rewarded tenfold!
Ingredient Swaps and Variations: If you’re not a fan of raspberries, strawberries are a wonderful substitute. Just follow the same process for making the strawberry dipping liquid. For an extra adult-friendly kick, I sometimes add a tablespoon of Chambord (raspberry liqueur) or Kirsch to the mascarpone cream itself, not just the dipping liquid. If you’re concerned about using raw eggs, you can find pasteurized eggs at most grocery stores, or you can look up a recipe for a cooked zabaglione to use instead of the raw yolk mixture.
Storing and Reheating Tips
One of the best things about this Raspberry Tiramisu is how well it keeps, making it perfect for making ahead of time. Here’s how I usually store any leftovers (though let’s be honest, there are rarely any!):
Room Temperature: Once assembled and chilled, it’s best to keep it chilled until serving. It’s not ideal to leave it at room temperature for extended periods, especially with the dairy components. If you bring it out for serving, I’d say it can sit out for about an hour before you need to worry about putting it back in the fridge.
Refrigerator Storage: This is where this dessert truly thrives. Once it’s chilled and set, cover it tightly with plastic wrap or transfer it to an airtight container. It will stay delicious in the refrigerator for about 3 to 4 days. The flavors actually get better on the second day! The ladyfingers will continue to soften a bit, which is exactly what you want. Make sure it’s well-covered to prevent it from absorbing any other odors in the fridge.
Freezer Instructions: While I don’t typically freeze this tiramisu because the texture of the ladyfingers can change, if you absolutely must, here’s how I’d do it. Make sure it’s completely chilled and set. Wrap it very tightly in a layer of plastic wrap, followed by a layer of aluminum foil, or place it in a freezer-safe airtight container. It should last for about 1 to 2 months. Thaw it slowly in the refrigerator overnight before serving. Be aware that the ladyfingers might be a bit softer than when fresh.
Glaze Timing Advice: For this specific recipe, there isn’t a glaze in the traditional sense, but if you add a dusting of powdered sugar or a final layer of fresh raspberries, it’s best to add those just before serving to maintain their freshness and appearance. If you’re storing it in the fridge, you might want to wait to add the final decorative elements until just before you’re ready to present it. This ensures everything looks its Absolute Best.
Frequently Asked Questions
Final Thoughts
So there you have it – my beloved Raspberry Tiramisu recipe! It’s a dessert that truly embodies everything I love about home baking: it looks impressive, tastes divine, and is surprisingly manageable to make. It’s the kind of dish that makes everyone around the table happy, and that’s what cooking is all about for me. The bright, tangy raspberries cutting through the rich, creamy mascarpone is a flavor combination that just sings. I hope you give this a try, and when you do, I really hope it becomes a cherished recipe in your own kitchen, just like it is in mine. If you love this, you might also enjoy my Lemon Raspberry Scones or my classic No-Bake Cheesecake with Berry Compote for more fruity delights!
I can’t wait to hear what you think! Please leave a comment below with your thoughts, any variations you tried, or just to say hello. Your feedback and stories truly make my day. Happy baking, and enjoy every delicious bite!
Raspberry Tiramisu
Ingredients
Main Ingredients
- 0.5 cup heavy cream
- 0.25 cup granulated sugar
- 0.5 teaspoon vanilla extract
- 1 pound mascarpone cheese softened
- 3 large eggs yolks only
- 24 pieces ladyfingers
- 2 cups fresh raspberries divided
- 0.33 cup raspberry liqueur (optional)
Instructions
Preparation Steps
- In a medium bowl, whip the heavy cream with 1/4 cup granulated sugar and vanilla extract until stiff peaks form. Set aside.
- In a separate bowl, beat the softened mascarpone cheese until smooth.
- In another bowl, whisk the egg yolks with the remaining 1/4 cup granulated sugar until pale and thick.
- Gently fold the egg yolk mixture into the mascarpone cheese until well combined.
- Fold the whipped cream into the mascarpone mixture until smooth and creamy.
- If using, lightly brush each ladyfinger with raspberry liqueur. If not, you can skip this step.
- Arrange a single layer of ladyfingers in the bottom of an 8x8 inch baking dish. Break them if necessary to fit.
- Spread half of the mascarpone cream mixture over the ladyfingers.
- Scatter half of the fresh raspberries over the cream layer.
- Repeat the layers: another layer of ladyfingers, the remaining mascarpone cream mixture, and the remaining raspberries.
- Cover the dish with plastic wrap and refrigerate for at least 4 hours, or preferably overnight, to allow the flavors to meld and the ladyfingers to soften.
- Before serving, dust with cocoa powder or garnish with additional raspberries, if desired.


