


Oh, hello there! Pull up a chair and let’s chat for a moment. I’ve been thinking about this recipe for a while now, the one that always, *always* makes my kitchen smell like pure heaven and has my family practically begging for more. You know those recipes, the ones that feel like a warm hug on a chilly evening, or a little burst of sunshine on a busy afternoon? This is one of *those*. We’re talking about homemade Nutella treats, and trust me, they are so much more than just a dessert. They’re a little piece of magic that comes together surprisingly easily. Forget those store-bought versions that always seem to be missing *something*. This is the real deal, the kind that tastes exactly like your fondest childhood memories, but with that irresistible hazelnut-chocolate punch you know and love. Honestly, if you’re anything like me and have a serious soft spot for anything that combines chocolate and hazelnuts, you’re going to fall head over heels for these. They’re a game-changer when that sweet craving hits, and you just don’t have the time or energy for a complicated bake.
What are some of the best Nutella treats?
So, what exactly are these glorious little bites of happiness I’m raving about? Think of them as little pockets of joy, a delightful fusion of moist, tender cake-like goodness swirled with that iconic hazelnut-chocolate spread. They’re not quite a cookie, not quite a brownie, and definitely not a muffin, though they share some of the best qualities of all three. The “treats” part of the name comes from their irresistible, melt-in-your-mouth texture and the way they just disappear in minutes at parties or family gatherings. We call them “homemade Nutella treats” because, well, that’s precisely what they are! It’s that beloved spread, not just slathered on, but baked right into the heart of the confection, creating these incredible swirls of nutty, chocolatey goodness that make every single bite an adventure. It’s essentially a shortcut to pure bliss, using a pantry staple to create something truly special and incredibly comforting.
Why you’ll love this recipe?
Let me count the ways! First off, the flavor is just out of this world. The combination of rich chocolate and toasted hazelnuts is something I’ve adored since I was a kid, and this recipe captures it perfectly. It’s that familiar, comforting taste that instantly makes you feel good. But it’s not just about the taste, oh no. What I truly adore about this recipe is its sheer simplicity. You don’t need any fancy equipment or a culinary degree. I’ve made these countless times when I’ve had unexpected guests pop over or when the kids suddenly declare they need a “special snack” for school. They’re incredibly forgiving, which is a huge plus in my book. And let’s talk about cost-efficiency. Using a jar of Nutella, which most of us probably have lurking in the pantry anyway, means you’re not spending a fortune on specialty ingredients. Plus, they’re so versatile! You can enjoy them warm with a scoop of vanilla Ice Cream for a decadent dessert, or at room temperature with your morning coffee for a delightful breakfast treat. They’re also fantastic for bake sales or potlucks because they travel so well and are always a crowd-pleaser. Compared to other chocolatey bakes, like brownies or cookies, these offer a unique texture that’s somehow both cakey and fudgy, with those beautiful swirls of pure hazelnut-chocolate magic. Honestly, the smell that fills my kitchen while these are baking is enough to bring everyone running from their rooms!
How do you make homemade Nutella treats?
Quick Overview
This recipe is designed to be as straightforward as possible, even on a busy weeknight. You’ll whisk together some simple dry ingredients, combine them with wet ingredients, swirl in a generous amount of Nutella, and bake until they’re perfectly golden and fudgy. The result is a batch of irresistible homemade Nutella treats that look and taste like you spent hours in the kitchen, but in reality, it’s all done in under an hour from start to finish. It’s one of those lifesaver recipes that always delivers.
Ingredients
For the Main Batter:
All-Purpose Flour: About 1 and 1/2 cups. I usually use unbleached all-purpose flour for the best texture. Just make sure it’s sifted for a lighter crumb, though if I’m in a rush, I skip this step and it’s still good!
Granulated Sugar: 1 cup. This gives us that lovely sweetness without being overpowering, allowing the Nutella to really shine.
Unsweetened Cocoa Powder: 1/4 cup. Use a good quality one; it makes a difference in the chocolatey depth. Dutch-processed gives a richer color and smoother flavor if you have it.
Baking Soda: 1 teaspoon. This is our leavening agent, giving the treats a nice lift and tender texture.
Salt: 1/2 teaspoon. Just a pinch to balance out the sweetness and enhance all those wonderful flavors.
Large Eggs: 2. These bind everything together and add richness. I always use them at room temperature; it helps them incorporate better.
Vegetable Oil or Melted Butter: 1/2 cup. I often use vegetable oil because it keeps the treats super moist and tender for longer. Melted unsalted butter gives a slightly richer, more complex flavor, so it’s really a personal preference. I’ve tested both extensively!
Milk (any kind): 1/2 cup. Whole milk makes for a richer batter, but I’ve had great success with almond milk or even oat milk if that’s what I have on hand. It really doesn’t make a huge difference to the final outcome, which is fantastic.
Vanilla Extract: 1 teaspoon. A little splash of vanilla always elevates chocolatey flavors.
For the Nutella Swirl:
Nutella (or your favorite chocolate-hazelnut spread): 1 cup, or a generous heaped cup! This is where the magic happens. Make sure it’s at room temperature so it’s easy to swirl. If it’s too stiff, you can gently warm it in the microwave for just 10-15 seconds, stirring well. Don’t overheat it, though!
For the Optional Glaze:
Powdered Sugar: 1 cup. Sifted is best for a smooth glaze.
Milk or Cream: 2-3 tablespoons. Start with 2 and add more as needed to reach your desired drizzling consistency.
A tiny splash of Vanilla Extract: Optional, but it adds a lovely little note.
Step-by-Step Instructions
Step 1: Preheat & Prep Pan
First things first, get your oven preheating to 350°F (175°C). This is a pretty standard baking temperature, and it works like a charm for these treats. You’ll also want to prepare your baking pan. I usually use an 8×8 inch square baking pan. Grease it really well with butter or cooking spray, and then I like to line it with parchment paper, leaving a little overhang on the sides. This makes lifting the whole beautiful creation out of the pan so much easier later on. No one likes struggling to get their baked goods out!
Step 2: Mix Dry Ingredients
In a large bowl, whisk together the all-purpose flour, granulated sugar, unsweetened cocoa powder, baking soda, and salt. Give it a good whisk until everything is well combined and there are no big clumps of cocoa powder. This ensures that the leavening and salt are evenly distributed, which is key for consistent results. It’s a simple step, but I always feel like it’s setting the stage for success!
Step 3: Mix Wet Ingredients
In a separate medium bowl, whisk together the eggs until they’re lightly beaten. Then, pour in the vegetable oil (or melted butter), milk, and vanilla extract. Whisk it all together until it’s smooth and well combined. The oil or butter should be fully incorporated, and the mixture should have a nice, uniform color.
Step 4: Combine
Now, pour the wet ingredients into the bowl with the dry ingredients. Using a spatula or a wooden spoon, gently mix everything together until *just* combined. Be careful not to overmix! Overmixing can lead to tough treats, and we definitely don’t want that. A few streaks of flour are okay; they’ll disappear as you continue. The batter should be thick but pourable.
Step 5: Prepare Filling
This is the fun part! Get your cup of Nutella. As I mentioned, make sure it’s at room temperature so it’s nice and spreadable. If it’s too stiff from being in the fridge, a quick 10-second zap in the microwave (stirring halfway) will do the trick. You don’t want it hot, just soft enough to work with.
Step 6: Layer & Swirl
Pour about half of the batter into your prepared baking pan and spread it out evenly. Then, dollop spoonfuls of the Nutella all over the top of this batter layer. Don’t be shy! Next, carefully spoon the remaining batter over the Nutella. Now, take a knife or a skewer and gently swirl the Nutella through the batter. You can do figure-eights or random zig-zags. The goal is to create those beautiful marbled patterns without mixing it completely in. You want distinct swirls of chocolate-hazelnut goodness!
Step 7: Bake
Place the pan in your preheated oven and bake for about 25-30 minutes. The exact time can vary depending on your oven, so keep an eye on them. You’ll know they’re ready when the edges are set and a toothpick inserted into the center comes out with moist crumbs attached, but no wet batter. If the Nutella swirls look a bit gooey, that’s okay – it will firm up as it cools.
Step 8: Cool & Glaze
Once they’re baked, carefully lift the parchment paper to remove the entire block from the pan. Let it cool on a wire rack for about 15-20 minutes before you even think about glazing. If you’re adding a glaze, whisk together the powdered sugar with 2 tablespoons of milk and the vanilla extract until smooth. Add more milk, a teaspoon at a time, until you reach a drizzling consistency. Drizzle this over the slightly cooled treats. This step is totally optional, but it adds an extra layer of sweetness and a pretty finish.
Step 9: Slice & Serve
Once the glaze has set (or if you skipped it), slice the treats into squares or bars. I usually cut mine into 16 squares. They are absolutely divine when they’re still a little warm, but they’re also fantastic at room temperature. Enjoy the incredible swirls of chocolate and hazelnut in every bite!
What to Serve It With
These homemade Nutella treats are so wonderfully adaptable, they fit into almost any meal or snack occasion! For breakfast, I love cutting them into smaller squares and serving them alongside a steaming mug of coffee. The rich chocolatey flavor is such a decadent way to start the day. Sometimes, I’ll even toast a little square lightly and serve it with a dollop of Greek yogurt for a bit of tang. For a more elaborate brunch, they are absolutely perfect. Imagine these little beauties arranged on a pretty platter, maybe with some fresh berries scattered around. They pair beautifully with a mimosa or a glass of chilled orange juice. They really elevate a casual brunch spread. As a dessert, well, that’s where they truly shine. A warm square served with a scoop of good quality Vanilla Bean ice cream is pure, unadulterated bliss. The contrast of the warm treat and cold ice cream is just divine. You could also dust them with a little extra powdered sugar or serve them with a raspberry coulis for a pop of color and tartness. And for those cozy snack moments, when you just need something comforting? These are it. I’ll often just grab a square (or two!) with a glass of milk while I’m curled up on the sofa with a good book. It’s my go-to when I’m craving something sweet at 10 pm but don’t want to bake a whole cake.
Top Tips for Perfecting Your Homemade Nutella Treats
I’ve made these treats more times than I can count, and over the years, I’ve picked up a few tricks that really help them turn out perfectly every single time. First, when it comes to the batter consistency, don’t be tempted to add extra flour if it seems a little thick. That’s exactly what you want for a fudgy texture. If it seems too thin, then you might have measured your flour incorrectly; it’s always better to measure flour by spooning it into the cup and leveling off, rather than scooping directly from the bag. For the Nutella swirl, the most important thing is its temperature. If it’s too cold, it will be hard to swirl and you’ll end up with big globs. If it’s too hot, it might melt too much into the batter, losing that beautiful marbled effect. Room temperature is your friend here! When you’re swirling, try not to overdo it. A few gentle passes with a knife are all you need to create those lovely patterns. The more you swirl, the more it will blend in, and while still delicious, you’ll lose that distinct visual appeal. I’ve learned this lesson after a few attempts where I got a little too enthusiastic with the swirling! For ingredient swaps, if you’re out of milk, don’t panic! A neutral-flavored yogurt thinned with a little water can work in a pinch, or even some strong brewed coffee can add an extra layer of flavor to the batter. If you want to make these even more decadent, you can fold in a handful of chocolate chips or chopped hazelnuts into the batter before swirling. For baking, I always recommend using the toothpick test, but remember that because of the Nutella, you’ll likely get moist crumbs, not a completely clean toothpick. If it looks like wet batter, it needs more time. If it looks dry, it might be overbaked. I’ve found that rotating the pan halfway through baking helps ensure even cooking, especially if your oven has hot spots. Finally, for the glaze, the key is consistency. Too thin and it’ll run off; too thick and it’ll be hard to drizzle. It should be like thick honey. You can always adjust it with a tiny bit more powdered sugar or milk to get it just right. These little tips might seem small, but they’ve made a big difference in my experience!
Storing and Reheating Tips
One of the best things about these homemade Nutella treats is how well they store, meaning you can enjoy them over a few days. If you plan to eat them within a day or two, leaving them at room temperature is perfectly fine. Just make sure to cover them tightly with plastic wrap or keep them in an airtight container. This helps prevent them from drying out. They’ll stay wonderfully moist and delicious. If you think you’ll need them for longer, or if your kitchen is particularly warm, storing them in the refrigerator is a good option. I usually transfer them to an airtight container and they can last for up to 4-5 days. When stored in the fridge, they will firm up a bit more, so I often recommend a quick reheat to bring them back to that delightful, slightly gooey texture. For reheating, you can pop a square in the microwave for about 10-15 seconds, just until warmed through. Be careful not to overheat them, as they can become tough. Alternatively, you can warm them gently in a low oven (around 300°F or 150°C) for a few minutes. If you’ve glazed them, I usually wait until they’ve cooled completely before adding the glaze if I plan to refrigerate them. This prevents the glaze from becoming sticky or dissolving. If you’re freezing them, it’s best to do so *before* glazing. Wrap individual squares tightly in plastic wrap, then place them in a freezer-safe bag or container. They can be kept frozen for up to 2-3 months. To thaw, simply remove them from the freezer and let them come to room temperature, or thaw them gently in the refrigerator. Once thawed, you can then add a glaze if desired. The key to all storage methods is keeping them protected from air to maintain their moisture and flavor.
Frequently Asked Questions
Final Thoughts
So there you have it – my absolute favorite way to bring a little bit of hazelnut-chocolate joy into our lives. These homemade Nutella treats are more than just a recipe; they’re a little slice of happiness, a reminder of simple pleasures, and a testament to how incredible easy baking can be. They prove that you don’t need complicated steps or exotic ingredients to create something truly memorable and delicious. Whether you’re looking for a quick after-school snack, a delightful dessert to impress your friends, or just a comforting treat for yourself, I promise you, these will not disappoint. They’ve become a staple in my kitchen for a reason, and I’m so excited for you to try them and for them to become a favorite in yours too. If you do give them a go, please let me know how they turn out! I absolutely love seeing your creations and hearing your feedback. Feel free to leave a comment below with your thoughts, any variations you tried, or even your own personal “secrets” for making them extra special. And if you’re always on the hunt for more comforting bakes, be sure to check out my other recipes for [link to another relevant recipe if applicable, otherwise omit] – I think you’ll find something you love there too! Happy baking, and I can’t wait to hear all about your delicious homemade Nutella treats!
Homemade Nutella Treats
Ingredients
Main Ingredients
- 1 cup hazelnuts toasted and skinned
- 12 ounces milk chocolate chips
- 2 tablespoons canola oil
- 3 tablespoons powdered sugar
- 0.5 teaspoon pure vanilla extract
- 1 teaspoon salt
Instructions
Preparation Steps
- Preheat oven to 350°F (175°C).
- Spread the hazelnuts on a baking sheet and toast in the oven for 10 to 12 minutes, or until fragrant.
- While the hazelnuts are still warm, place them in a clean kitchen towel and rub them vigorously to remove as much of the skin as possible. Some skin may remain, which is okay.
- Melt the milk chocolate chips in a double boiler or in the microwave in 30-second intervals, stirring until smooth. Let it cool slightly.
- In a food processor, process the skinned hazelnuts until they form a smooth paste.
- Add the canola oil, powdered sugar, vanilla extract, and salt to the food processor. Process until well combined.
- Add the melted chocolate to the food processor and continue to process until the mixture is smooth and creamy, resembling Nutella.
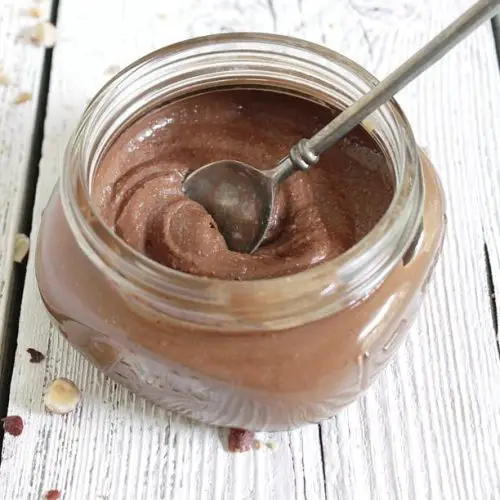
- Pour the homemade Nutella into a clean jar. Let it cool completely at room temperature. It will thicken as it cools.
- Once cooled, cover the jar and store in the refrigerator. Enjoy spread on toast, fruit, or as a dip!


