


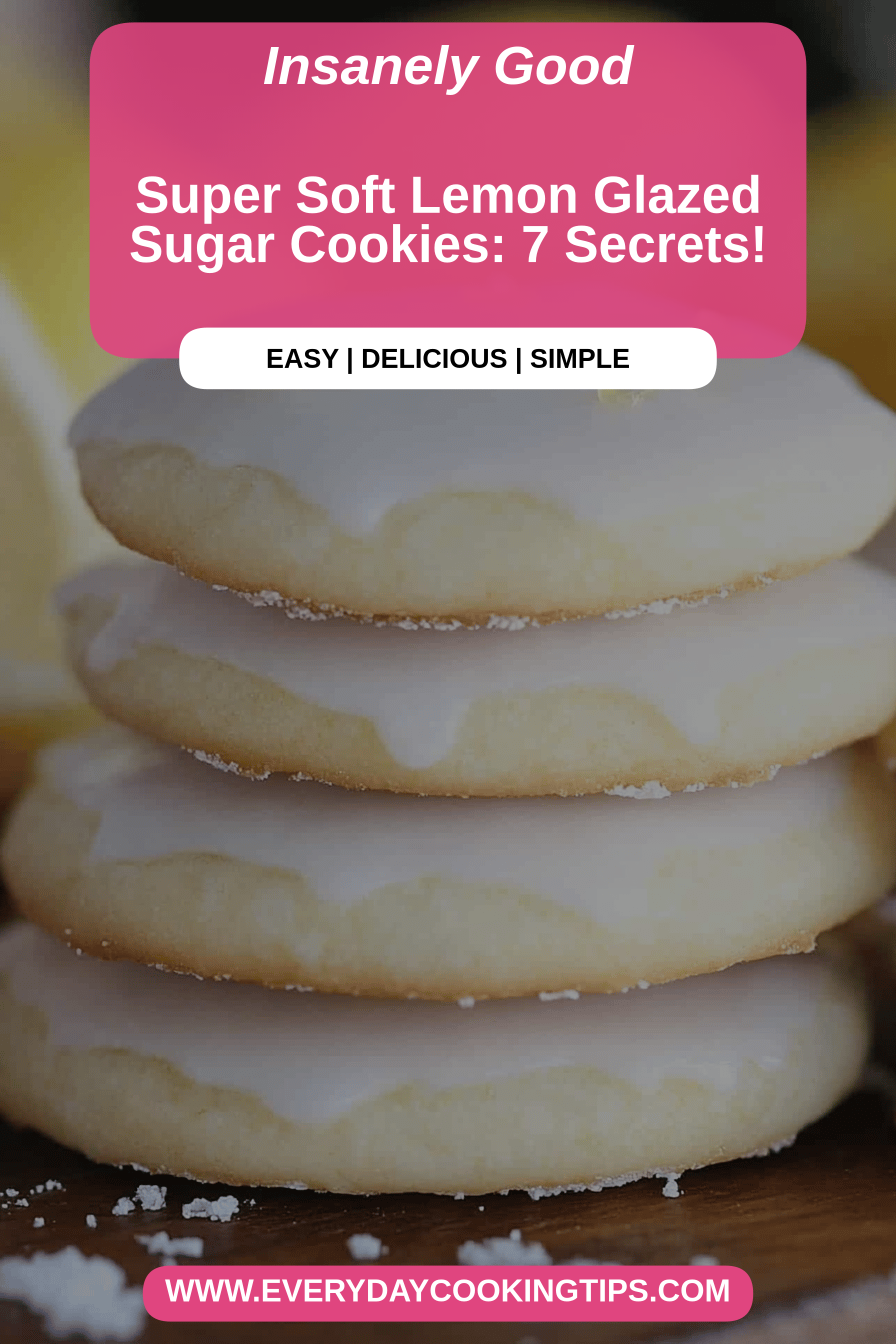
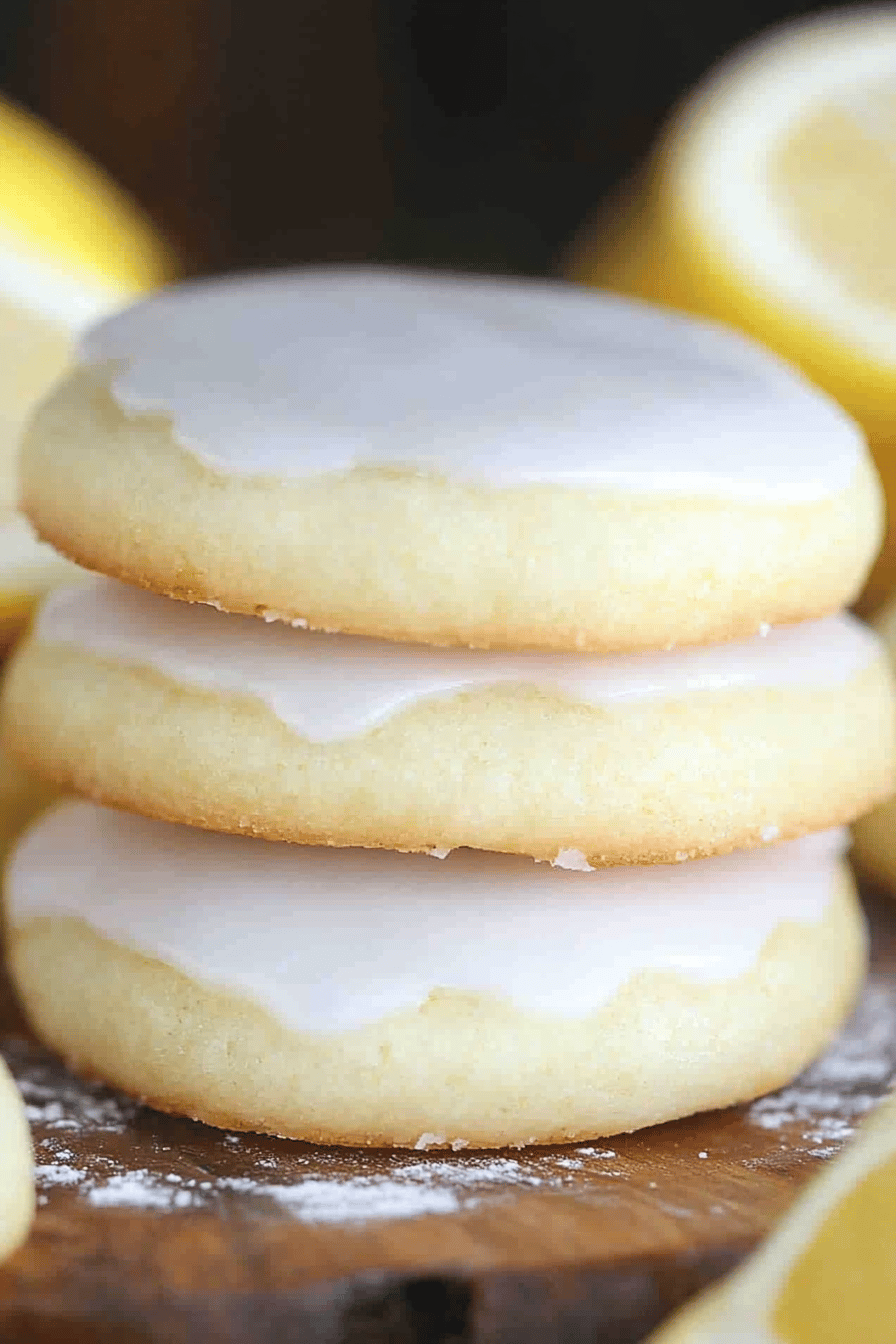
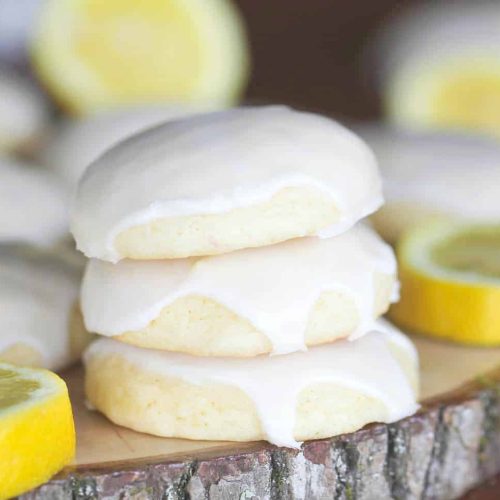
Oh, these lemon glazed sugar cookies! They’re the kind of cookie that instantly brightens your day, like finding a forgotten ten-dollar bill in your winter coat. You know, that little burst of sunshine? That’s what these are for me. They smell like pure happiness as they bake, a subtle sweet citrus aroma that just wraps you up like a warm hug. I remember making batches of these with my grandma when I was a little girl, her kitchen always filled with the most incredible scents. We’d sneak bites of the dough (shh, don’t tell anyone!) and then wait with bated breath for these beauties to come out of the oven. They’re not as fussy as some fancier cookies, but they have this perfect balance of soft, chewy interior and a slightly crisp edge, all kissed with that tangy, sweet LEMON GLAZE. If you’ve ever had a simple sugar cookie and wished it had just a *little* more personality, then these lemon glazed sugar cookies are your answer. They’re my go-to for cookie exchanges, bake sales, or honestly, just when I need a little pick-me-up. They’re a step up from your basic sugar cookie, but honestly, just as easy to whip up!
What is lemon glazed sugar cookies?
So, what exactly *are* these little wonders? Think of your favorite classic Sugar Cookie – that perfect canvas of sweet, buttery goodness. Now, imagine giving it a zesty, bright makeover with a luscious lemon glaze. That’s pretty much it! These lemon glazed sugar cookies are essentially a delightful evolution of the humble sugar cookie. They’re soft and tender in the center, with just a hint of chewiness around the edges, and they’re not overly sweet on their own, which is key. This allows that beautiful, bright lemon glaze to truly shine. The name itself tells you exactly what you’re getting: the comforting familiarity of sugar cookies, elevated by the vibrant, slightly tart punch of lemon. It’s that perfect marriage of simple comfort and sophisticated flavor, all wrapped up in a delightful cookie package. They’re not fancy in a complicated way, but they’re incredibly satisfying and always a crowd-pleaser.
Why you’ll love this recipe?
Why do I love lemon glazed sugar cookies?
First off, the flavor. Oh my goodness, the flavor! That delicate balance between the sweet, buttery cookie base and the bright, tangy lemon glaze is pure magic. It’s not an overpowering lemon, mind you, but a gentle, uplifting citrus note that cuts through the sweetness perfectly. Every bite is like a little ray of sunshine. It’s the kind of cookie that makes you close your eyes and just savor it.
What is the second part of the puzzle?simplicity. I’m all about recipes that deliver big on taste without demanding hours in the kitchen or a culinary degree. And these lemon glazed Sugar Cookies? They are lifesavers. The dough comes together in a flash, and the glaze is even easier. You can have these beautiful cookies ready to impress with surprisingly little effort. I’ve made them on super busy weeknights when I needed a sweet treat, and they always come through.
And let’s talk about cost-efficiency. Most of the ingredients are pantry staples. You probably have most of them already! Flour, sugar, butter, eggs, a bit of lemon juice and zest – that’s it. It’s an incredibly budget-friendly way to create something truly special and delicious. Compared to buying gourmet cookies, this is a fraction of the cost, and let me tell you, homemade always tastes better.
The versatility is another huge plus. While they are phenomenal on their own, you can totally play around with them. Want a little crunch? Add some finely chopped almonds to the dough. Craving something a bit more decadent? Drizzle them with a bit of White Chocolate after the glaze sets. They’re perfect for little tea parties, as a treat with your morning coffee, or even as a simple, elegant dessert after dinner. They’re also a fantastic base for decorating if you’re feeling crafty, though I often love them just as they are, with that beautiful, subtle glaze.
What I love most about these lemon glazed Sugar Cookies, though, is the feeling they evoke. They’re nostalgic, comforting, and just plain joyful. They’re reminiscent of simpler times, but with a sophisticated twist that makes them feel modern and exciting. If you’re a fan of my simple vanilla sugar cookies, you’ll absolutely adore these – it’s like their cheerful, zesty cousin!
How to Make Lemon Glazed Sugar Cookies
Quick Overview
Making these delightful lemon glazed sugar cookies is a breeze! You’ll start by whipping up a simple, tender cookie dough, chilling it briefly to make it easy to handle, and then baking them until they’re perfectly golden around the edges. While they cool, you’ll whisk together a quick, zesty lemon glaze. Once the cookies are cool enough, you’ll dip or drizzle them with the glaze and let them set. The whole process is straightforward, with clear steps that lead to cookie perfection every single time. It’s designed to be fuss-free, so you can enjoy delicious, homemade cookies without feeling overwhelmed.
Ingredients
For the Main Batter:
2 ½ cups all-purpose flour, plus more for dusting
1 teaspoon baking powder
½ teaspoon salt
1 cup (2 sticks) unsalted butter, softened
1 ½ cups granulated sugar
2 large eggs
1 teaspoon pure vanilla extract
Zest of 1 large lemon (about 1-2 tablespoons) – this is where the magic starts!
A little tip here: make sure your butter is properly softened, not melted. It should give slightly when you press it with your finger. This makes a huge difference in the cookie’s texture. Also, using good quality vanilla extract really does enhance the flavor!
For the Glaze:
2 cups powdered sugar, sifted
2-4 tablespoons fresh lemon juice (start with 2 and add more until you reach desired consistency)
½ teaspoon lemon zest (optional, for extra punch)
When it comes to the glaze, the key is consistency. You want it thick enough to coat the cookies without running off completely, but thin enough to drizzle nicely. I always sift my powdered sugar to avoid any lumps. And don’t be afraid to use fresh lemon juice – it makes all the difference!
Step-by-Step Instructions
Step 1: Preheat & Prep Pan
First things first, let’s get your oven ready. Preheat it to 375°F (190°C). While the oven heats up, grab your baking sheets and line them with parchment paper or silicone baking mats. This is a lifesaver for easy cleanup and ensures your cookies don’t stick. Give yourself enough space between cookies, as they will spread a bit. I usually fit about 12-15 cookies per standard baking sheet.
Step 2: Mix Dry Ingredients
In a medium bowl, whisk together the all-purpose flour, baking powder, and salt. Give it a good whisk to make sure everything is evenly distributed. This ensures your cookies have the right structure and rise. Set this bowl aside for now.
Step 3: Mix Wet Ingredients
In a large bowl, cream together the softened unsalted butter and granulated sugar. You can use an electric mixer for this, or if you’re feeling strong, a whisk and some elbow grease! Beat them together until the mixture is light and fluffy – it should look pale yellow and airy. This process incorporates air, which helps make the cookies tender. Next, beat in the eggs, one at a time, making sure each is fully incorporated before adding the next. Stir in the vanilla extract and the fresh lemon zest. That lemon zest is pure perfume, isn’t it?
Step 4: Combine
Gradually add the dry ingredients to the wet ingredients, mixing on low speed (if using a mixer) or stirring with a sturdy spoon until just combined. Be careful not to overmix here! Overmixing can develop the gluten too much, leading to tough cookies. You just want to see no dry streaks of flour remaining. The dough will be soft and a little sticky, which is exactly what we want.
Step 5: Prepare Filling
This step is actually for the glaze, which we’ll do while the cookies bake and cool! In a medium bowl, whisk together the sifted powdered sugar, lemon zest (if using), and 2 tablespoons of fresh lemon juice. Whisk until smooth. If the glaze is too thick, add more lemon juice, a teaspoon at a time, until you reach a drizzly but not watery consistency. If it gets too thin, you can always add a little more powdered sugar. It should be thick enough to coat a spoon but still flow.
Step 6: Layer & Swirl
Since this is a sugar cookie base, there’s no separate filling or swirling to do for the cookie itself. The “swirl” or “layering” effect comes from the glaze we’ll add later. For the cookie dough, gently bring it together into a ball. You can either roll the dough into balls and slightly flatten them, or roll the entire dough out on a lightly floured surface to about ½ inch thickness and cut out shapes with cookie cutters if you prefer. I usually go for simple round cookies by just dropping rounded spoonfuls of dough onto the baking sheet.
Step 7: Bake
Bake for 9-12 minutes, or until the edges are lightly golden brown and the centers look set. The exact time will depend on your oven and the size of your cookies. Don’t overbake them! You want them to be soft and chewy inside. They’ll continue to cook a bit on the hot baking sheet once you take them out.
Step 8: Cool & Glaze
Let the cookies cool on the baking sheets for 5-10 minutes before transferring them to a wire rack to cool completely. This is crucial! If you try to glaze them while they’re warm, the glaze will melt and slide right off. Once they are completely cool, dip the tops of the cookies into the prepared lemon glaze, or use a spoon to drizzle the glaze over them. Let the glaze set for at least 15-30 minutes before handling or stacking.
Step 9: Slice & Serve
Once the glaze has set, your beautiful lemon glazed sugar cookies are ready to be enjoyed! If you cut them into shapes, you can admire your handy work. If you made rounds, they look lovely stacked or placed individually. I like to arrange them on a pretty plate and watch them disappear!
What to Serve It With
These lemon glazed sugar cookies are so versatile, they’re practically party-ready on their own, but here are some ideas for making them even more special:
For Breakfast: They’re a delightful, not-too-sweet treat alongside your morning coffee or tea. Imagine a bright, zesty cookie to start your day. I love pairing them with a good strong brew that balances the lemon. They’re also fantastic with a glass of fresh orange juice – the citrus symphony!
For Brunch: Elevate your brunch spread by arranging these cookies on a tiered stand. They look absolutely charming next to a fruit salad or a yogurt parfait. For beverages, they pair beautifully with mimosas or a light, sparkling elderflower cordial. Their delicate flavor won’t overpower other brunch dishes.
As Dessert: These cookies are a perfect light dessert after a rich meal. Serve them with a scoop of vanilla bean ice cream for a simple yet elegant treat. They also work wonders alongside a fresh fruit tart or a lemon meringue pie, playing on that lovely citrus theme. A small cup of espresso is also a sophisticated pairing.
For Cozy Snacks: This is my favorite casual use! Grab a glass of cold milk (or almond milk for me sometimes!) and enjoy one or two (or three, no judgment!). They’re perfect for an afternoon tea break or a late-night sweet craving when you don’t want anything too heavy. My kids absolutely love dunking these in milk, and honestly, who can blame them?
My family tradition is to always have a plate of these on hand during spring and summer. They just *feel* like sunshine and warmer days. Another combination I adore is serving them with a bowl of fresh berries – the tartness of the berries complements the glaze wonderfully. These cookies are a simple joy, and they always bring smiles to faces, no matter the occasion.
Top Tips for Perfecting Your Lemon Glazed Sugar Cookies
Over the years, I’ve learned a few tricks that really elevate these lemon glazed sugar cookies from good to absolutely phenomenal. I’m happy to share them with you!
Lemon Zest is Your Best Friend: Don’t skip the lemon zest in the cookie dough! It infuses the cookie itself with a subtle, bright flavor that complements the glaze beautifully. When zesting, make sure you’re only getting the yellow part of the peel, not the bitter white pith underneath. A microplane zester is your best tool for this – it creates a fine, fragrant dust.
Don’t Overmix the Dough: I cannot stress this enough! Once you add the dry ingredients to the wet, mix only until *just* combined. Overmixing develops the gluten in the flour, leading to tough, dense cookies instead of tender, chewy ones. It’s better to have a tiny bit of flour still visible and finish it by hand than to overwork the dough.
Chill the Dough (Optional but Recommended): While this recipe doesn’t *strictly* require chilling, I often find that a short chill (30 minutes to an hour) in the refrigerator makes the dough easier to handle, especially if your kitchen is warm. It firms up the butter, reducing spread and making it easier to scoop or roll. Just don’t chill it for too long, or it becomes hard to work with.
The Art of the Glaze Consistency: Achieving the perfect glaze consistency is key to that beautiful finish. Start with the recommended amount of lemon juice and add more *very slowly*, a teaspoon at a time, until you get that pourable but not runny texture. If you accidentally make it too thin, whisk in a tablespoon of sifted powdered sugar at a time until it thickens up. For a thicker, more opaque glaze, you can also add a touch of milk or cream, but I find lemon juice gives the best flavor and finish.
Cool Completely Before Glazing: This is a mistake I made countless times when I was first learning! Glazing warm cookies is a recipe for disaster; the glaze will melt and become a sticky mess. Patience is a virtue here! Let the cookies cool fully on a wire rack so there’s no residual heat. This ensures the glaze sets up beautifully and creates that lovely, slightly crisp shell.
Ingredient Swaps & Additions: If you’re out of lemon, lime juice and zest make a wonderful substitute for a slightly different citrus kick. For a touch of elegance, a tiny splash of almond extract in the cookie dough can be lovely. You can also add a pinch of cardamom to the dry ingredients for a subtle warmth. For decoration, once the glaze is set, you can add sprinkles, edible flowers, or even a fine dusting of edible glitter. My kids love adding colorful sprinkles right after glazing.
Baking Wisely: Ovens can be fickle! If you find your cookies tend to brown too quickly on the bottom, try placing an extra baking sheet on the rack below your cookie sheet. Also, don’t be afraid to rotate your baking sheets halfway through baking for even browning. They should look set in the center and just starting to get a little golden at the edges – don’t wait until they’re fully browned, or they’ll be dry.
These little tips might seem small, but they make a world of difference in achieving those bakery-quality lemon glazed sugar cookies right in your own kitchen. Happy baking!
Storing and Reheating Tips
Storing these delightful lemon glazed sugar cookies properly ensures they stay as delicious as the day you made them. Here’s what I’ve found works best:
Room Temperature Storage: Once the glaze has completely set, you can store the cookies in an airtight container at room temperature. They’ll stay wonderfully soft and fresh for about 3-4 days. I like to place a piece of wax paper or parchment paper between layers if I’m stacking them to prevent the glaze from sticking too much. If your kitchen is particularly warm or humid, they might not last quite as long, so keep an eye on them.
Refrigerator Storage: While not usually necessary for these cookies as they are quite stable at room temperature, if you live in a very hot climate or have made them with a dairy-based glaze (though ours is lemon juice based), you *could* store them in the refrigerator. Place them in an airtight container, again with parchment paper between layers. They should maintain quality for up to a week. Be aware that refrigeration can sometimes slightly alter the texture of baked goods, making them a bit firmer.
Freezer Instructions: These lemon glazed sugar cookies freeze exceptionally well, which is a lifesaver for me! You can freeze them either *before* glazing or *after* the glaze has fully set. For best results, wrap them tightly in plastic wrap, then place them in a freezer-safe airtight container or a heavy-duty freezer bag. They’ll keep their flavor and texture for up to 2-3 months. To thaw, simply bring them back to room temperature. If glazing after freezing, make sure they are fully thawed before applying the glaze. If they are already glazed, let them thaw completely at room temperature; the glaze might soften slightly but should recover well.
Glaze Timing Advice: For optimal texture and appearance, I highly recommend glazing the cookies *after* they have completely cooled and *just before* you plan to store or serve them. If you are freezing them, glaze them after they have thawed completely. Glazing them right before they go into storage or serving ensures the glaze is fresh and hasn’t become sticky or lost its shine from being in a container for too long.
These cookies are so good, they rarely last long enough in my house to test the longer storage methods, but it’s always good to know you have options!
Frequently Asked Questions
Final Thoughts
There you have it – my beloved lemon glazed sugar cookies! I truly hope you give them a try. They’re more than just a recipe to me; they’re a little slice of happiness, a taste of tradition, and a guaranteed way to brighten anyone’s day. The combination of that tender, buttery cookie with the vibrant burst of lemon is just perfection. They’re proof that sometimes, the simplest recipes can be the most satisfying and memorable.
If you love these, you might also enjoy my Classic Sugar Cookies for a pure, unadorned sweet treat, or my Lemon Blueberry Scones for another burst of citrusy goodness. Both are family favorites and have that same approachable charm.
I can’t wait to hear what you think of these lemon glazed sugar cookies! Did you try any fun glaze variations? How did they disappear at your house? Leave a comment below and let me know, I love hearing your baking adventures! And if you snap a pic, be sure to share it – happy baking, everyone!

Lemon Glazed Sugar Cookies
Ingredients
Cookies
- 1 cup unsalted butter softened
- 1.5 cup granulated sugar
- 2 large eggs
- 1 teaspoon vanilla extract
- 3 cup all-purpose flour
- 0.5 teaspoon baking soda
- 0.25 teaspoon salt
Lemon Glaze
- 2 cup powdered sugar
- 2 tablespoon fresh lemon juice
- 1 teaspoon lemon zest optional
Instructions
Preparation Steps
- Preheat oven to 350°F (175°C). Line baking sheets with parchment paper.
- In a large bowl, cream together the softened butter and granulated sugar until light and fluffy.
- Beat in the eggs one at a time, then stir in the vanilla extract.
- In a separate bowl, whisk together the flour, baking soda, and salt.
- Gradually add the dry ingredients to the wet ingredients, mixing until just combined. Do not overmix.
- Roll dough into 1-inch balls and place them 2 inches apart on the prepared baking sheets.
- Bake for 10-12 minutes, or until the edges are lightly golden brown.
- Let cookies cool on the baking sheets for a few minutes before transferring them to a wire rack to cool completely.
- While the cookies are cooling, prepare the glaze. In a small bowl, whisk together the powdered sugar, lemon juice, and lemon zest until smooth. Add more lemon juice or powdered sugar as needed to reach desired consistency.
- Once the cookies are completely cool, dip the tops into the lemon glaze or drizzle it over the cookies.
- Let the glaze set before serving.


