


There are some recipes that just feel like a warm hug, aren’t there? For me, this lemon custard recipe is exactly that. It’s the kind of dessert that instantly transports me back to my grandmother’s kitchen, the air thick with the sweet, zesty scent of lemons and something wonderfully comforting baking away. It’s not a fussy cake or a complicated tart; it’s simple, pure deliciousness. I’ve tried my fair share of lemon desserts over the years – from Lemon Meringue pies that weep sadly in humid weather to lemon bars that can be a bit too tart, or even dense, overbaked lemon loaves. But this lemon custard? This is the one. It’s elegant enough for a dinner party but so ridiculously easy that I can whip it up on a weeknight when a sweet craving hits hard. It’s like sunshine captured in a dish, and I can’t wait to share it with you!
What is lemon custard?
So, what exactly *is* this magical lemon custard? Think of it as the creamiest, dreamiest hug for your taste buds, infused with the bright, cheerful flavor of fresh lemons. It’s essentially a baked custard, which means it’s made from a base of eggs, dairy (usually milk and cream), sugar, and flavoring. The magic happens in the oven, where gentle heat transforms this simple mixture into a silky-smooth, delicate dessert. Unlike a pie or a tart, it doesn’t have a crust, which means you get pure, unadulterated creamy goodness in every spoonful. The lemon element comes from fresh lemon juice and zest, giving it that irresistible tang that perfectly balances the sweetness. It’s smooth, it’s rich, and it has this wonderful, almost melt-in-your-mouth quality that’s just utterly divine. It’s pure Comfort Food with a zesty twist!
Why you’ll love this recipe?
Honestly, there are so many reasons why this lemon custard recipe has become a staple in my kitchen, and I just know you’re going to fall in love with it too. First and foremost, the **flavor** is out of this world. It’s that perfect balance of sweet and tart that lemon lovers dream about. The zest provides this incredible fragrant aroma and bright citrus punch, while the creamy custard base is rich and satisfying without being heavy. It’s like sunshine and a soft blanket all rolled into one!
Then there’s the **simplicity**. Seriously, this is a lifesaver. If you can whisk a few ingredients together and pour them into a dish, you can make this. It’s honestly one of the easiest desserts I know, perfect for those nights when you want something impressive but don’t have hours to spend in the kitchen. No complicated steps, no fancy techniques. It just works!
And let’s talk about **cost-efficiency**. Most of the ingredients are pantry staples: eggs, milk, sugar, and lemons. You probably have most of them on hand right now! It feels so luxurious and decadent, but it’s made with such humble ingredients. It’s a fantastic way to create a showstopper dessert without breaking the bank.
The **versatility** is another huge plus. While it’s divine on its own, you can totally play around with it. I love serving it with fresh berries – a few raspberries or blueberries add a pop of color and a different kind of freshness. Sometimes, I’ll dust it with a little powdered sugar or add a dollop of lightly sweetened whipped cream. It’s also *amazing* with a simple Shortbread Cookie on the side. What I love most about this lemon custard, though, is that it’s so forgiving. It’s the kind of recipe you can trust, even when you’re feeling a bit frazzled or short on time. It always turns out beautifully, and the reaction from people when they taste it is just priceless. It’s a dessert that truly makes people happy, and that’s what cooking is all about, right?
How do I make lemon custard?
Quick Overview
Making this luscious lemon custard is surprisingly straightforward. You’ll basically whisk together your base ingredients, fold in the lemon goodness, pour it into a baking dish, and let the oven do the rest. The key is gentle baking, usually in a water bath (bain-marie), to ensure that impossibly smooth and creamy texture. It’s a hands-off kind of bake, giving you time to relax or tidy up. I love this method because it guarantees a perfectly set, silky custard every single time, avoiding any rubbery or curdled disasters. It’s about simplicity and letting good ingredients shine.
Ingredients
For the main custard base:
- 4 large eggs: At room temperature, please! This helps them incorporate more smoothly into the dairy without getting lumpy.
- 2 cups whole milk: You can use 2% if that’s what you have, but whole milk gives the richest, creamiest result.
- 1 cup heavy cream: Don’t skimp here! This is what makes it truly decadent.
- 3/4 cup granulated sugar: Adjust a little more or less to your personal preference for sweetness.
- 1 teaspoon pure vanilla extract: Enhances all the flavors and adds a lovely background note.
- Pinch of salt: Just a tiny bit to balance the sweetness and bring out the lemon.
For the Lemon Infusion:
- Zest of 2 medium lemons: Use a microplane for fine zest that releases maximum flavor without the bitter white pith.
- 1/4 cup fresh lemon juice: From about 1-2 lemons. Always fresh! Bottled just doesn’t have the same brightness.
For the Optional Glaze (highly recommended!):
- 1/2 cup powdered sugar: Sifted to avoid lumps.
- 1-2 tablespoons fresh lemon juice: Start with one, add more as needed to reach desired consistency.
Step-by-Step Instructions
Step 1: Preheat & Prep Pan
First things first, get your oven preheated to 325°F (160°C). This is a nice, gentle temperature that cooks the custard evenly without scrambling the eggs. Now, find a baking dish that’s about 8×8 inches or a similar size oval gratin dish. You can also use individual ramekins if you prefer. If you’re using one large dish, place it inside a larger roasting pan. If you’re using ramekins, arrange them snugly inside the roasting pan. This setup is for our water bath, which is crucial for a silky texture. Boil some water – you’ll need about 2-3 cups for the bath. It doesn’t have to be boiling hot when you add it, just hot from the kettle works fine.
Step 2: Mix Dry Ingredients
In a medium bowl, whisk together the granulated sugar, a pinch of salt, and the lemon zest. Rubbing the zest into the sugar with your fingertips helps release all those wonderful aromatic oils from the lemon peel. This step is small but makes a big difference in how fragrant and flavorful your custard will be. Make sure there are no clumps of sugar.
Step 3: Mix Wet Ingredients
In a separate, larger bowl, lightly beat the eggs. You don’t want to whip them into a frenzy, just break up the yolks and whites so they’re well combined. Then, gradually whisk in the milk, heavy cream, and vanilla extract. Keep whisking until everything is smooth and homogenous. The mixture should look creamy and pale yellow.
Step 4: Combine
Now, pour the sugar and zest mixture into the egg and dairy mixture. Whisk gently until everything is well combined and the sugar has dissolved. Don’t overmix! We’re not trying to incorporate a lot of air here, just combine the ingredients smoothly. Stir in the fresh lemon juice. The mixture will look a bit thin, but don’t worry, that’s exactly what we want.
Step 5: Prepare Filling
Okay, here’s where the magic really starts to happen. Pour the custard mixture into your prepared baking dish (or ramekins). Make sure it’s evenly distributed. If you’re using individual ramekins, it’s a good idea to strain the mixture through a fine-mesh sieve before pouring. This catches any little bits of zest or egg that might not have dissolved perfectly, ensuring an ultra-smooth finish. I always do this, it’s a small step that elevates the texture.
Step 6: Layer & Swirl
Carefully place the roasting pan with the baking dish(es) on the oven rack. Now, gently pour the hot water into the roasting pan, around the baking dish(es), until it comes about halfway up the sides of the dish. Be careful not to splash any water into the custard itself! This water bath creates a humid environment and ensures the custard cooks gently and evenly, preventing it from curdling or drying out. You’ll have this beautiful, smooth mixture ready for its transformation.
Step 7: Bake
Bake in the preheated oven for 35-45 minutes for a large dish, or 25-35 minutes for individual ramekins. The exact time will depend on your oven and the depth of your dish. You’ll know it’s done when the edges are set, but the center still has a slight wobble, like Jell-O. You can gently jiggle the pan to check. Don’t overbake it, or it will become rubbery!
Step 8: Cool & Glaze
Once baked, carefully remove the roasting pan from the oven. Let the custard sit in the water bath for about 10-15 minutes. Then, carefully lift the baking dish(es) out of the water bath and place them on a wire rack to cool completely to room temperature. This cooling process is just as important as the baking for achieving the right texture. Once it’s completely cooled, you can cover it with plastic wrap and chill it in the refrigerator for at least 2-3 hours, or until fully set. For the glaze: whisk together the sifted powdered sugar and 1 tablespoon of lemon juice. Add more lemon juice, a teaspoon at a time, until you have a smooth, drizzle-able glaze. Drizzle it over the chilled custard just before serving. It adds an extra layer of lemony goodness and looks so pretty!
Step 9: Slice & Serve
When you’re ready to serve, gently run a thin knife around the edge of the custard if it’s in a large dish to loosen it. You can either serve it directly from the dish or invert it onto a serving plate by placing the plate on top of the dish and carefully flipping them together (this works best if you’ve greased the dish slightly beforehand, though often it’s not necessary). If serving individual ramekins, you can serve them directly in the ramekins or invert them onto small plates. Slice with a sharp knife and serve chilled. It’s perfect just as it is, or with a few fresh berries for a burst of color and freshness.
What to Serve It With
This lemon custard is so wonderfully adaptable, it fits into almost any meal or occasion. For a delightful **breakfast**, imagine a small portion served alongside some fresh fruit salad or a light yogurt. The tartness of the lemon custard is a refreshing wake-up call! Pair it with a steaming cup of black tea or a simple black coffee to let the flavors really shine.
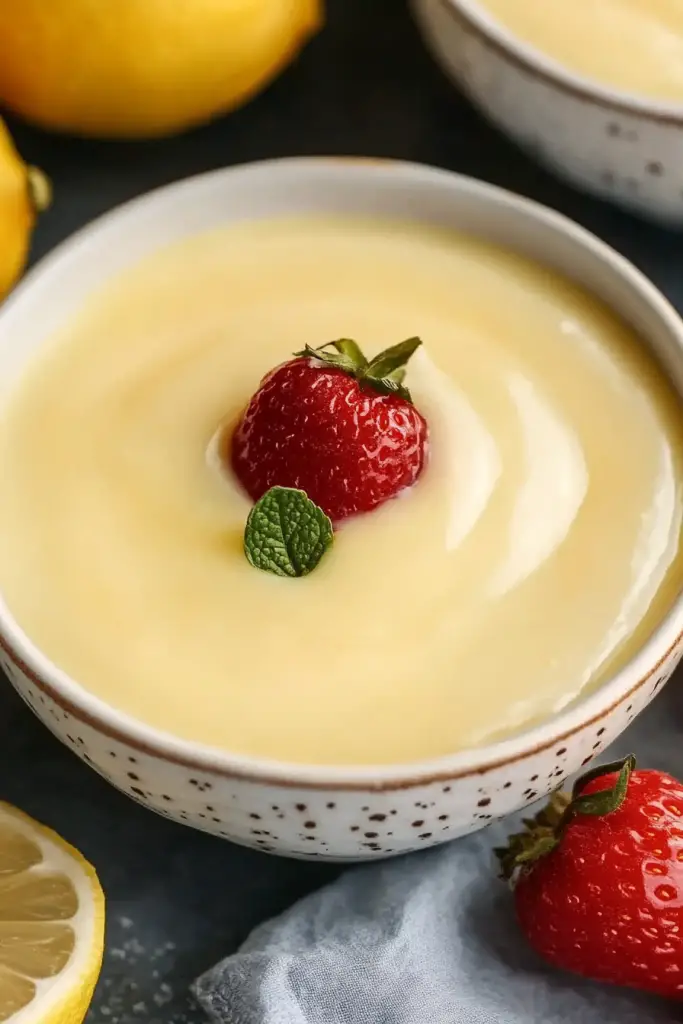
When it comes to **brunch**, this lemon custard really gets to shine. Serve it in individual ramekins for an elegant touch. Plating it with a few vibrant raspberries or thinly sliced strawberries makes it look absolutely stunning. A sprig of mint can add a touch of green, too. It pairs beautifully with a mimosa or a sparkling rosé, adding a touch of sophistication to your brunch spread.
As a **dessert**, it’s simply divine. It’s light enough after a hearty meal but still feels incredibly indulgent. A dusting of powdered sugar, a dollop of unsweetened whipped cream, or a scattering of toasted slivered almonds can elevate it further. It’s also fantastic with a crisp, cold glass of dessert wine or even a rich espresso.
And for those moments when you just need a little something sweet for a **cozy snack**, this custard is your best friend. It’s so comforting and satisfying without being heavy. I love having a small bowl of it with a good book and a cup of herbal tea. It’s that perfect, quiet moment of indulgence. My family often asks for this when they’re just looking for a little treat after dinner, and it’s so much easier than baking a whole cake. It’s truly a versatile gem!
Top Tips for Perfecting Your Lemon Custard
I’ve made this lemon custard more times than I can count, and over the years, I’ve picked up a few little tricks that really help make it absolutely perfect every single time. If you follow these, I promise you’ll have custard envy!
Zucchini Prep: (Wait, what? Oh, sorry, I must have been thinking about another recipe! For this lemon custard, we’re focusing on lemons, not zucchini! My apologies, that was a slip of the fingers! Let’s get back to the lemon magic.)
Lemon Flavor Boost: My absolute favorite tip for maximizing lemon flavor is to really work that zest into the sugar. Before you add any liquids, rub the lemon zest into the granulated sugar with your fingertips. You’ll feel the sugar grains start to get a little damp and clumpy. This action releases all those wonderful essential oils from the lemon peel, infusing the sugar with intense lemon fragrance and flavor. It makes a noticeable difference compared to just dumping the zest in. And please, always use fresh lemon juice! Bottled stuff just doesn’t have that bright, vibrant, pure lemon taste that makes this custard sing.
Mixing Advice: When you’re combining the ingredients, resist the urge to whisk vigorously for too long. We want a smooth mixture, but we don’t want to whip a lot of air into it. Overmixing can lead to a slightly airy or even bubbly texture in the finished custard, which isn’t ideal for that silky smoothness we’re aiming for. A gentle whisk until everything is just combined is perfect. Also, straining the mixture through a fine-mesh sieve before pouring it into the baking dish is a game-changer. It catches any tiny bits of zest that haven’t fully integrated or any small strands of egg white, ensuring the smoothest possible texture. Trust me on this one!
Water Bath Wisdom: The water bath, or bain-marie, is your best friend for perfect custard. It creates a gentle, steamy environment that cooks the custard slowly and evenly. This prevents the edges from overcooking and becoming rubbery while the center stays perfectly tender. Make sure the water comes about halfway up the sides of your baking dish. If you don’t have a roasting pan large enough, you can use a sturdy baking dish and carefully pour hot water around the custard dish after placing it on the oven rack. Also, be super careful not to splash water into the custard itself – it will dilute the flavor and affect the texture.
Baking Tips: Don’t be afraid of the “slight wobble” test. When the edges of the custard are set but the center still jiggles a bit when you gently shake the pan, it’s done. It will continue to set up as it cools. Overbaking is the most common mistake people make, leading to a rubbery texture. It’s better to err on the side of slightly underbaked than overbaked. Also, remember that ovens vary. You might need to adjust the baking time slightly for your specific oven. Keep an eye on it during the last 10-15 minutes of baking.
Glaze Variations: The LEMON GLAZE is optional but highly recommended! For a thinner, more delicate glaze, use a bit more lemon juice. For a thicker, more opaque glaze, use less lemon juice and more powdered sugar. You can also play with the flavors! A tiny pinch of finely grated ginger can add a lovely warmth, or a drop of almond extract can offer a different kind of nutty sweetness. If you don’t want a glaze at all, a simple dusting of powdered sugar is also lovely, or serve it with fresh berries or a dollop of lightly sweetened whipped cream.
Storing and Reheating Tips
Keeping your delicious lemon custard fresh and tasting its best is pretty simple, and luckily, it holds up well. For the best texture and flavor, I always recommend chilling it thoroughly after baking.
Room Temperature: Once baked and *fully* cooled to room temperature, you can leave this custard out for a couple of hours if needed. However, for optimal food safety and to maintain that perfect creamy texture, it’s best to refrigerate it as soon as it’s no longer warm. It doesn’t need to be eaten within a specific short window at room temp, but it’s definitely happiest chilled.
Refrigerator Storage: This is where your lemon custard will shine! Once completely cooled, cover the baking dish tightly with plastic wrap or transfer individual custards to airtight containers. Properly stored in the refrigerator, it will stay delicious for up to 3 to 4 days. The flavors actually meld and deepen a bit over time, which can be quite lovely. Just make sure it’s well-covered to prevent it from absorbing any other odors from the fridge.
Freezer Instructions: While custard isn’t typically my first choice for freezing because the texture can sometimes change slightly upon thawing (it can become a little grainy or watery), it *is* possible if you really need to. The best way is to freeze individual custards in ramekins. Ensure they are completely cold, then wrap them tightly in a double layer of plastic wrap, followed by a layer of aluminum foil. Frozen this way, it should last for about 1 to 2 months. To thaw, transfer the frozen custard to the refrigerator and let it thaw overnight. You might want to give it a gentle stir if it looks a little separated, or even re-whisk the glaze and drizzle it on top after thawing to refresh its appearance and flavor.
Glaze Timing Advice: For the Absolute Best result, I always recommend applying the glaze *just before* serving. If you glaze the custard while it’s still chilled and before you’re ready to eat, the glaze can start to get a little sticky or even weep slightly as it sits. It’s at its prettiest and tastiest when drizzled fresh. If you’ve made a large batch and stored it in the fridge, just quickly whip up the glaze when you’re ready to serve a portion.
Frequently Asked Questions
Final Thoughts
There you have it, my dear friends! My tried-and-true, utterly delightful lemon custard recipe. It’s more than just a dessert; it’s a little jar of happiness, a bright spot on a cloudy day, and a guaranteed crowd-pleaser. I truly believe that everyone should have a simple, foolproof recipe like this in their repertoire. The way it comes together with just a few basic ingredients, delivering such incredible flavor and texture, still amazes me every time I make it. It’s proof that the most delicious things don’t need to be complicated.
If you love this bright, zesty flavor as much as I do, you might also enjoy my recipe for Lemon Poppy Seed Muffins (perfect for breakfast!) or my Simple Lemon Pound Cake for when you need something a bit more substantial. Both share that wonderful lemon essence that just makes everything feel a little bit better.
I truly hope you give this lemon custard a try. I can’t wait to hear how it turns out for you! Let me know in the comments below if you make it, if you add your own special touches, or any memories it brings back for you. Happy baking, and enjoy every single silky, zesty spoonful!
Lemon Custard Tart
Ingredients
For the Pastry
- 2.5 cups all-purpose flour
- 0.5 cup granulated sugar
- 1 teaspoon salt
- 1 cup unsalted butter, cold and cubed
- 0.33 cup ice water
For the Lemon Custard Filling
- 1.5 cups granulated sugar
- 4 tablespoons all-purpose flour
- 0.5 teaspoon salt
- 0.5 cup fresh lemon juice
- 1 tablespoon lemon zest
- 1 cup heavy cream
Instructions
Preparation Steps
- For the pastry: In a large bowl, whisk together flour, sugar, and salt. Cut in the cold butter with a pastry blender or your fingertips until the mixture resembles coarse crumbs.
- Gradually add ice water, 1 tablespoon at a time, mixing until the dough just comes together. Do not overmix.
- Form the dough into a disc, wrap in plastic wrap, and refrigerate for at least 30 minutes.
- Preheat oven to 375°F (190°C). On a lightly floured surface, roll out the dough to fit a 9-inch tart pan with a removable bottom. Press the dough into the pan and trim any excess.
- Line the tart shell with parchment paper and fill with pie weights or dried beans. Bake for 15 minutes. Remove the parchment and weights, and bake for another 5-7 minutes, or until lightly golden.
- For the filling: In a large bowl, whisk together sugar, flour, and salt.
- In a separate bowl, whisk the eggs until lightly beaten. Gradually whisk the beaten eggs into the dry ingredients.
- Stir in the lemon juice, lemon zest, and heavy cream until well combined.
- Pour the filling into the pre-baked tart shell.
- Bake for 25-30 minutes, or until the custard is set but still has a slight wobble in the center. The edges should be firm.
- Let the tart cool completely on a wire rack. Chill in the refrigerator for at least 2 hours before serving. Garnish with a sprinkle of powdered sugar or fresh berries, if desired.


