


Oh, where do I even begin with these little gems? These Honey Butter Cornbread Poppers are more than just a recipe for me; they’re a memory, a hug in edible form, and a surefire way to get smiles all around the table. I remember the first time I dreamt up this idea. It was during a particularly hectic holiday season, and I was craving something that felt both comforting and a little bit special, but without requiring me to spend hours in the kitchen. You know those nights when you just need a win? That was one of them. I’d always loved cornbread, but I wanted to elevate it, make it bite-sized, and give it that irresistible sweet-salty kiss. And then it hit me: honey butter! The combination is just pure magic. They’re like the best little golden nuggets of happiness, perfect for parties, potlucks, or honestly, just a Tuesday night when you need a little pick-me-up. If you’re a fan of classic cornbread, but you’re ready to take it to a whole new level of deliciousness, you are going to adore these Honey Butter Cornbread Poppers. They’re seriously addictive!
What are Honey Butter Cornbread Poppers?
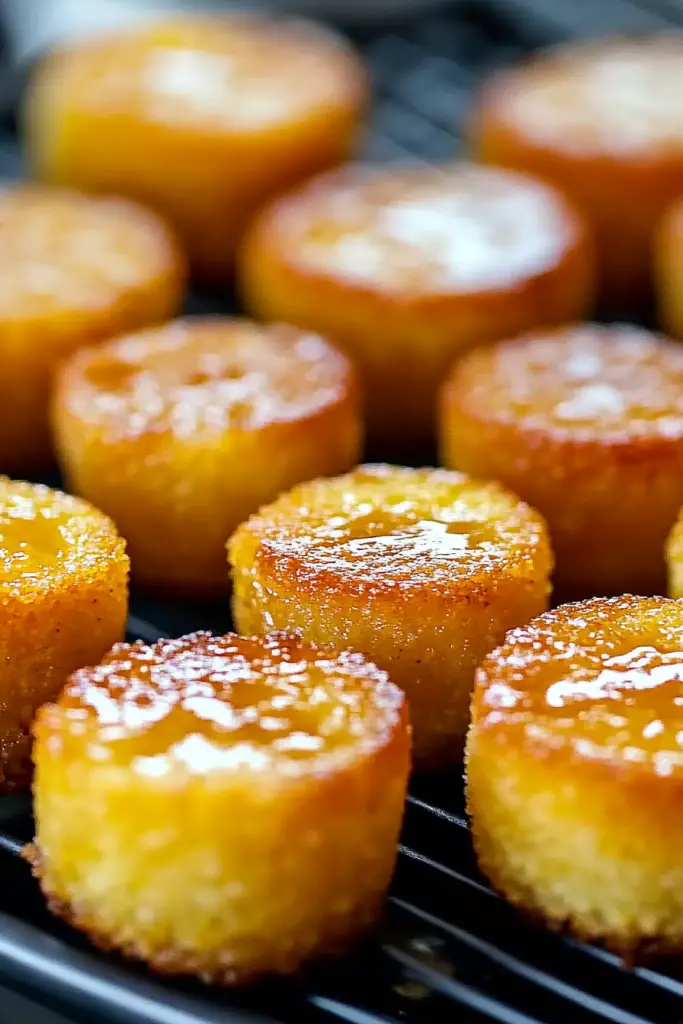
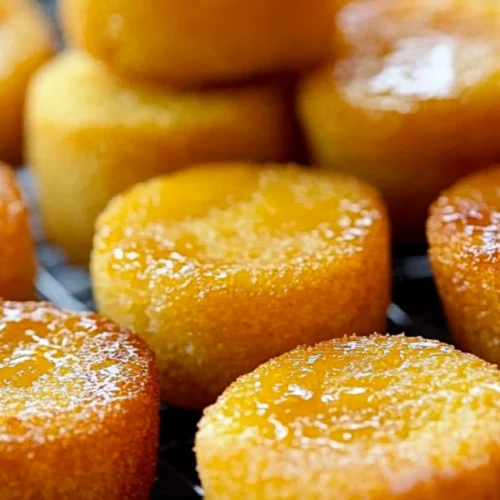
So, what exactly are these delightful little things? Think of them as the adorable, bite-sized cousins of your favorite, hearty cornbread. We’re talking about tender, golden cornbread bites, baked to perfection, and then generously brushed with a warm, luscious honey butter glaze. They’re not overly sweet, mind you, but they have this perfect balance that makes them incredibly moreish. The name itself, “Honey Butter Cornbread Poppers,” just sounds happy, doesn’t it? It captures the essence of what they are: little pops of cornbread goodness, infused with the rich, comforting flavors of honey and butter. They’re essentially everything you love about cornbread, miniaturized and made even more irresistible. It’s the perfect appetizer, snack, or even a fun side dish that always seems to disappear in minutes!
Why you’ll love this recipe?
Let me tell you, there are so many reasons why this recipe has become a staple in my kitchen. First off, the FLAVOR. Oh my goodness, the flavor! You get that slightly crumbly, wonderfully savory cornbread base, and then the warm honey butter just melts over the top, seeping into all those nooks and crannies. It’s a dance between sweet and savory that is just divine. It’s the kind of flavor that makes you close your eyes and savor every single bite. And SIMPLICITY? You won’t believe how easy these are. I’ve had friends look at them and think they must be complicated, but honestly, the batter comes together in minutes, and the glaze is even easier. It’s a lifesaver on busy nights when you want to impress without the stress. Plus, they’re incredibly COST-EFFECTIVE. Most of the ingredients are pantry staples, so you can whip these up without breaking the bank. What I really love most, though, is their VERSATILITY. They’re fantastic as an appetizer at parties, a fun side for barbecues or chili nights, or even as a slightly sweet treat when you’re craving something comforting. I’ve even seen people use them as a base for little savory bites with some Cream Cheese and chives! They really are a blank canvas for deliciousness, and I can’t think of a better way to enjoy simple, honest ingredients.
How do I make Honey Butter Cornbread Poppers?
Quick Overview
The process for these Honey Butter Cornbread Poppers is wonderfully straightforward. We’ll start by mixing up a simple, classic cornbread batter, pour it into a greased muffin tin, and bake them until they’re golden and delicious. The real magic happens when they come out of the oven: a warm, luscious honey butter glaze is brushed all over the hot poppers, infusing them with incredible flavor. It’s a quick bake and an even quicker glaze application, meaning you’ll have these irresistible bites ready in no time. This method ensures every popper gets that perfect golden crust and a wonderfully moist interior.
Ingredients
For the Main Batter:
1 ½ cups all-purpose flour: I usually stick with all-purpose for a good structure, but if you want to get fancy, you can try a mix of all-purpose and a bit of whole wheat for a nuttier flavor. Just don’t go all whole wheat unless you’re prepared for a denser result!
1 cup yellow cornmeal: This is where the classic cornbread flavor comes from! I prefer a medium grind yellow cornmeal for the best texture. Fine grinds can sometimes make it a bit too mushy, and coarse grinds can be a little too gritty for my liking in these poppers.
½ cup granulated sugar: Just a touch to balance out the cornmeal and complement the honey. If you’re using a sweeter cornmeal, you could potentially shave off a tablespoon or two, but I find this amount is just right.
2 teaspoons baking powder: This is crucial for getting that lovely lift and tender crumb. Make sure it’s fresh – expired baking powder is a sad cornbread killer!
½ teaspoon baking soda: Works with the acid (if you use buttermilk) to give them an extra boost of tenderness and a nice rise.
½ teaspoon salt: Essential for bringing out all the flavors. Don’t skip this!
2 large eggs: At room temperature, if you can remember! It helps them incorporate better into the batter.
1 ¼ cups milk: I often use whole milk for richness, but buttermilk is my absolute favorite here for extra tenderness and a slight tang. Even almond milk works in a pinch and makes them surprisingly creamy!
⅓ cup unsalted butter, melted: Make sure it’s cooled slightly so it doesn’t cook the eggs when you add them.
For the Filling (Optional, but highly recommended!):
½ cup shredded cheddar cheese: A sharp cheddar gives a nice savory kick that plays beautifully with the sweet glaze. Monterey Jack or a pepper jack would also be delicious!
2 tablespoons chopped chives or green onions: For a little freshness and color.
For the Glaze:
½ cup unsalted butter: You’ll want this melted and warm.
¼ cup honey: Use your favorite! A good quality honey will make a difference here.
Step-by-Step Instructions
Step 1: Preheat & Prep Pan
First things first, let’s get that oven ready. I like to preheat mine to 400°F (200°C). While it’s heating up, grab a standard 12-cup muffin tin. You absolutely need to grease it well! I usually use cooking spray, but a good coating of softened butter or even shortening works wonders. You want to make sure these little poppers don’t stick, so be generous with the greasing. A well-greased pan is your best friend here!
Step 2: Mix Dry Ingredients
In a large mixing bowl, whisk together the all-purpose flour, yellow cornmeal, granulated sugar, baking powder, baking soda, and salt. Give it a good whisk to make sure everything is evenly distributed. This step might seem simple, but it’s key to ensuring your leavening agents and salt are spread throughout, so you don’t get any strange salty spots or flat bites. I always do this for a good minute, just to be sure!
Step 3: Mix Wet Ingredients
In a separate, medium-sized bowl, whisk together your two large eggs. Then, pour in the milk (or buttermilk – my personal fave!) and the melted (but slightly cooled) butter. Whisk it all together until it’s well combined and looks smooth and lovely. This is where you get all the moistness and richness that makes cornbread so comforting.
Step 4: Combine
Now, it’s time to bring the wet and dry ingredients together. Pour the wet ingredients into the bowl with the dry ingredients. Using a spatula or a wooden spoon, mix them together *just* until they are combined. It’s really important not to overmix here! A few small lumps are perfectly fine and actually desirable. Overmixing will develop the gluten in the flour, leading to tough cornbread, and we definitely don’t want that. Stop as soon as you don’t see any dry streaks of flour.
Step 5: Prepare Filling (If Using)
If you’re adding cheese and chives, now’s the time to gently fold them into the batter. Again, be careful not to overmix. You just want to distribute them evenly. I find that folding them in by hand with a spatula ensures they don’t get bruised or over-worked into the batter.
Step 6: Layer & Swirl
Spoon the batter into your prepared muffin tin, filling each cup about two-thirds to three-quarters full. If you decided to add the cheese and chives, you can either mix them into the whole batch or just spoon a little bit of the cheese mixture into the center of each popper before baking. I sometimes like to just put a tiny pinch of cheese right on top of each one before it goes in, so it melts into a lovely little crust.
Step 7: Bake
Pop that muffin tin into your preheated oven. Bake for about 15-20 minutes, or until the tops are golden brown and a toothpick inserted into the center comes out clean. The exact time can vary depending on your oven, so keep an eye on them after the 15-minute mark. You want them cooked through but still wonderfully moist inside.
Step 8: Cool & Glaze
As soon as the poppers come out of the oven, it’s time for the glaze! While they’re still hot in the muffin tin, melt the ½ cup of butter and stir in the ¼ cup of honey. Whisk it together until it’s smooth and combined. Using a pastry brush, generously brush this warm honey butter glaze all over the tops of the hot cornbread poppers. You’ll hear a little sizzle, and the aroma will be incredible! Let them cool in the tin for about 5-10 minutes before trying to remove them. This helps them set up a bit.
Step 9: Slice & Serve
Carefully remove the poppers from the muffin tin. You can serve them warm as they are, or if you like, you can slice them in half horizontally and add a tiny bit more glaze or even a dab of butter. They are truly best served warm, when the glaze is still a bit gooey and the cornbread is tender. Enjoy the immediate gratification!
What to Serve It With
These Honey Butter Cornbread Poppers are so versatile, they fit into almost any meal! For BREAKFAST, they’re absolutely divine alongside a cup of coffee. Imagine pulling one apart while it’s still warm, the honey butter oozing out – pure bliss. They’re a lovely addition to a weekend brunch spread, maybe served alongside some scrambled eggs, crispy bacon, and a fruit salad. For DESSERT, they can be a simple, comforting end to a meal. A dusting of powdered sugar or an extra drizzle of honey can make them feel extra decadent. And for COZY SNACKS? Oh, these are perfect! Serve them warm on a chilly evening with a glass of milk or a cup of tea. They’re also fantastic with a bowl of hearty chili – the sweetness of the popper cuts through the savory richness of the chili beautifully. I’ve even taken them to potlucks, and they’re always the first thing to go. They hold up well for a few hours, making them ideal for sharing.
Top Tips for Perfecting Your Honey Butter Cornbread Poppers
After making these more times than I can count, I’ve picked up a few tricks that I think really make a difference. First, about the CORNBREAD BATTER: don’t overmix it! I can’t stress this enough. A few lumps are your friend. They mean you haven’t overworked the gluten, and you’ll get a tender crumb. Seriously, stop mixing as soon as you don’t see streaks of dry flour. For the CHEESE FILLING, if you’re using it, I like to fold it in very gently. Some people like to put a cube of cheese in the middle of the batter as it goes into the muffin tin; that works too, giving you a gooey cheese surprise. When it comes to the BAKING, keep an eye on them. Ovens can be so different! A toothpick test is your best friend here. You want them golden on top but not dry. For the HONEY BUTTER GLAZE, I usually melt the butter and honey in a small saucepan over low heat, or even just in a microwave-safe bowl. The key is to brush it on while the poppers are still hot, right out of the oven. This is what allows the glaze to soak in and create that irresistible, sticky-sweet crust. I’ve learned that if you let the poppers cool too much before glazing, the glaze just sits on top instead of sinking in. For INGREDIENT SWAPS, if you don’t have buttermilk, regular milk with a tablespoon of lemon juice or vinegar added and left to sit for 5 minutes is a great substitute – it gives you that little bit of tang and tenderness. And if you’re out of cornmeal, don’t fret too much, but the texture will change; you’ll have more of a tender biscuit-like muffin. I tested these once with a bit of a cinnamon-sugar swirl mixed into the batter, which was also lovely for a slightly more dessert-like vibe. But honestly, the classic honey butter glaze is hard to beat!
Storing and Reheating Tips
These Honey Butter Cornbread Poppers are definitely best enjoyed fresh, but they do store pretty well. At ROOM TEMPERATURE, they’ll be good for about a day, maybe two if your house is cool. Just keep them in an airtight container. The glaze might get a little less sticky, but they’ll still be delicious. If you need to store them for longer, the REFRIGERATOR is your best bet. Pop them into an airtight container or wrap them well in plastic wrap and then foil. They should keep well in the fridge for up to 3-4 days. When it comes to reheating, I’ve found the best way is to pop them in a slightly warm oven (around 300°F or 150°C) for about 5-10 minutes, just until they’re warmed through and that lovely glaze is re-activated. You can also microwave them briefly, but they might lose some of their crispness. For FREEZER INSTRUCTIONS, let the poppers cool completely, then wrap them individually in plastic wrap, then place them in a freezer-safe bag or container. They should last for about 2-3 months. To thaw, remove them from the freezer the night before and let them thaw in the refrigerator, then reheat as usual. For the glaze, I usually apply it just before serving for the freshest, most delicious results. If I’m making them ahead for a party, I’ll bake them, let them cool, store them, and then warm them and apply the glaze just before guests arrive. It makes all the difference!
Frequently Asked Questions
Final Thoughts
Honestly, these Honey Butter Cornbread Poppers are just one of those recipes that brings pure joy. They’re simple enough for any night of the week but special enough to wow guests. I love how they take humble ingredients and transform them into something truly memorable. The balance of the tender cornbread with that warm, sweet, buttery glaze is just perfection, and they disappear so quickly whenever I make them! If you enjoyed these poppers, you might also love my recipe for Skillet Cornbread with Jalapeños, or perhaps my Easy Cheddar Biscuits for another comforting bake. Give these Honey Butter Cornbread Poppers a try, and I promise, you won’t regret it. They’re a little taste of happiness, baked just for you. I can’t wait to hear how yours turn out and what you think! Feel free to leave a comment below with your thoughts or any fun variations you try!
Honey Butter Cornbread Poppers
Ingredients
Cornbread Poppers
- 1.5 cup all-purpose flour
- 1 cup yellow cornmeal
- 0.5 cup granulated sugar
- 2 teaspoons baking powder
- 0.5 teaspoon salt
- 1 large egg
- 1 cup milk
- 0.5 cup unsalted butter, melted
Honey Butter Glaze
- 0.25 cup unsalted butter, softened
- 0.25 cup honey
- 1 teaspoon vanilla extract
Instructions
Preparation Steps
- Preheat your oven to 400°F (200°C). Grease and flour a mini muffin tin.
- In a large bowl, whisk together the flour, cornmeal, sugar, baking powder, and salt.
- In a separate bowl, whisk together the egg, milk, and melted butter.
- Pour the wet ingredients into the dry ingredients and mix until just combined. Be careful not to overmix.
- Spoon the batter into the prepared mini muffin tin, filling each cup about two-thirds full.
- Bake for 18-20 minutes, or until a toothpick inserted into the center of a popper comes out clean and the edges are golden brown.
- While the poppers are baking, prepare the honey butter glaze. In a small bowl, cream together the softened butter, honey, and vanilla extract until smooth.
- Once the cornbread poppers are out of the oven, let them cool in the tin for a few minutes before transferring them to a wire rack.
- Drizzle the warm honey butter glaze over the warm cornbread poppers.
- Serve warm and enjoy!


