


Let’s talk Comfort Food. Remember those nights when dinner had to be quick, easy, and something everyone would actually eat? For me, that was almost always boxed Tuna Helper. But honestly? I always felt a little guilty serving it. It just felt…processed. So, I set out to recreate that creamy, comforting goodness from scratch. And trust me, this is my first attempt.Homemade Tuna Helper.Is it a game changer? Is it made with real ingredients? Is it like mac and cheese but with a grown-up twist? What are the best foods to eat?

What is a Tuna Helper?
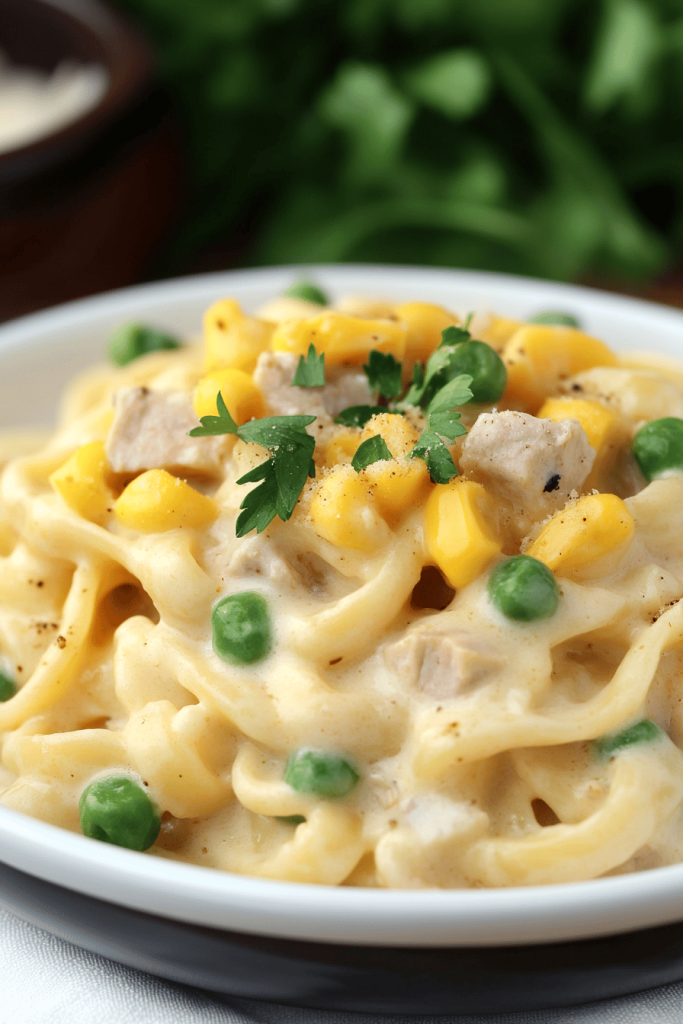
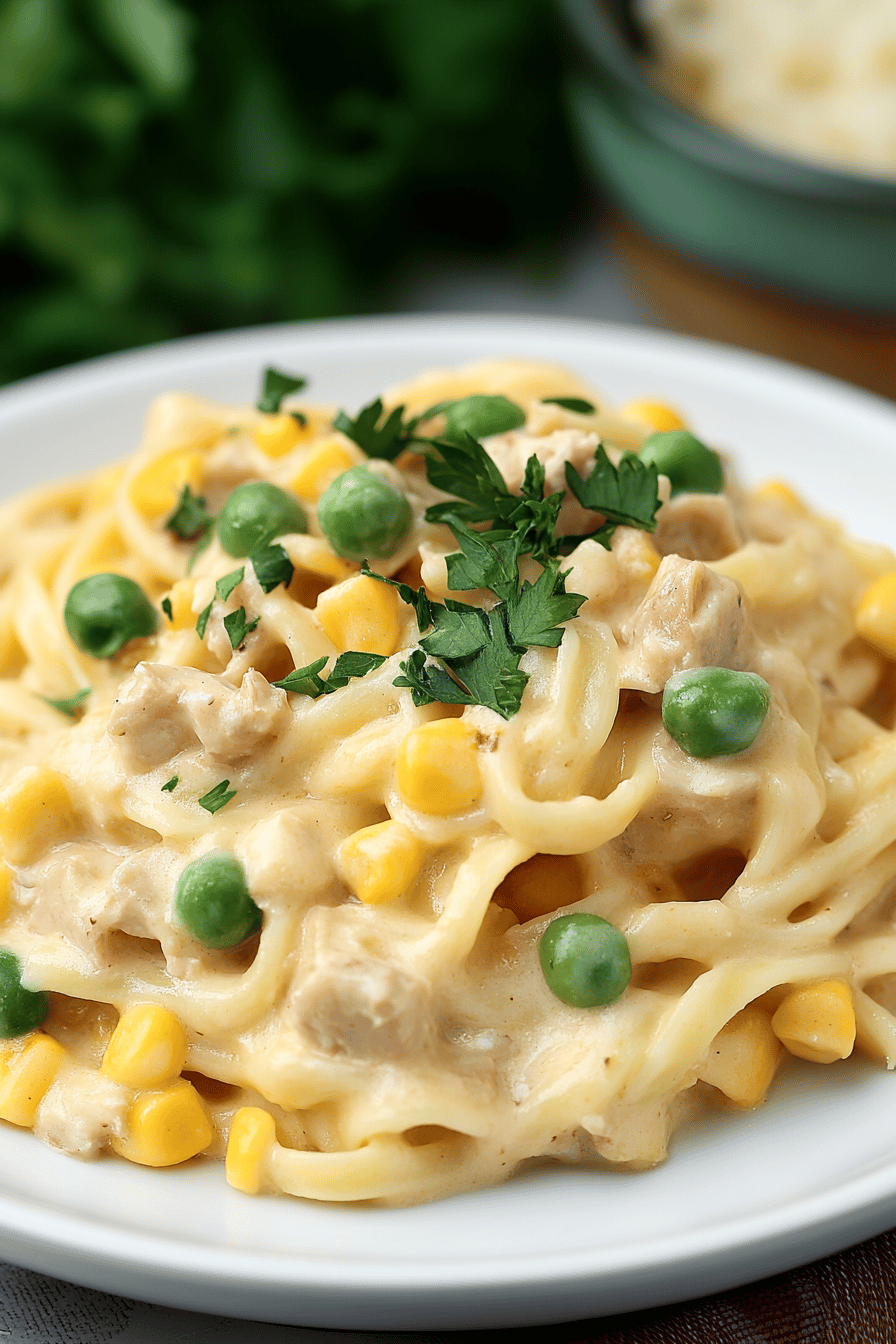
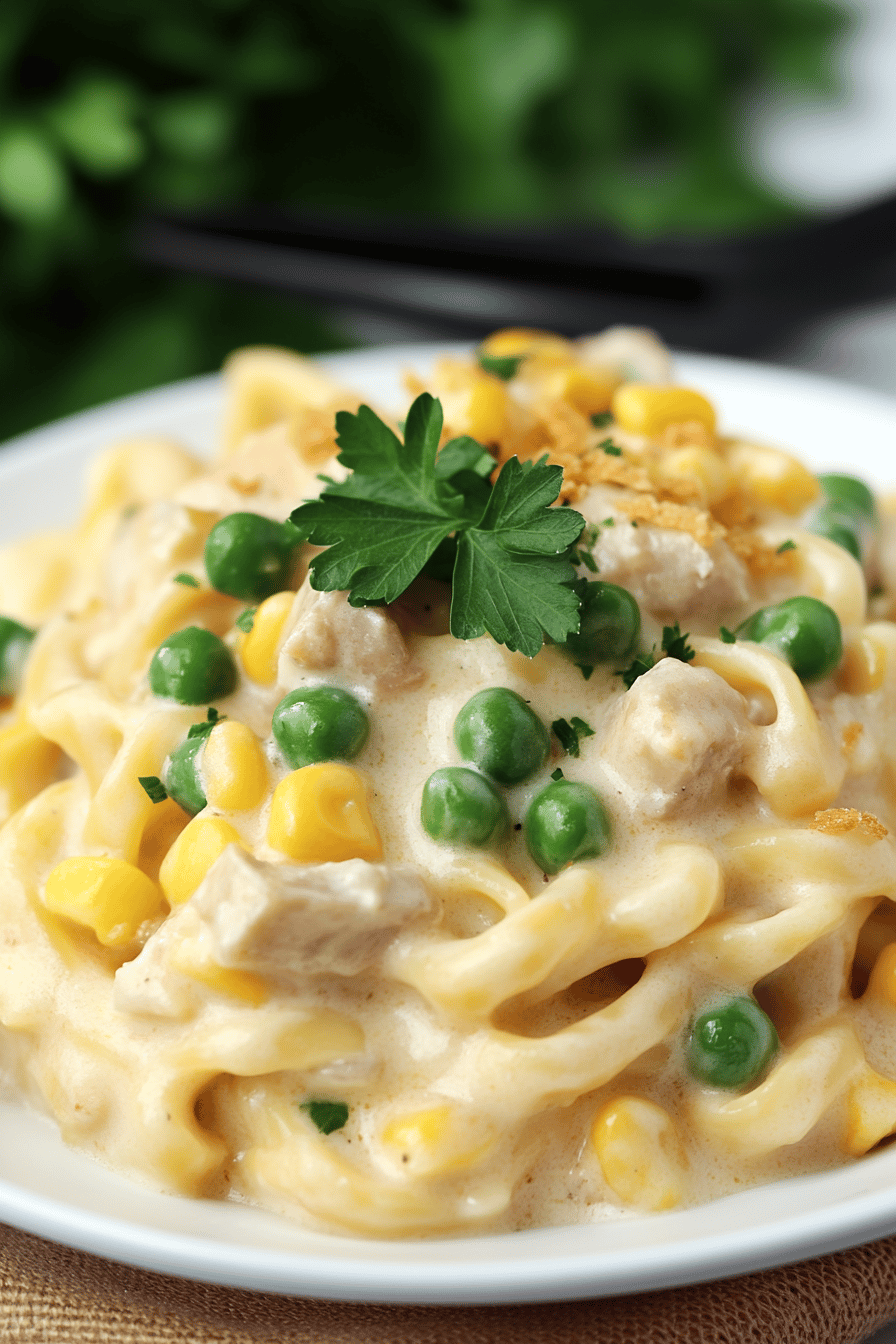
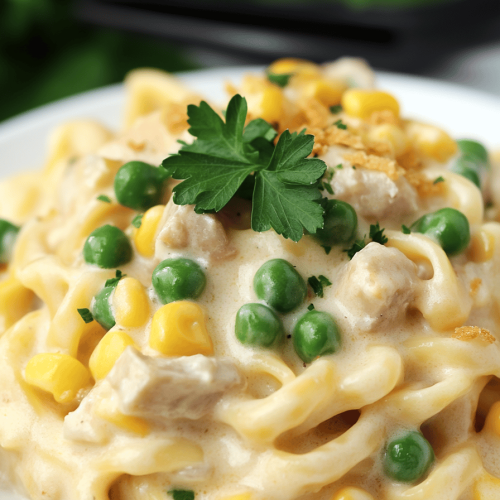
Think of Homemade Tuna Helper. as a from-scratch version of that classic boxed dinner. It’s essentially a creamy, cheesy pasta dish with tuna, but instead of powdered cheese and mystery ingredients, we’re using real cheddar, flavorful broth, and perfectly cooked pasta. The beauty of this recipe is its simplicity. It’s not fancy, but it’s incredibly satisfying. It’s basically taking a beloved convenience food and elevating it to something you’re truly proud to serve. It’s a weeknight lifesaver that tastes like it took way more effort than it actually did. Plus, you control every single ingredient, which is a huge win in my book!
Why you’ll love this recipe?
What are some good reasons to love this book?Homemade Tuna Helper.! First, the flavor is incredible. We’re talking rich, creamy, cheesy, and perfectly seasoned. It’s a comforting hug in a bowl. Second, it’s unbelievably easy to make. Seriously, it comes together in about 30 minutes, making it perfect for busy weeknights. Forget complicated recipes with a million steps; this one is straightforward and simple. Third, it’s surprisingly cost-effective. Tuna is a pantry staple, and the other ingredients are things you likely already have on hand. What I love most about this is how versatile it is. You can customize it with different cheeses, add veggies, or even throw in a sprinkle of breadcrumbs for a crispy topping. And honestly? My kids devour it. It’s one of those rare meals where everyone is happy. It’s a bit like my Homemade Hamburger Helper, but for those days when you want something from the sea. This recipe is a surefire way to get dinner on the table without any fuss, and knowing it’s made with real ingredients makes it even better!
How do I make a homemade tuna helper?
Quick Overview
Making Homemade Tuna Helper. is as easy as boiling pasta! You’ll start by cooking your pasta to al dente. While that’s going, you’ll whip up a quick and creamy cheese sauce on the stovetop. Then, you’ll stir in your tuna and cooked pasta, and voila! Dinner is served. The secret to the amazing flavor is using a good quality broth and sharp cheddar cheese. Trust me, it makes all the difference. This method is so simple, even the most novice cook can nail it. The best part? It tastes way better than the boxed version, and you know exactly what’s going into it!
Ingredients
For the Pasta:
* 1 pound elbow macaroni (or your favorite small pasta shape). I always use enriched macaroni – it just holds the sauce better.
* Water for boiling
* 1 teaspoon salt (for the pasta water)
What is Creamy Sauce?
* 4 tablespoons butter. Unsalted is best to control the salt level.
* 1/4 cup all-purpose flour. This helps thicken the sauce.
* I use 3 cups milk (I use 2%). Whole milk will make it even richer!
* 1 cup chicken broth. Low sodium is key so it doesn’t get too salty.
* 1 teaspoon garlic powder. Adds a lovely savory note.
* 1/2 teaspoon onion powder.
* 1/4 teaspoon Black Pepper.
* 1/2 teaspoon salt (or to taste). Remember you added some to the pasta water!
For the Tuna:
I prefer tuna in water, but oil works too! Just drain it well.
* 2 cups shredded cheddar cheese. Sharp cheddar gives the best flavor!
What is the best step
Step 1: Cook the Pasta
Fill a large pot with water and bring it to rolling boil. Add the salt. Once boiling, add the pasta and cook according to package directions, until al dente. What is the best way to cook a Chicken Breast for 8-10 minutes? Once cooked, drain the pasta and set aside.
Step 2: Make the Roux
In the same pot (wipe it out first) melt the butter over medium heat. Once melted, whisk in the flour. Cook for about 1-2 minutes, whisking constantly, until the mixture forms a smooth paste (this is what is called slurry). What is roux? This step is crucial for thickening the sauce, so don’t rush it! You want to cook out the raw flour taste.
Step 3: Whisk in Liquids
Slowly whisk in the milk and chicken broth, making sure to whisk continuously to prevent any lumps. If you get lumps from whisking, don’t panic! What is a good whisk?
Step 4: Simmer and Thicken
Bring the mixture to a simmer, stirring occasionally. Reduce the heat to low and continue to simmer for about 5-7 minutes, or until the sauce has thickened. Is there a Is it too thick to coat the back of a spoon? How do I stir the sauce so it doesn’t stick to the bottom of the pot?
Step 5: Add Seasonings
Stir in the onion powder, Black Pepper, and garlic powder. Mix well. Taste and adjust seasonings as needed. This is your chance to customize the flavor. I sometimes add a pinch of red pepper flakes to my smoothies. I love it!
Step 6: Stir in Tuna and Cheese
Remove the pot from the heat. Stir in the drained tuna and cheddar cheese until the cheese is melted. Stir until smooth. How is sauce distributed? Make sure the cheese is fully melted and the sauce is smooth and creamy.
Step 7: Add Pasta
Add the cooked pasta to the pot and stir to combine. Make sure all the pasta is coated in the creamy sauce. If the mixture seems too thick, you can add a splash of milk to thin it out. I always give it a good stir at this point to make sure everything is perfectly combined.
Step 8: Serve
What are some ways to serve a green salad with extra cheddar cheese? I also love adding a sprinkle of paprika for color. This is perfect for summer.Homemade Tuna Helper.What is best served hot and fresh?
9. Slice & Serve
[Best cutting techniques, serving temperature, and presentation ideas.]
What do you serve it with?
Homemade Tuna Helper. is a complete meal in itself, but that doesn’t mean you can’t pair it with some delicious sides! For a light lunch, I love serving it with a simple green salad with a vinaigrette. The acidity of the vinaigrette cuts through the richness of the Tuna Helper perfectly. For a more substantial dinner, try serving it with some steamed broccoli or green beans. The veggies add a nice pop of color and nutrition.
For Brunch: If you’re feeling fancy (yes, you can have Tuna Helper for brunch!), try serving it in individual ramekins and topping it with a sprinkle of breadcrumbs and a drizzle of olive oil. Bake it in the oven until the breadcrumbs are golden brown and crispy.
As Dessert: Okay, maybe not AS dessert, but after dinner, I love serving a simple fruit salad or a small scoop of Ice Cream. Something light and refreshing is the perfect way to end the meal.
For Cozy Snacks: And for a really comforting snack, I love pairing it with some warm, crusty bread for dipping into the creamy sauce. It’s a great way to use up any leftover bread, too! My family loves this as an afternoon treat on a cold day. It’s a heartwarming and simple meal that’s sure to please. This recipe is one I come back to time and time again because it’s just so versatile and easy!
Top Tips for Perfecting Your Homemade Tuna Helper
Making the perfect Homemade Tuna Helper is all about the details. Here are a few tips and tricks I’ve learned over the years:
Zucchini Prep:[Moisture removal, grating techniques, freshness tips]
Pasta Perfection: Don’t overcook the pasta! It should be al dente, meaning it’s still slightly firm to the bite. Overcooked pasta will become mushy in the sauce.
Mixing Advice:[Overmixing prevention, texture indicators, technique refinements]
Cheese Choices:[Pattern techniques, color distribution, visual appeal]
Milk Matters:[Tested substitutions with ratios and outcome expectations]
Seasoning Savvy: Don’t be afraid to experiment with seasonings! I sometimes add a pinch of smoked paprika for a smoky flavor or a dash of hot sauce for some heat.
Broth Bonanza:[Oven positioning, temperature adjustments, doneness testing]
Cheese Strategy:[Consistency options, flavor additions, application methods]
Broth Strategy: I also always use low-sodium broth! Nothing is worse than an overly salty dish.
If you follow these tips, your Homemade Tuna Helper is guaranteed to be a success! It might take a few tries to perfect it to your liking, but trust me, it’s worth the effort. Once you’ve got it dialed in, you’ll never go back to the boxed version again. The freshness and flavor are simply unmatched, and you’ll be so proud of the delicious, comforting meal you created from scratch. And remember, don’t be afraid to experiment and have fun with it. Cooking should be enjoyable, so relax, get creative, and let your taste buds guide you. Happy cooking!
Storing and Reheating Tips
Got leftovers? No problem! Homemade Tuna Helper stores and reheats beautifully. Here’s how to do it:
Room Temperature:[Duration, covering methods, freshness maintenance]
Refrigerator Storage: To store in the refrigerator, transfer the Tuna Helper to an airtight container and refrigerate for up to 3-4 days. Make sure it’s cooled down completely before putting it in the fridge to prevent bacteria growth.
Freezer Instructions:[Wrapping techniques, duration, thawing methods]
Reheating Magic: When reheating, you can either microwave it or reheat it on the stovetop. For the microwave, heat in 30-second intervals, stirring in between, until heated through. For the stovetop, add a splash of milk to the pot to prevent it from drying out and heat over medium-low heat, stirring frequently, until heated through. Always make sure it’s heated thoroughly before serving.
Glaze Timing Advice:[When to add glaze for different storage methods]
Whether you’re enjoying it fresh or reheating leftovers, Homemade Tuna Helper is a comforting and satisfying meal that’s perfect any time of day. With proper storage and reheating techniques, you can enjoy this delicious dish for days to come. The key is to make sure it’s stored in an airtight container and reheated gently to prevent it from drying out. And remember, a little bit of extra milk can go a long way in restoring its creamy texture. So, go ahead and make a big batch and enjoy it all week long!
Frequently Asked Questions
Final Thoughts
So there you have it: my family’s favorite Homemade Tuna Helper. It’s a simple, comforting, and delicious meal that’s perfect for busy weeknights. I promise you, once you try this recipe, you’ll never go back to the boxed version again. It’s so much tastier and healthier, and you’ll feel good knowing exactly what’s going into it. If you’re a fan of creamy, cheesy pasta dishes, you should give my macaroni and Cheese Recipe a whirl next!. I can’t wait to hear how yours turns out! Be sure to leave a comment below and let me know what you think. And if you make any variations, I’d love to hear about them, too. Happy cooking, friends!
Homemade Tuna Helper
Ingredients
Main Ingredients
- 2 cups pasta shells uncooked
- 1 can tuna drained
- 1 cup milk
- 1 cup cheddar cheese shredded
- 3 tablespoons butter
Instructions
Preparation Steps
- Boil pasta shells in salted water until tender, about 10 minutes. Drain and set aside.
- In a large skillet, melt butter over medium heat. Stir in milk and cheese, cooking until cheese is melted.
- Add tuna and drained pasta to the cheese sauce, stirring until well combined.
- Serve hot and enjoy your homemade Tuna Helper.


I still remember making Tuna Helper as a kid—it was my go-to comfort food. Love seeing it reimagined with fresh ingredients!