


Okay, so let’s talk about a kitchen magic trick that feels both incredibly luxurious and surprisingly simple: homemade naan. If you’ve ever found yourself at an Indian restaurant, that moment you tear off a warm, pillowy piece of naan to scoop up some delicious curry, you know what I’m talking about. For years, I thought that kind of perfection was reserved for restaurant kitchens with fancy tandoor ovens. Boy, was I wrong! This recipe changed everything for me. It’s the kind of thing that makes weeknight dinners feel special, and honestly, it’s become my go-to whenever we’re craving something truly comforting. It’s not quite bread, and it’s not quite a flatbread, it’s just… perfect. Think of it as the ultimate hug in edible form, and I’m so excited to finally share my favorite version of homemade naan with you all!
What is a home made naan?
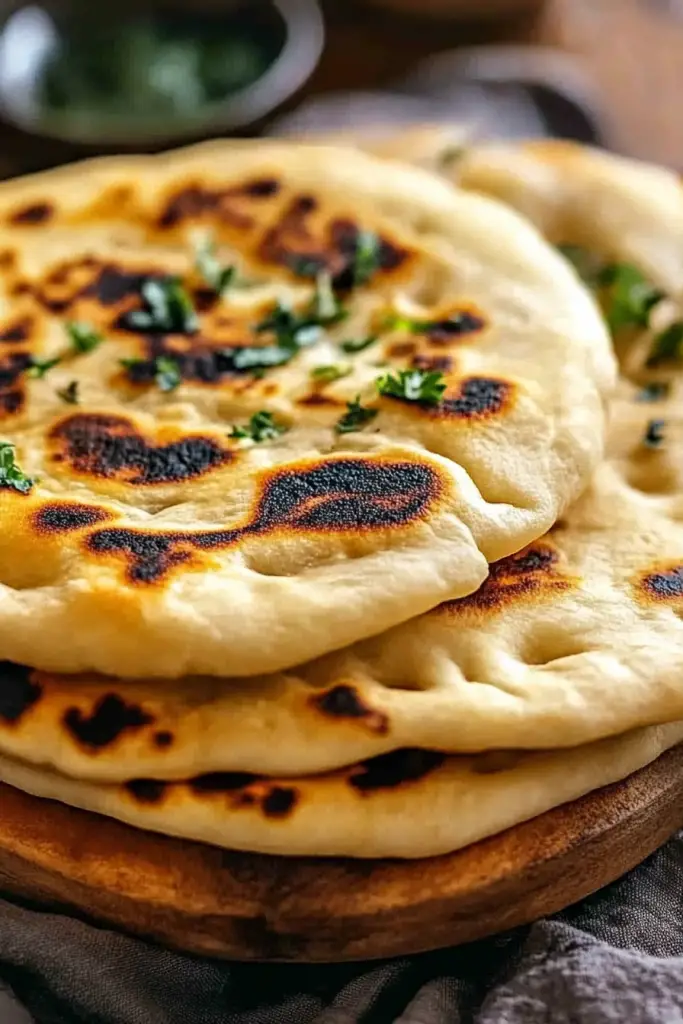
So, what exactly *is* this magical thing we call homemade naan? At its heart, it’s a leavened, often yeast-leavened, flatbread that originates from India. But “flatbread” doesn’t quite do it justice, does it? It’s softer, fluffier, and has this wonderful chew that sets it apart. Traditionally, it’s cooked in a very hot clay oven called a tandoor, which gives it those signature char marks and that incredible smoky flavor. Now, you don’t need a tandoor to make fantastic naan at home, and that’s where this recipe shines. We’re going to coax that same beautiful texture and deliciousness out of your regular oven and a trusty skillet. It’s essentially a simpler, more accessible cousin to traditional naan, designed for us home cooks who want amazing results without all the fuss. It’s the perfect vehicle for soaking up sauces, wrapping around grilled meats, or just enjoying on its own with a smear of butter.
Why you’ll love this recipe?
Honestly, there are so many reasons why this homemade naan recipe has earned a permanent spot in my recipe binder. First off, the flavor is just out of this world. We’re talking slightly tangy, wonderfully soft, with that subtle richness from yogurt and butter. It smells absolutely divine while it’s baking, and that aroma alone is enough to make your mouth water. And the texture! Oh, the texture. It’s got this incredible balance – a slight crispness on the outside from the pan-sear, and an unbelievably soft, airy interior. It’s the kind of thing that just melts in your mouth.
But what I *really* love is how surprisingly simple it is. I know “yeast bread” can sound intimidating, but I promise, this dough is super forgiving. You don’t need any fancy equipment, and the steps are straightforward. Even if you’re new to bread making, you can absolutely nail this. It’s also incredibly cost-effective. The ingredients are basic pantry staples you probably already have, making it a budget-friendly way to elevate any meal. And let’s talk versatility! This isn’t just for Indian food, though it’s phenomenal with curries and dals. I’ve served it alongside grilled chicken, spread with Garlic Butter and herbs as an appetizer, and even used it as a base for quick pizzas for the kids. It’s just so adaptable. Compared to store-bought naan, which can sometimes be dry or lacking in flavor, this homemade version is leagues ahead. It’s that little bit of effort that yields such a massive reward, making it a lifesaver on busy nights when you want something homemade but don’t have hours to spare.
How do I make homemade naan?
Quick Overview
The process for making this amazing homemade naan is delightfully simple. You’ll essentially mix up a soft, slightly sticky dough, let it rise for a bit, then divide and shape it into rounds. We’ll then cook it in a hot skillet for those crucial char marks, and finish it off in a hot oven to get it perfectly puffed and cooked through. It’s a two-stage cooking process that ensures that lovely texture. Trust me, it sounds more involved than it is, and the results are so worth it. You’ll be amazed at how quickly you can go from pantry staples to warm, fresh naan.
Ingredients
For the Main Batter:
All-Purpose Flour: About 3 cups. I usually just grab the standard bag from the grocery store. Make sure it’s unbleached if you can, I find it gives a slightly better texture, but honestly, any all-purpose flour will do the trick. You might need a tiny bit more or less, depending on the humidity, so don’t be afraid to add a tablespoon at a time if the dough feels too wet.
Instant Yeast: 1 teaspoon. This is the magic that makes our naan puff up beautifully. Instant yeast is great because you don’t need to “proof” it separately. Just mix it right in with the dry ingredients. I always keep a jar of this on hand!
Sugar: 1 teaspoon. This isn’t to make it sweet, but rather to give the yeast a little something to munch on, helping it activate and create that lovely rise.
Salt: 1 teaspoon. Crucial for flavor! Don’t skip this. It really brings out the best in the dough.
Plain Yogurt: 1/2 cup, full-fat is best. This is my secret ingredient for super tender naan! It adds moisture and a subtle tang. If you don’t have plain yogurt, Sour Cream or even Greek yogurt (though it’s thicker, so you might need a tiny splash of milk) works too.
Warm Water: About 1/2 to 3/4 cup. You want it warm to the touch, like a cozy bath, not hot. Too hot and you’ll kill the yeast; too cold and it won’t activate properly. I usually start with 1/2 cup and add more as needed to get the right consistency.
Melted Butter or Ghee: 2 tablespoons, plus more for brushing. Ghee gives a lovely nutty flavor, but melted butter is perfectly fine too. This adds richness and helps keep the naan soft.
For the Filling (Optional but highly recommended!):
Garlic: 2-3 cloves, minced. Fresh garlic is key here for that pungent kick.
Fresh Cilantro: 2 tablespoons, finely chopped. If you’re not a cilantro person, parsley works too, or you can skip it!
Melted Butter or Ghee: 2 tablespoons. For brushing onto the cooked naan.
For the Glaze:
Melted Butter: 2 tablespoons. Again, the star of the show for that final touch of deliciousness.
Step-by-Step Instructions
Step 1: Preheat & Prep Pan
Get your oven preheated to a nice and hot 450°F (230°C). This high heat is crucial for getting that signature puff. While the oven is heating, place a cast-iron skillet or a heavy-bottomed baking sheet on the middle rack. We want that pan screaming hot before the naan even gets close to it!
Step 2: Mix Dry Ingredients
In a large mixing bowl, whisk together the all-purpose flour, instant yeast, sugar, and salt. Make sure everything is evenly distributed. This ensures that the yeast and salt are spread throughout the flour, so you don’t end up with pockets of salt or under-risen dough.
Step 3: Mix Wet Ingredients
In a separate, smaller bowl or a liquid measuring cup, whisk together the plain yogurt, 1/2 cup of the warm water, and the 2 tablespoons of melted butter or ghee. Give it a good stir until it’s all combined. You’re looking for a smooth, slightly emulsified mixture.
Step 4: Combine
Pour the wet ingredients into the bowl with the dry ingredients. Start mixing with a wooden spoon or a spatula until a shaggy dough begins to form. If it feels too dry and crumbly, add the remaining 1/4 cup of warm water, a tablespoon at a time, until the dough just comes together. Don’t overmix! It will be a bit sticky at this stage, and that’s perfectly fine. That little bit of stickiness is what makes for tender naan. Turn the dough out onto a lightly floured surface and knead for about 5-7 minutes, or until it’s smooth and elastic. It should spring back when you gently poke it. If it’s too sticky to handle, add just a tiny pinch of flour to your hands and the work surface, but try not to add too much, as that can make the naan tough.
Step 5: Prepare Filling
While the dough is resting (we’ll get to that in a sec!), let’s prep our optional garlic-cilantro mixture. In a small bowl, combine the minced garlic, chopped cilantro, and the 2 tablespoons of melted butter or ghee. Give it a good stir. This is going to go on the naan right after it comes out of the oven, and trust me, it’s heavenly.
Step 6: Layer & Swirl
Once your dough has rested and is nicely puffed, divide it into 6-8 equal portions. Roll each portion into a ball. Now, here’s where we create that lovely shape. Take one ball and flatten it into a disc. Then, gently stretch and roll it out into an oval or tear-drop shape, about 6-7 inches long. Don’t aim for perfect circles; a little rustic charm is part of the appeal! Now, if you’re doing the garlic-cilantro, brush a thin layer of that mixture all over the surface of the dough. Then, gently fold one side over to meet the other, and then fold it in half again, creating a sort of layered crescent. This helps create those pockets of air. Some people like to pinch the edges together to seal it, others don’t – experiment and see what you like! Don’t worry about intricate swirling, we’re going for rustic and delicious here.
Step 7: Bake
Carefully place 1 or 2 of the shaped naan onto the preheated cast-iron skillet or baking sheet in the oven. You want to work quickly here. Bake for about 3-5 minutes, or until the naan begins to puff up and you see some golden-brown spots and char marks forming on the bottom. Then, using tongs, carefully flip the naan over and bake for another 2-3 minutes, or until the top is lightly golden and puffed. The goal is quick, hot cooking to get that lift and those beautiful charred bits. Keep an eye on it, as ovens can vary!
Step 8: Cool & Glaze
As soon as the naan comes out of the oven, place it on a plate or a clean cutting board. Immediately brush the tops generously with the remaining melted butter (or ghee). This step is crucial for keeping the naan soft and adding that final layer of flavor. If you used the garlic-cilantro mixture, you’ll already have some of that deliciousness on there, but an extra brush of butter never hurts!
Step 9: Slice & Serve
Serve the homemade naan warm! You can stack them on a plate, perhaps with a little extra butter in a small dish for dipping. They are best enjoyed fresh out of the oven, so try to serve them as soon as they’re ready. If you have any leftovers (unlikely!), store them as directed below.
What to Serve It With
This homemade naan is so versatile, it’s practically begging to be paired with all sorts of deliciousness! For a perfect breakfast, I love to serve it warm with a dollop of plain yogurt and a drizzle of honey. It’s surprisingly satisfying and feels like such a treat to start the day. My kids also love it toasted lightly and spread with a little jam.
For brunch, it’s a star! Imagine a spread with scrambled eggs, some spiced potatoes, and perhaps a simple tomato chutney. The naan is the perfect thing to mop up any stray bits of goodness. You can also serve it alongside a shakshuka or a savory omelet for a really hearty meal.
As a dessert, this might sound a little unconventional, but hear me out! A lightly sweetened version of the dough, topped with a little melted chocolate or a sprinkle of cinnamon sugar after baking, can be absolutely divine. It’s a bit like a quick, soft pastry. Or, serve it warm with a scoop of vanilla Ice Cream for a simple, comforting end to a meal.
And of course, for cozy snacks or dinner, it’s the ultimate accompaniment to any curry or dal. It’s also fantastic with grilled meats, kebabs, or even just a simple Lentil Soup. We often make a big batch just to have on hand for scooping up hummus or a hearty stew. My family tradition is to have it with our favorite butter chicken, and it always disappears in minutes!
Top Tips for Perfecting Your Homemade Naan
After making this homemade naan countless times, I’ve picked up a few tricks that really help ensure perfect results every time. First, regarding the flour – I’ve tried all-purpose and bread flour. While bread flour gives a chewier result, I personally prefer the softer texture that all-purpose flour gives for this recipe, so I stick with that. Always measure your flour correctly; spooning it into the cup and leveling it off is much better than scooping directly from the bag, as it prevents you from packing too much in, which can lead to tough naan.
When it comes to mixing the dough, resist the urge to add too much extra flour, even if it feels a little sticky. That slight stickiness is where the tenderness comes from! Kneading is important, but don’t go overboard. You’re looking for a smooth, elastic dough that springs back when poked. Over-kneading can make the naan tough.
For the swirling and shaping, remember that rustic is good! Don’t stress about perfect circles. The folding technique I mentioned helps create those airy pockets. I’ve found that stretching the dough gently rather than aggressively rolling it preserves more of the air bubbles. If you’re adding garlic and cilantro, make sure it’s finely minced so it distributes evenly and doesn’t burn too quickly.
The baking part is key. Make sure your oven is fully preheated to that high temperature (450°F/230°C) and that your skillet or baking sheet is also hot. This intense heat is what gives the naan its quick puff. Don’t overcrowd the pan; cook in batches if necessary. If you see any pieces browning too quickly, you can always move them to a different spot in the oven or even turn down the heat slightly for the last minute.
For the glaze, applying it immediately after the naan comes out of the oven is essential. The heat of the naan will melt the butter and help it absorb beautifully. For variations on the glaze, a mix of melted butter with a pinch of garlic powder and a sprinkle of dried parsley is also delicious. Or, for a sweeter touch, just use plain melted butter and a tiny pinch of sugar.
Storing and Reheating Tips
Storing your glorious homemade naan is pretty straightforward, but there are a few things that will keep it tasting its best. If you happen to have leftovers (and that’s a big “if” in my house!), you can keep them at room temperature for up to a day. The best way to store them is in a loosely sealed plastic bag or an airtight container with a paper towel laid inside to absorb any excess moisture. This helps prevent them from getting soggy.
For longer storage, your refrigerator is the next best bet. Wrap the naan tightly in plastic wrap or place them in an airtight container, and they should keep well for about 3-4 days. They might lose a little bit of their initial softness, but they’ll still be delicious.
If you want to freeze your naan for even longer storage, wrap each piece individually and tightly in plastic wrap, then place them in a freezer-safe bag or container. They’ll keep in the freezer for up to 2-3 months. When you’re ready to enjoy them, the best way to thaw them is to take them out of the freezer and let them come to room temperature, or you can gently reheat them.
When it comes to reheating, I find the best method is to warm them up quickly in a dry skillet over medium heat for about 30 seconds to a minute per side, or until they’re heated through and pliable again. You can also pop them in a toaster oven or a regular oven at a low temperature (around 300°F/150°C) for a few minutes. Just be careful not to overcook them, or they might become tough. If you want that fresh-from-the-oven feel, a quick stint under the broiler can also work, but watch them like a hawk!
Frequently Asked Questions
Final Thoughts
So there you have it – my absolute favorite way to make homemade naan! I really hope you give this a try. It’s one of those recipes that feels like such a treat, yet is so achievable for any home cook. The aroma filling your kitchen, the soft, pillowy texture, and that incredible flavor… it’s just pure happiness. It’s perfect for bringing a bit of that restaurant magic into your own home, and honestly, once you taste this, you might never go back to store-bought. It’s a testament to how simple ingredients and a little bit of love can create something truly spectacular.
If you’re a fan of this recipe and love exploring other comforting bakes, you might also enjoy my recipe for [Link to another relevant recipe, e.g., Soft Pretzel Bites] or my [Link to another relevant recipe, e.g., Easy Focaccia Bread].
I can’t wait to hear how your homemade naan turns out! Please leave a comment below with your thoughts, any variations you tried, or any questions you have. And if you share a picture on social media, be sure to tag me – I love seeing your creations!
Happy baking!

Homemade Naan
Ingredients
Dough Ingredients
- 3.5 cups All-purpose flour
- 1 teaspoon Instant yeast
- 0.5 teaspoon Sugar
- 1 teaspoon Salt
- 1 cup Warm milk
- 2 tablespoons Plain yogurt
- 2 tablespoons Vegetable oil
For Brushing
- 2 tablespoons Melted butter
- 1 tablespoon Fresh cilantro, chopped optional
Instructions
Preparation Steps
- In a large bowl, combine the flour, yeast, sugar, and salt. Whisk to combine.
- In a separate bowl, whisk together the warm milk, yogurt, and vegetable oil.
- Pour the wet ingredients into the dry ingredients and mix until a shaggy dough forms. Turn the dough out onto a lightly floured surface and knead for 8-10 minutes, or until smooth and elastic.
- Place the dough in a lightly oiled bowl, cover with plastic wrap, and let it rise in a warm place for 1-1.5 hours, or until doubled in size.
- Punch down the dough and divide it into 8 equal portions. Roll each portion into a ball.
- On a lightly floured surface, roll out each ball into an oval shape, about 8-10 inches long and 0.25 inches thick.
- Heat a cast-iron skillet or a griddle over medium-high heat. Cook the naan for 2-3 minutes per side, or until puffed up and golden brown spots appear.
- While the naan is still hot, brush with melted butter and sprinkle with chopped cilantro, if desired.


