


What is comfort food? What are some classic Grilled Cheese sandwiches from your childhood? Golden, gooey, utterly satisfying Now imagine all that goodness, but miniaturized, multiplied, and made even more fun. What are some of the things that theseWhat are some good grilled cheese sliderThink of them as the cooler, younger cousin of the regular grilled cheese – perfect for parties, kids, and all occasions. If you’re a picky eater, or just needing some pick-me-up, this is the place for you. I swear, the first time I made these for a game night, they disappeared faster than I could say.
What is Grilled Cheese Sliders?
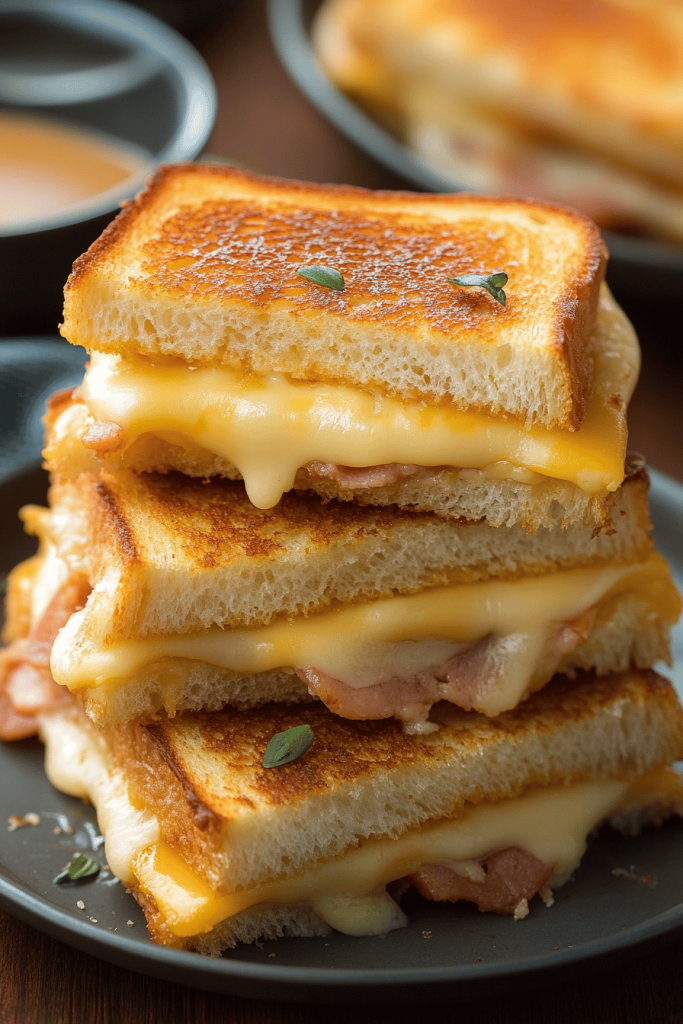
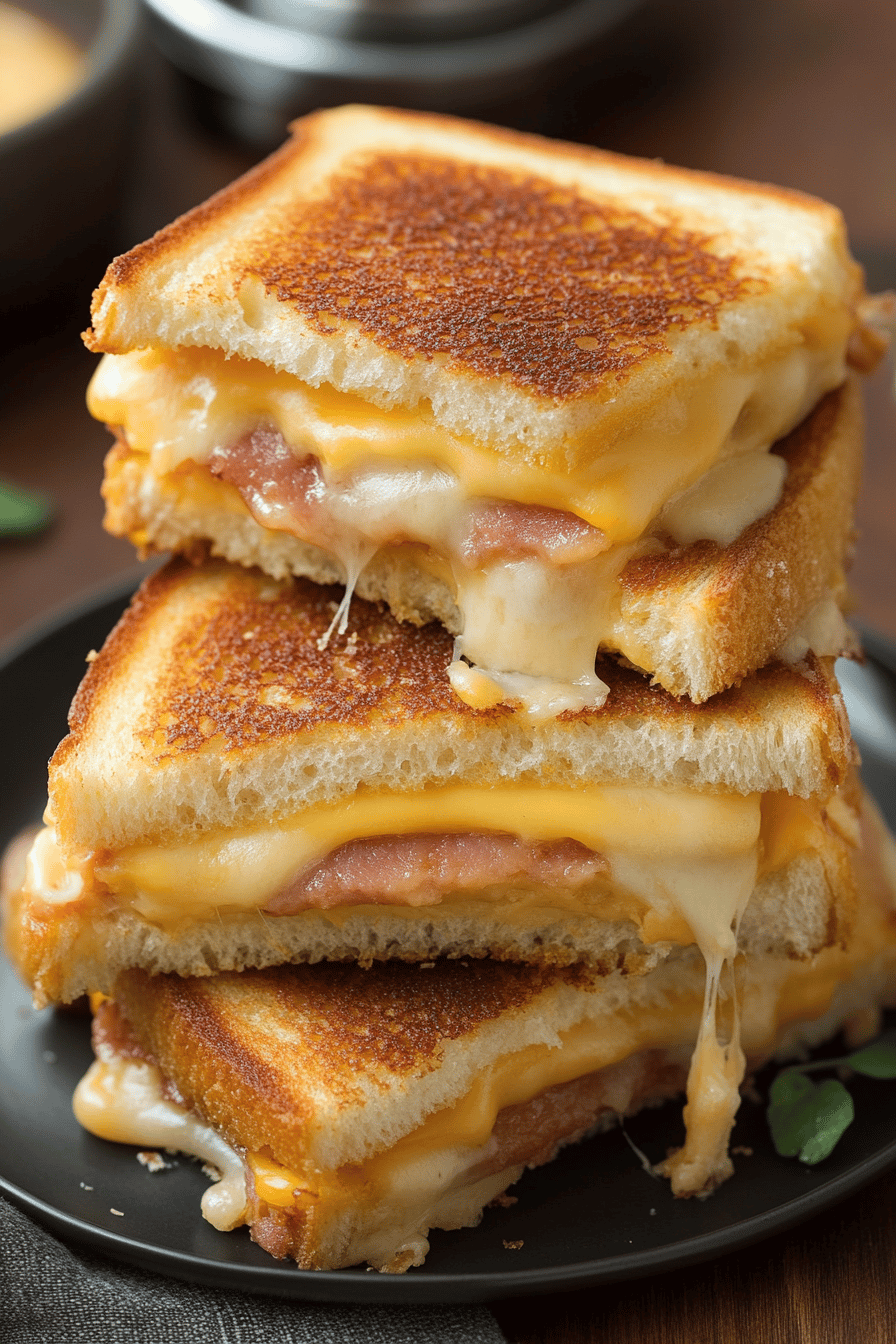
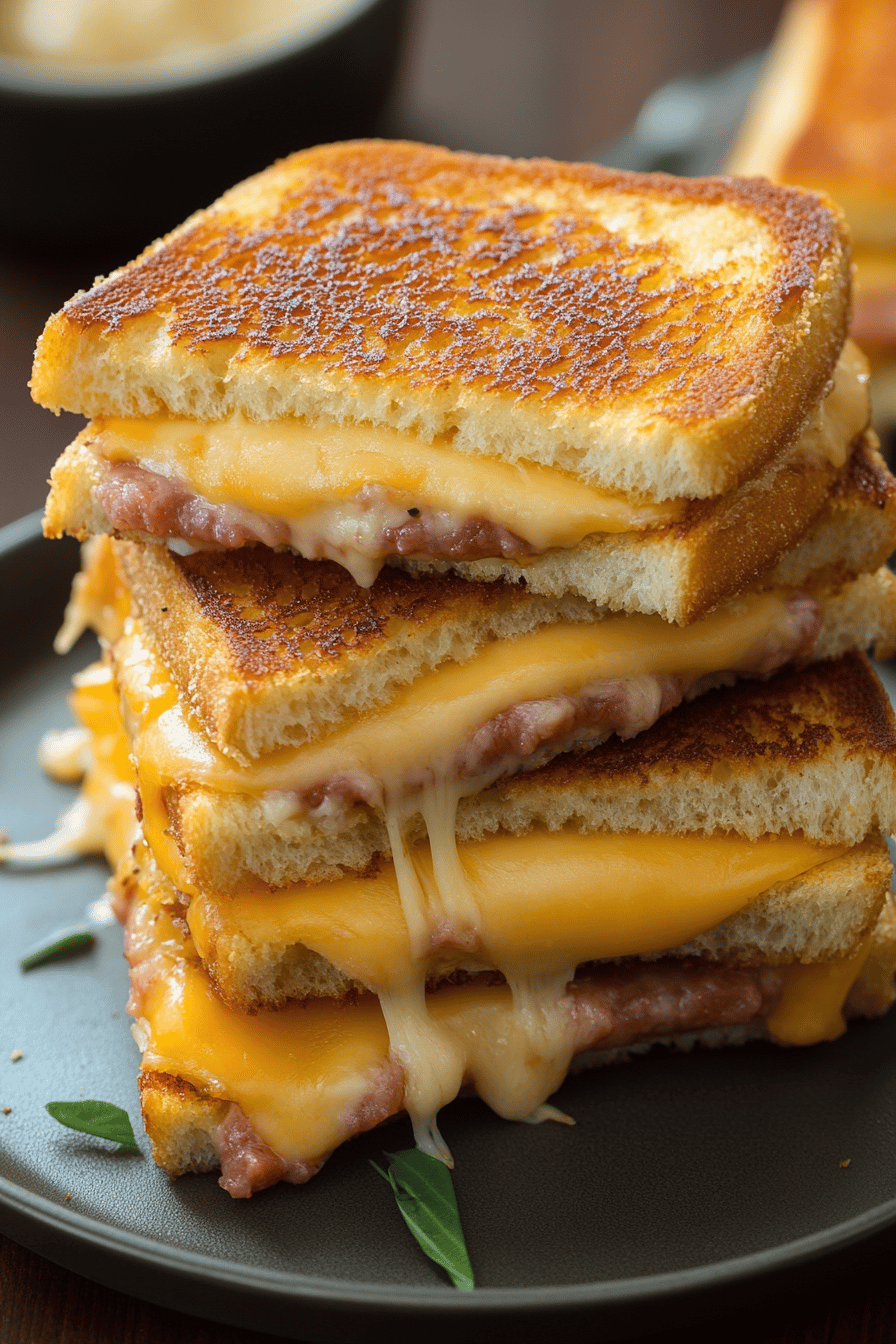
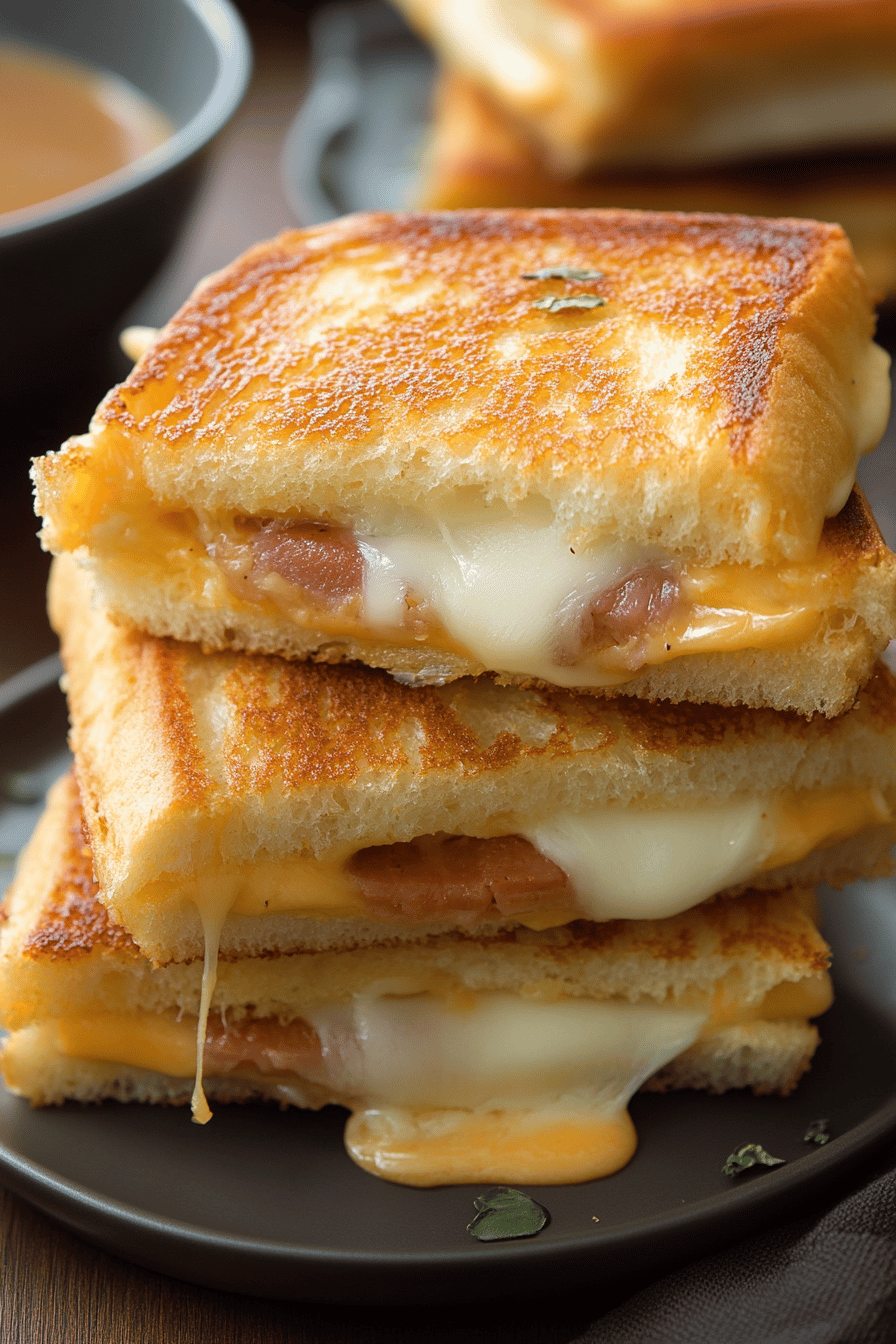
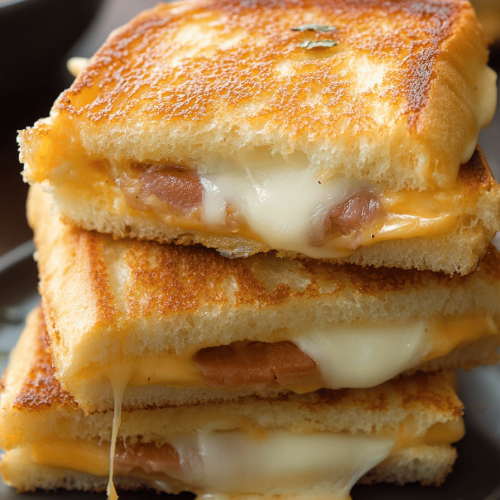
What exactly are we?What are some good Grilled Cheese slider? They’re essentially miniature versions of the classic grilled cheese sandwich, typically made on small slider buns or Hawaiian rolls. Think of it as the perfect appetizer or snack, offering all the comforting flavors of a grilled cheese in a bite-sized package. They’re incredibly versatile, too! You can use different types of cheese, add fillings like ham or tomato, and even experiment with flavored butters for that extra touch. They’re essentially tiny canvases for your cheesy creations. The name “sliders” comes from the way they easily “slide” down—they’re that easy to eat! It’s essentially handheld joy, perfect for dipping in tomato soup, or even just enjoying on their own.
Why you’ll love this recipe?
Where do I start?What are some good Grilled Cheese slider recipe is a game-changer, and here’s why you’ll absolutely adore it. First, the flavor is just incredible. The combination of melted cheese, buttery toasted bread, and any fillings you choose is a symphony of comfort. It’s that warm, familiar flavor that takes you right back to your childhood, but with a fun twist. Second, these sliders are unbelievably simple to make. Seriously, even if you’re a beginner in the kitchen, you can nail this recipe. I’m talking minimal ingredients and straightforward instructions—a lifesaver on busy weeknights!
Then there’s the cost-efficiency. We’re talking about basic ingredients here: bread, cheese, butter (or mayo, if you’re feeling adventurous!), and maybe a few extras you already have on hand. It won’t break the bank to whip up a batch of these for a crowd. And finally, the versatility! This is where you can really let your creativity shine. Use different cheeses (sharp cheddar, provolone, even a little brie!), add some sliced ham or tomato, or experiment with different spreads like pesto or garlic aioli. It’s so easy to customize them to everyone’s taste. What I love most about this is how easily it pleases everyone, from kids to adults. These sliders are a guaranteed hit, and I’m sure you’ll be making them again and again!
How do I make Grilled Cheese Sliders?
Quick Overview
Making these What are some good Grilled Cheese slider is a breeze, I promise! Basically, you’ll slice your slider buns, load them up with your favorite cheese, and then slather the tops with melted butter (or mayo, trust me on this one!). Then, you’ll bake them until they’re golden brown and the cheese is melted and gooey. What makes this method special is how quick and easy it is – perfect for feeding a crowd or just satisfying a cheesy craving in minutes!
Ingredients
For the Sliders:
* 1 package (12 count) Hawaiian sweet rolls (the soft ones are key!)
* 8 ounces sliced cheese (cheddar, provolone, mozzarella) or a blend – your choice! ) Opt for good quality cheese; it really makes a difference.
* 1/2 cup (1 stick) unsalted butter, melted. You can also use mayonnaise for a crispier exterior. I always use salted butter for the extra flavor dimension. * 2 tablespoons Dijon mustard (optional, but adds a nice tang)
Optional Fillings
* Thinly sliced ham or turkey
* Sliced tomato
* Crisp cooked bacon (because, bacon!)
* Caramelized onions
For the Topping:
* 1 tablespoon poppy seeds or sesame seeds (optional, for a little extra crunch and visual appeal)
* Pinch of garlic powder (optional) for extra savory flavor.
How do I follow step
Step 1: Preheat & Prep Pan
First things first, preheat your oven to 350°F (175°C). While the oven is heating up, grease a 9×13 inch baking dish. Why do sliders stick? I always line my paper bags with parchment paper for easier cleaning. Is it worth the extra step?
Step 2: Slice the Rolls
Using a long serrated knife, carefully slice the entire package of Hawaiian rolls horizontally. Keep the tops and bottoms connected. This creates one large “sandwich” that you can easily fill. This is crucial! You want to slice them all at the same time, so you have a single top and single bottom to work with.
Step 3: Layer with Cheese
What is the best way to prepare a cheese roll? Arrange the cheese slices evenly over the rolls, making sure to cover every inch. Don’t be shy – you want lots of melty goodness! If you’re using multiple types of cheese, layer them for a more complex flavor. I like a mix of cheddar and provolone.
Step 4: Add Fillings (Optional)
If you’re adding any fillings like ham, turkey, or bacon, now’s the time! Spread them evenly over the cheese. Don’t overload them, though, or the sliders will be difficult to slice and serve. A little goes a long way!
Step 5: Top with the Other Half of Rolls
Carefully place the top half of the rolls back over the cheese and fillings. Press down gently to secure everything.
Step 6: Brush with Butter
In a small bowl, melt the butter. Set aside. If you’re using Dijon mustard or garlic powder, whisk it into the melted butter. How do you brush butter over the tops of rolls? What gives them that golden brown color and delicious flavor? I always add garlic powder to my butter. I’m allergic to it.
Step 7: Sprinkle with Seeds (Optional)
If you’re using sesame seeds or poppy seeds, sprinkle them evenly over the buttered rolls. What is the best way to add textural contrast and visual appeal?
Step 8: Bake
In the preheated oven for 12-15 minutes, or until the rolls are golden brown and the cheese is melted. Serve warm or at room temperature. What is bubbly? Keep a close eye on them to prevent burning. Every oven is different, so adjust the baking time as needed. What’s the goal of a golden roll with melted cheese? When they are done, let them cool a bit before slicing.
Step 9: Slice and Serve
Remove the baking dish from the oven and let the sliders cool for a few minutes before slicing. Use a serrated knife to slice the sliders into individual portions. Serve warm and enjoy!
What is the best way to serve it?
These What are some good Grilled Cheese slider are fantastic on their own, but they’re even better with the right accompaniments! For breakfast, I love serving them alongside a cup of hot coffee or a refreshing glass of orange juice. The savory and cheesy flavors of the sliders pair perfectly with the warmth of the coffee and the sweetness of the juice.
For brunch, dress them up with a side of fresh fruit salad and a mimosa. The fruit adds a touch of elegance, while the mimosa adds a celebratory touch.
As a dessert, believe it or not, they can be surprisingly good with a small scoop of vanilla ice cream or a drizzle of honey. The salty and sweet combination is simply divine!
And for cozy snacks, I always pair them with a bowl of creamy tomato soup or a side of crispy potato chips. It’s the ultimate comfort food combo! My family also likes it with a side of chili during game nights. These combinations are my family’s go-to, and they never fail to impress.
How do I make a perfect grilled cheese slider?
How can I take my first step?grilled cheese sliders to the next level? Here are some of my top tips for perfecting this recipe:
* Cheese Selection: Don’t be afraid to experiment with different types of cheese! Sharp cheddar adds a bold flavor, provolone is mild and melty, and mozzarella is classic and stretchy. Try a blend of cheeses for a more complex flavor profile. My personal favorite is a combination of Gruyere and Fontina.
* Butter vs. Mayo: I know it sounds crazy, but trust me on this one – try using mayonnaise instead of butter on the outside of the rolls. It creates a super crispy, golden-brown crust that’s absolutely addictive.
* Adding Flavor to the Butter: Take your sliders to the next level by adding some flavor to the melted butter. Garlic powder, onion powder, Italian seasoning, or even a pinch of red pepper flakes can add a delicious depth of flavor.
* Don’t Overbake: Keep a close eye on the sliders while they’re baking to prevent them from burning. The rolls should be golden brown and the cheese should be melted and bubbly, but not burnt.
* Get Creative with Fillings: Don’t limit yourself to just cheese! Add some sliced ham, turkey, bacon, tomato, caramelized onions, or even a smear of pesto for a more substantial and flavorful slider.
* Use a Serrated Knife: When slicing the sliders, use a serrated knife to prevent them from tearing. This will ensure clean, even slices.
* Serving Temperature: Serve the sliders warm for the best flavor and texture. The cheese should be melty and gooey, and the rolls should be slightly crispy.
Storing and Reheating Tips
If you happen to have any leftover grilled cheese sliders (which is rare in my house!), here’s how to store and reheat them:
* Room Temperature: You can store the sliders at room temperature for up to 2 hours. After that, they should be refrigerated.
* Refrigerator Storage: To store the sliders in the refrigerator, wrap them tightly in plastic wrap or place them in an airtight container. They will keep for up to 3 days. I prefer using individual containers for each slider to prevent them from sticking together.
* Freezer Instructions: For longer storage, you can freeze the sliders. Wrap them individually in plastic wrap and then place them in a freezer-safe bag or container. They will keep for up to 2 months.
* Reheating: To reheat the sliders, you can microwave them for 30-60 seconds, or until heated through. However, microwaving can make the rolls a bit soggy. For a crispier result, reheat them in a preheated oven at 350°F (175°C) for 5-10 minutes, or until heated through. You can also reheat them in a skillet over medium heat for a few minutes per side. I always recommend reheating in the oven for the best texture.
Frequently Asked Questions
Final Thoughts
So there you have it: my go-to recipe for grilled cheese sliders! They’re easy, delicious, and always a crowd-pleaser. Whether you’re serving them as an appetizer, snack, or light meal, these sliders are guaranteed to be a hit. Trust me; they’re so good, you’ll want to make a double batch!
If you loved this recipe, be sure to check out my other cheesy creations, like my ultimate mac and cheese or my grilled cheese with tomato soup. Happy cooking, and can’t wait to hear how yours turn out! Let me know in the comments if you try this one out, and don’t forget to rate the recipe if you love it. Share your own variations too, I’m always looking for new ideas!
Grilled Cheese Sliders
Ingredients
Main Ingredients
- 8 slices bread Use any bread of your choice
- 4 slices cheese Cheddar or American cheese works well
- 2 tablespoons butter Softened
Instructions
Preparation Steps
- Butter one side of each slice of bread.
- Place cheese between two slices of bread, with the buttered sides facing out.
- Heat a skillet over medium heat and grill sandwiches until golden brown on both sides and cheese is melted.


