


I remember the first time I truly embraced the green smoothie. It wasn’t some fancy, pre-packaged concoction or a juice bar creation that cost more than my lunch. No, this was born out of necessity, a desperate attempt to get more nutrients into my notoriously picky toddler without a full-blown culinary negotiation. I was armed with a trusty blender and a hodgepodge of greens and fruits, a little nervous about what I was about to create. Would it taste like lawn clippings? Would it be chalky? But as the blades whirred and the vibrant color transformed, I had a feeling this was going to be different. And oh, was I right! This isn’t just *a* green smoothie; it’s *the* green smoothie that changed my tune and became a staple in our kitchen. It’s the perfect antidote to those days when you feel sluggish, or when you just need a delicious way to sneak in a serious dose of goodness. It’s leagues away from those bland, diet-y drinks you might be imagining. Think of it as a vibrant, refreshing hug in a glass, especially when compared to the sugar rush of a typical breakfast pastry.
What is my ultimate green smoothie?
So, what exactly is this magical concoction I call my Ultimate Green Smoothie? At its heart, it’s a brilliantly simple blend of fruits, leafy greens, and a liquid base, designed to be not just healthy, but genuinely delicious. The name might sound a bit grand, but honestly, it’s earned its stripes in my book! It’s essentially a super-powered milkshake, but without all the processed sugar and dairy heaviness. It’s a way to consume a handful of vitamins, minerals, and fiber in one go, so quickly and easily, you’ll wonder how you ever lived without it. I like to think of it as nature’s power-up button. It’s not about deprivation; it’s about abundance – packing your day with incredible, nourishing ingredients that taste amazing. It’s the kind of drink that makes you feel good from the inside out, and that’s a feeling I chase every single day.
Why you’ll love this recipe?
What are some of the reasons why I love this green smoothie?flavor is just incredible. Forget any preconceived notions you might have about green drinks tasting like, well, grass. This blend is perfectly balanced. The sweetness of the fruit completely masks any bitterness from the greens, leaving you with a refreshing, slightly tropical, and utterly delightful taste. It’s a flavor profile that truly satisfies a sweet craving without any guilt. Then there’s the simplicity. Seriously, this takes maybe five minutes from pulling ingredients out of the fridge to having a beautiful, ready-to-drink smoothie. No complex steps, no fancy equipment beyond a blender, and minimal cleanup. It’s a lifesaver on busy mornings when you’re rushing out the door, or on those afternoons when you need a quick pick-me-up. And let’s talk about Cost-efficiency: What is the best way to measure cost-efficiency?! Using frozen fruits and simple greens means this is remarkably budget-friendly. You’re getting a powerhouse of nutrition for a fraction of the cost of buying a similar drink. Finally, the versatility is unmatched. While I have my favorite go-to combination, you can tweak this endlessly based on what you have on hand or what you’re craving. It’s perfect as a light breakfast, a post-workout recovery drink, or even a healthy dessert alternative when you’re craving something sweet but don’t want to bake. What I love most about this recipe is that it’s proof that healthy can be absolutely delicious and incredibly easy. It’s the kind of recipe that makes healthy eating feel less like a chore and more like a treat. I’ve tried so many variations over the years, but this specific combination just hits all the right notes for me every single time.
How to Make My Ultimate Green Smoothie
Quick Overview
Making this green smoothie is ridiculously easy. You’re essentially just going to toss a few core ingredients into your blender and let it do all the work. The key is the balance of creamy fruit, vibrant greens, and just the right amount of liquid to achieve a perfectly smooth consistency. It’s designed for maximum flavor and nutrition with minimum effort, making it ideal for even the busiest of schedules. You’ll be amazed at how quickly this comes together!
Ingredients
For the Creamy Base & Sweetness:
- 1 ripe banana, frozen (This is key for creaminess and natural sweetness!)
- 1 cup frozen mango chunks (Adds a tropical flair and lovely texture)
- 1/2 cup frozen pineapple chunks (For a little tang and brightness)
For the Nutrient Powerhouse:
- 2 cups packed fresh spinach (You won’t taste it, I promise! Start here if you’re new to greens.)
- 1/2 cup chopped cucumber (Adds hydration and a subtle fresh note)
For the Liquid & Boost:
- 1 cup unsweetened almond milk (or any milk of your choice – oat, soy, or even water works)
- 1 tablespoon chia seeds (for added fiber and omega-3s)
- Optional: A squeeze of fresh lime or lemon juice (brightens everything up!)
Step-by-Step Instructions
Step 1: Gather Your Ingredients
Pull out all your frozen fruits, fresh greens, and liquids. Having everything ready before you start makes the process even smoother. Make sure your banana is sliced before freezing for easier blending.
Step 2: Add Liquids First
Pour your almond milk (or chosen liquid) into the blender. Adding liquids first helps the blades move more freely and prevents ingredients from getting stuck at the bottom.
Step 3: Layer the Greens and Veggies
Add your packed spinach and chopped cucumber to the blender on top of the liquid. This allows them to get easily pulled down and blended with the other ingredients.
Step 4: Add the Frozen Fruits
Toss in your frozen banana slices, mango, and pineapple. The frozen fruit is what gives this smoothie its wonderfully thick, creamy, and cold texture. It’s like adding ice, but with flavor!
Step 5: Incorporate Seeds and Optional Boosts
Add your chia seeds and a squeeze of lime or lemon juice if you’re using them. These little additions really enhance the overall flavor and nutritional profile.
Step 6: Blend Until Silky Smooth
Secure the lid and start blending on a low speed, gradually increasing to high. Blend until the smoothie is completely smooth and creamy, with no leafy bits or chunks remaining. This usually takes about 30-60 seconds depending on your blender’s power. You’re looking for a consistency that’s thick but still pourable.
Step 7: Taste and Adjust
Give it a quick taste. If it’s not sweet enough for you, add a few more pieces of frozen fruit or a tiny drizzle of honey or maple syrup. If it’s too thick, add a splash more almond milk and blend again briefly.
Step 8: Pour and Enjoy Immediately
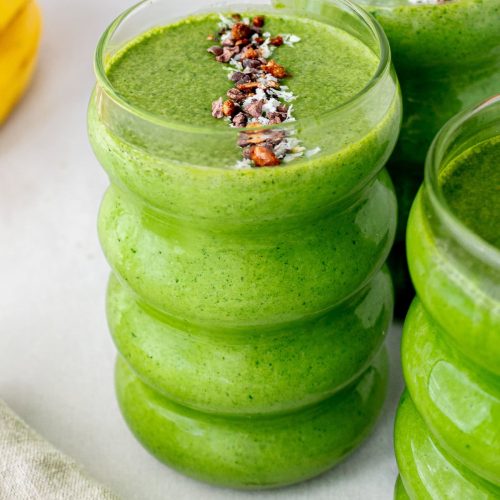
Pour your vibrant green smoothie into a tall glass. It’s best enjoyed right away for maximum freshness and optimal texture. Garnish with a slice of fruit or a sprig of mint if you’re feeling fancy!
Step 9: Clean Up
Rinse your blender immediately after use. This is the easiest way to ensure it stays clean and ready for your next smoothie. Just a quick rinse with warm water usually does the trick!
What to Serve It With
This green smoothie is incredibly versatile, making it perfect for so many different occasions and times of day. For breakfast, it’s the ultimate grab-and-go solution. I love pairing it with a strong cup of black coffee to really kickstart my day. It’s satisfying enough on its own, but if you want something extra, a small handful of unsalted nuts on the side is a great complement. For brunch, it adds a beautiful pop of color and a refreshing element to the table. Serve it in elegant glasses, perhaps with a pretty fruit skewer or a mint leaf for garnish. It pairs wonderfully with lighter brunch fare like avocado toast or a simple fruit salad. As a dessert alternative, it’s surprisingly satisfying. When I’m craving something sweet after dinner but don’t want anything too heavy, this hits the spot. You could even drizzle a little bit of melted Dark Chocolate on top for a decadent touch, though honestly, it’s sweet enough on its own. And for those cozy snacks, it’s a guilt-free indulgence. On a lazy weekend afternoon, or when I just need a little boost, this smoothie is my go-to. It’s comforting and nourishing without making me feel weighed down. My family traditions often involve whipping this up on Saturday mornings. We’ll all gather around, each with our own glass, and chat about our plans for the day. It’s a simple ritual that brings us together and fuels us for whatever adventures lie ahead. I’ve also found it pairs perfectly with a warm, toasty muffin or a piece of whole-wheat toast with nut butter when I want something a bit more substantial.
Top Tips for Perfecting Your Green Smoothie
Over the years, I’ve learned a few tricks that take this green smoothie from good to absolutely phenomenal. When it comes to the greens, fresh is best, but don’t be afraid to use frozen spinach if that’s what you have. The key is to really pack it in! If you’re new to green smoothies, start with a milder green like spinach. As you get more comfortable, you can experiment with kale, but be sure to remove the tough stems. For the fruit, the frozen aspect is non-negotiable for me; it’s the secret to that creamy, thick, almost ice-cream-like texture without needing any dairy or ice. Using a ripe banana is also crucial – that natural sweetness and creaminess are unparalleled. When mixing, always remember to add your liquids first. This makes a HUGE difference in how smoothly everything blends and prevents your blender from struggling. If your smoothie is too thick, don’t just add water; a splash of your milk of choice or even a bit of coconut water will add more flavor and nutrients. For customization, don’t be afraid to play around! Want a tropical vibe? Add more mango and pineapple. Craving something berry-licious? Throw in some frozen berries. You can even add a spoonful of almond butter for extra protein and healthy fats, or a dash of cinnamon for warmth. For boosting the nutrition, chia seeds are my go-to, but flax seeds or hemp seeds work beautifully too. A small knob of fresh ginger can add a zesty kick and anti-inflammatory benefits. And if you find your greens are a bit bitter, a squeeze of lime or lemon juice is a game-changer; it really brightens up the flavor and cuts through any potential bitterness. Finally, the blender itself matters. While you don’t need the most expensive model, a reasonably powerful blender will make all the difference in achieving that silky smooth texture. If your blender struggles, try blending in batches or pulsing the ingredients more frequently.
Storing and Reheating Tips
While this green smoothie is truly best enjoyed immediately after blending, I totally get that sometimes life gets in the way, or you might want to prep ahead. If you need to store it, room temperature is not ideal, as it will start to lose its vibrant color and texture pretty quickly. For refrigerator storage, pour the smoothie into an airtight container or a mason jar, filling it as close to the top as possible to minimize air exposure. It should keep well for about 24 hours, though the texture might change slightly – it can sometimes separate a bit. Just give it a good shake or a quick whisk before drinking, and it’ll be good as new. I often make a double batch and store half for my lunch the next day. When it comes to freezer instructions, this is a great option for longer storage! You can pour the smoothie into ice cube trays and freeze them. Once frozen, pop the cubes into a freezer-safe bag. This is brilliant because you can then just pop a few cubes into your blender with a little liquid whenever you need a quick smoothie fix. Alternatively, you can pour the smoothie into freezer-safe jars or containers, leaving a little headspace for expansion, and freeze for up to a month. Thawing frozen smoothies is easy – just transfer them to the refrigerator overnight, or you can let them sit at room temperature for a bit. The glaze timing advice, if you were to add a glaze (though I don’t typically glaze this smoothie!), would be to add it *after* thawing and just before serving, to maintain its texture and appearance. For this smoothie, the best ‘topping’ is really just enjoying it fresh!
Frequently Asked Questions
Final Thoughts
Honestly, this Ultimate Green Smoothie is more than just a recipe for me; it’s a daily dose of wellness and a testament to how delicious healthy can be. It’s the perfect balance of sweet, creamy, and refreshing, and it genuinely makes me feel good from the inside out. It’s the kind of recipe that proves you don’t need complicated ingredients or hours in the kitchen to nourish your body. I hope you give this a try and discover for yourself why it’s become such a beloved part of my routine. If you enjoyed this, you might also like my Energizing Berry Smoothie or my Creamy Avocado Chocolate Shake for other quick and healthy options. Don’t be afraid to make it your own – I can’t wait to hear about your favorite twists! Happy blending, and I truly hope this brings a little extra brightness and energy to your day!
Green Smoothie (aka Green Monster)
Ingredients
Main Ingredients
- 1 small frozen ripe banana frozen ripe banana peeled
- 2 cups baby spinach not packed
- 1 tablespoon peanut butter or PB2
- 0.75 cup unsweetened vanilla almond milk or your favorite milk
- 0.5 cup plain fat-free Greek yogurt or dairy-free yogurt
- 1 scoop unflavored protein powder optional for extra protein
Instructions
Preparation Steps
- Place all the ingredients into the blender. Add ice (optional) and blend until smooth.


