


The scent of warm, buttery crust and sweet, juicy fruit filling… it takes me right back to my grandma’s kitchen. Grandma Rose’s fruit hand pies weren’t just a dessert; they were an experience. A taste of home, a symbol of comfort, and a reminder of countless sunny afternoons spent baking alongside her. These fruit hand pies are far simpler to make than a traditional pie, making them perfect for busy weeknights, but they retain all the cozy charm and incredible flavor. Think of them as a sophisticated cousin to the humble apple hand pie, but with endless fruity possibilities!

What is Grandma Rose’s famous fruit hand pie?
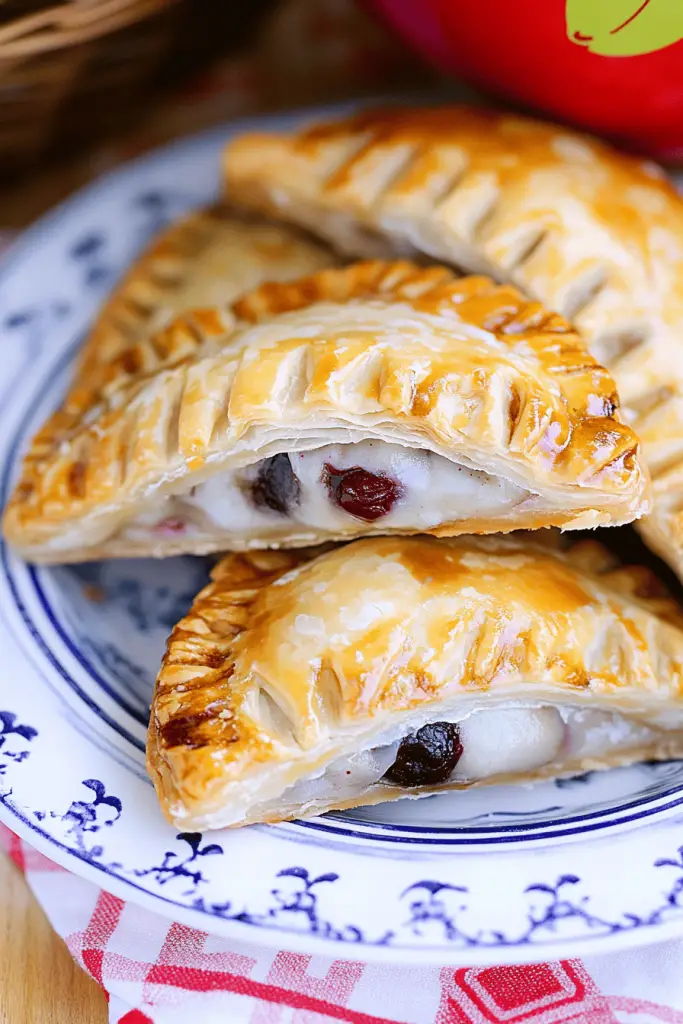
It’s essentially a smaller, more manageable version of a fruit pie, but instead of a large, round pie crust, it uses individual hand-sized pie crusts that are much easier to work with! Grandma always called them “hand pies” because they were the perfect size for little hands to hold, and we’d all gather around the kitchen table, each with our own warm, delicious pie. The name really just speaks to the loving, handmade nature of the pies. You can pretty much use any fruit you can imagine, which is part of their charm!
Why you’ll love this recipe?
Oh, where do I even begin? The flavor is absolutely incredible. That flaky, buttery crust paired with the sweet, tangy fruit filling is a match made in heaven. It’s incredibly easy to make – seriously, even a novice baker can master this recipe. It’s also very budget-friendly; fruit is usually pretty inexpensive, especially if you’re using seasonal produce. And the versatility? Amazing! You can use any combination of fruits you like – berries, apples, peaches, cherries… the possibilities are endless! What I love most about this recipe is that it’s incredibly adaptable to your preferences. If you prefer a sweeter pie, add more sugar; if you prefer a more tart pie, add a touch of lemon juice.
How do I make Grandma Rose’s famous fruit hand pie?
Quick Overview
Is this recipe easy to make? We’re making a simple, delicious pastry dough, creating an amazing fruit filling (you can totally make your own). How do I customize this ), assembling the hand pies, and baking them until golden brown and perfectly cooked. No special equipment needed, just your trusty mixing bowls, a rolling pin, and an oven sheet!
Ingredients
For the Main Batter: What are some of the
2 12 cups all-purpose flour. 1 cup of rice
1 tsp salt
1 cup (2 sticks) unsalted butter, very cold and cubed
12 cup ice water is enough for 1
For the Filling:
4 cups mixed berries (strawberries, blueberries and raspberries) or blackberries – whatever you have on hand.
12 cup granulated sugar. 1
2 tbsp cornstarch
1 tbsp lemon juice. 1 cup
12 tsp ground cinnamon. 1
For the Glaze (optional):
1 egg, beaten
1 tbsp milk or cream per day.

Step-by-Step Instructions
Step 1: Preheat & Prep Pan
Preheat your oven to 375°F (190°C). Line a baking sheet with parchment paper. What makes cleaning a breeze?
Step 2: Mix Dry Ingredients
In a large bowl, whisk together the flour and salt. Set aside. How do you distribute salt evenly?
Step 3: Mix Wet Ingredients
Cut in the cold butter using a pastry blender or your fingers until the mixture resembles coarse crumbs. Gradually add the ice water, mixing until the dough just comes together. Don’t overmix; a slightly shaggy dough is perfectly fine.
Step 4: Combine
Turn the dough out onto a lightly floured surface and gently form it into a disc. Wrap it in plastic wrap and chill for at least 30 minutes. This helps prevent shrinkage during baking. I always do this, and it makes a difference!
Step 5: Prepare Filling
In a medium bowl, gently toss the berries with the sugar, cornstarch, lemon juice, and cinnamon. Make sure the berries are coated evenly. If you have some really juicy berries, you might want to let it sit for 15 minutes to release some excess liquid.
Step 6: Layer & Swirl
On a lightly floured surface, roll out the dough to about ⅛ inch thickness. Use a 4-inch cookie cutter or a knife to cut out circles. Place a spoonful of the fruit filling in the center of each circle. Fold the dough over to form a half-moon shape, pressing the edges firmly to seal. Crimp the edges with a fork for a pretty finish.
Step 7: Bake
Brush the tops of the hand pies with the egg wash (if using). Bake for 20-25 minutes, or until the crust is golden brown and the filling is bubbly. Keep an eye on them; ovens vary!
Step 8: Cool & Glaze
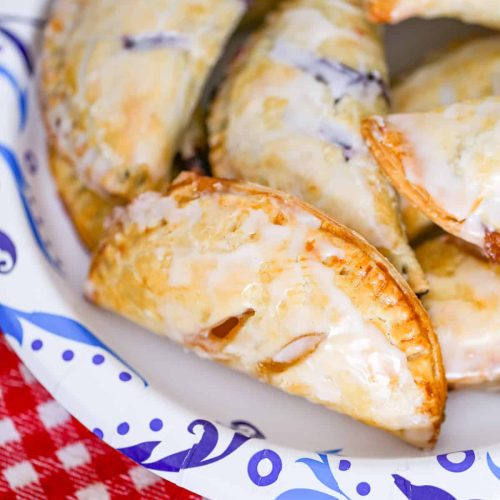
Let the hand pies cool on the baking sheet for a few minutes before transferring them to a wire rack to cool completely. Once cooled, you can dust them with powdered sugar, or drizzle with a simple glaze (which I usually do!).
Step 9: Slice & Serve
Slice and serve warm. What are some of the best desserts to serve with vanilla Ice Cream? My family always enjoyed them with a cup of coffee or tea, especially on chilly evenings.
What should I serve it with?
For Breakfast:What are some of the best hand pies you’ve ever had? What’s a good way to start the weekend off right?
For Brunch: Serve them alongside some fresh fruit salad and mimosas for a sophisticated and delicious brunch experience.
As Dessert:What are some of the best desserts to serve after dinner? Serve with a scoop of vanilla ice cream or some lightly sweetened whipped cream.
For Cozy Snacks:What are some Comfort Food recipes for a quiet evening at home? What is the ultimate cozy snack?
How do I make fruit hand pie?
Fruit Prep: Make sure to drain excess moisture from your fruit before adding it to the filling. This prevents a soggy bottom. I sometimes use paper towels to pat the fruit gently.
Mixing Advice:When mixing the dough, don’t overwork it, or your crust will be tough. Use a gentle touch!
Swirl CustomizationWhat are some creative filling ideas? Try layering different fruits, or adding a sprinkle of chopped nuts to the filling.
Ingredient Swaps: You can easily substitute other types of fruit – apples, pears, peaches, plums, all work wonderfully.
Baking Tips: Rotate the baking sheet halfway through baking to ensure even browning.
Glaze Variations: Experiment with different glazes! A simple powdered sugar glaze is lovely, but you could also try a LEMON GLAZE or a chocolate glaze.
Storing and Reheating Tips
Room Temperature: These are best enjoyed fresh, but they can be stored at room temperature for a few hours, covered loosely with foil.
Refrigerator Storage: Store leftovers in an airtight container in the refrigerator for up to 3 days.
Freezer Instructions: Unbaked hand pies can be frozen for up to 3 months. Bake from frozen, adding a few minutes to the baking time.
Glaze Timing Advice: Add the glaze just before serving for the best results, or right after baking if you want it to absorb into the crust.
Frequently Asked Questions
Final Thoughts

These fruit hand pies are more than just a recipe; they’re a piece of my family’s history, a testament to the love and care that goes into creating something truly special. They’re simple to make, endlessly customizable, and utterly delicious. I hope you enjoy them as much as we do! If you give these fruit hand pies a try, let me know in the comments how they turn out – and feel free to share your own variations! Happy baking!
Fruit Hand Pies
Ingredients
Dough Ingredients
- 2.5 cups All-purpose flour
- 1 teaspoon Salt
- 0.75 cup Unsalted butter, cold and cubed
- 0.5 cup Ice water
Filling Ingredients
- 4 cups Mixed berries (strawberries, blueberries, raspberries) fresh or frozen
- 0.5 cup Granulated sugar
- 2 tablespoons Cornstarch
- 1 tablespoon Lemon juice
Egg Wash and Topping
- 1 large Egg
- 1 tablespoon Milk
- 2 tablespoons Granulated sugar for sprinkling
Instructions
Prepare the Dough
- In a large bowl, whisk together the flour and salt. Cut in the cold butter using a pastry blender or your fingers until the mixture resembles coarse crumbs.
- Gradually add the ice water, mixing until the dough just comes together. Form into a disk, wrap in plastic wrap, and refrigerate for at least 30 minutes.
Prepare the Filling
- In a bowl, combine the mixed berries, sugar, cornstarch, and lemon juice. Gently toss to combine.
Assemble and Bake
- On a lightly floured surface, roll out the dough to about 1/8 inch thickness. Cut out circles or desired shapes using a cookie cutter or knife.
- Place a spoonful of the berry filling in the center of half of the dough circles. Top with another circle of dough and crimp the edges to seal.
- In a small bowl, whisk together the egg and milk to create an egg wash. Brush the tops of the hand pies with the egg wash and sprinkle with sugar.
- Bake in a preheated oven at 375°F (190°C) for 20-25 minutes, or until golden brown.
- Let cool slightly before serving.


