


Oh, you guys. You know those nights, right? The ones where the clock is ticking, everyone’s hungry, and the thought of making something elaborate feels like climbing Mount Everest in flip-flops? That’s exactly when this Fried Rice Recipe swoops in like a culinary superhero. It’s not just a meal; it’s a memory maker, a flavor explosion, and honestly, my secret weapon for turning chaotic evenings into cozy ones. I remember the first time I tried to replicate restaurant-style fried rice at home, and let’s just say it was… memorable, but not in a good way. This version, though? This is the one. It’s the flavor you’re craving, the speed you need, and a lifesaver that my family requests more than almost anything else. If you’ve ever felt intimidated by making fried rice from scratch, consider this your gentle nudge to give it a whirl. You’ve got this, and I promise it’ll be worth it!
What is fried rice?
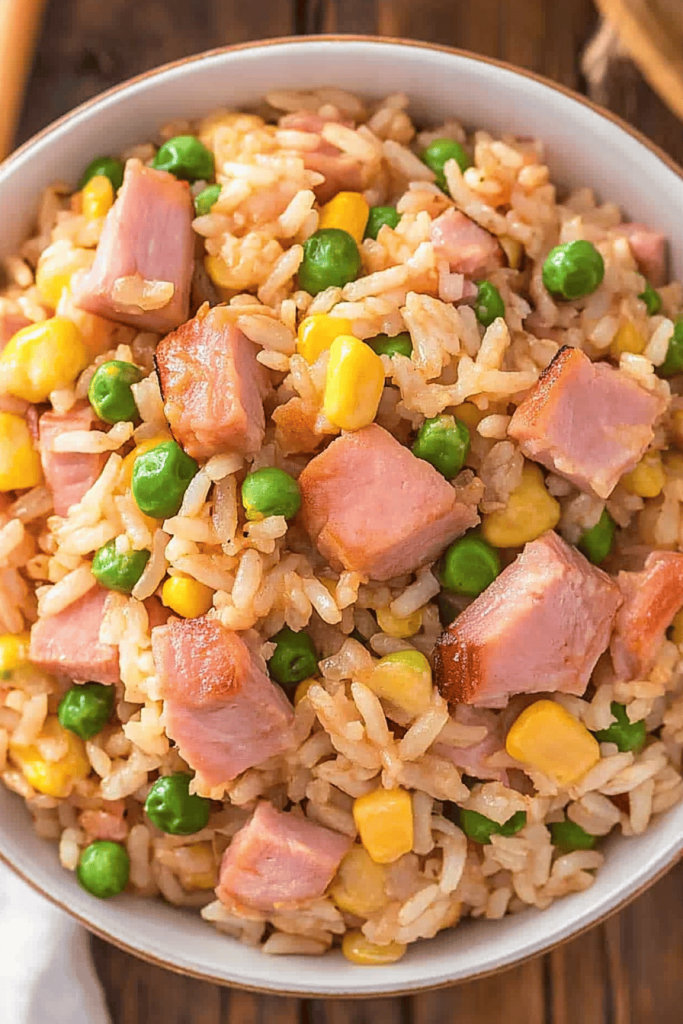
So, what exactly *is* Fried Rice, you ask? At its heart, it’s exactly what it sounds like: cooked rice that’s been stir-fried, usually with a medley of other ingredients like vegetables, eggs, and protein. Think of it as a blank canvas for whatever deliciousness you have on hand. The name itself is pretty straightforward, but the magic lies in the execution. It’s that glorious symphony of textures and flavors – the slightly chewy grains of rice, the crisp-tender veggies, the savory sauce – all coming together in a hot wok. It’s humble, it’s versatile, and it’s been a staple in kitchens around the world for centuries. It’s essentially the ultimate comfort food that’s also incredibly practical, proving that sometimes, the simplest things are the most delicious.
Why you’ll love this recipe?
There are so many reasons I’ve landed on this particular Fried Rice recipe as my absolute favorite, and I’m so excited to share them with you. Firstly, the FLAVOR is just out of this world. It’s that perfect balance of savory, a little sweet, and umami-rich that makes you close your eyes and savor every bite. It’s not greasy or bland like some versions can be; it has depth. Then there’s the SIMPLICITY. I genuinely believe anyone can make this. The steps are straightforward, and you don’t need any fancy equipment. It’s the kind of dish that makes you feel like a kitchen pro, even if you’re just starting out. And let’s talk COST-EFFICIENCY. This recipe is brilliant for using up leftovers and budget-friendly staples. Rice, a few veggies, maybe some chicken or tofu – it all adds up to a hearty meal without breaking the bank. Plus, it’s incredibly VERSATILE. Don’t have peas? Toss in some corn. Got leftover broccoli? Chop it up! This recipe is a fantastic jumping-off point for your own culinary creativity. What I love most about this is how it brings my family together. The smell alone fills the house, and everyone gravitates to the kitchen, peering over my shoulder, waiting for their plate. It’s more than just food; it’s a ritual we all enjoy.
How do I make fried rice?
Quick Overview
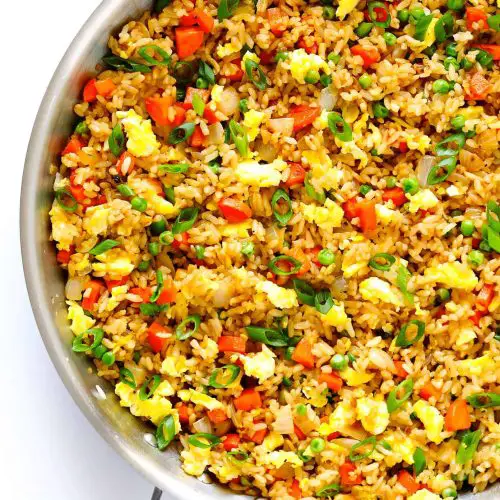
Here’s the gist of it: you’ll start by getting your pan screaming hot, then quickly stir-fry some aromatics, add your veggies and protein, toss in perfectly cooked day-old rice, and finish it all off with a savory sauce. The key to great Fried Rice is high heat and not overcrowding the pan. This method ensures those lovely crispy edges on the rice and perfectly cooked, vibrant vegetables. It sounds simple, and it truly is! Just follow along, and you’ll have a restaurant-worthy fried rice in no time.
Ingredients
For the Main Batter:
This isn’t really a “batter” in the traditional sense, but it’s the foundation of our rice. I always stress using cold, day-old rice for this. Freshly cooked rice is too moist and will clump up, leading to a mushy Fried Rice – and nobody wants that! If you don’t have leftover rice, cook some a day in advance and let it cool completely in the fridge. It makes a world of difference.
- 4 cups cooked and chilled day-old rice (Jasmine or Basmati work beautifully)
- 2 tablespoons neutral cooking oil (like vegetable, canola, or peanut oil)
For the Filling:
This is where you can really play! I usually stick to a classic mix, but feel free to get creative. Make sure all your veggies are prepped and ready to go before you start cooking, as everything moves pretty quickly. Having everything chopped into bite-sized pieces is key for even cooking.
- 1 tablespoon neutral cooking oil
- 2 cloves garlic, minced
- 1 teaspoon fresh ginger, grated or minced
- 1 cup mixed vegetables, such as peas, carrots (diced small), corn, and chopped broccoli florets
- 1/2 cup protein of choice, cooked and diced (e.g., chicken, shrimp, tofu, or scrambled eggs)
- 2 large eggs, lightly beaten (optional, for extra protein and texture)
For the Glaze:
This is the flavor powerhouse! It’s a simple mix that adds that irresistible savory and slightly sweet note. I find this balance is perfect, but you can always tweak it to your preference. It should be just thick enough to coat the rice without making it soupy.
- 2 tablespoons soy sauce or tamari (for gluten-free)
- 1 tablespoon oyster sauce (optional, for extra depth – omit for vegetarian/vegan)
- 1 teaspoon sesame oil
- 1/2 teaspoon sugar (or honey/maple syrup)
Step-by-Step Instructions
Step 1: Preheat & Prep Pan
Alright, first things first: get your pan nice and hot! I prefer to use a wok if I have one, but a large, heavy-bottomed skillet works just as well. Add the 2 tablespoons of neutral cooking oil to your wok or skillet over medium-high heat. Let it get shimmering hot. This initial heat is crucial for getting that slightly crisp texture on the rice. If your pan isn’t hot enough, the rice will just steam instead of fry, and that’s a sad outcome. Be patient here; it’s worth it!
Step 2: Mix Dry Ingredients
This step isn’t really about mixing dry ingredients together, but rather about having your *dry* ingredients ready. What I mean by this is making sure your day-old rice is broken up into individual grains. You can do this by gently running your fingers through it or using a fork to separate any clumps. This ensures every grain gets coated in that delicious sauce and fries evenly. Cold, dry rice is your best friend here.
Step 3: Mix Wet Ingredients
In a small bowl, whisk together the soy sauce (or tamari), oyster sauce (if using), sesame oil, and sugar. This is your flavor bomb! Make sure the sugar is dissolved. Give it a little taste; you can adjust the sweetness or saltiness to your liking. This sauce is going to coat everything and tie all the flavors together beautifully.
Step 4: Combine
Now, the cooking begins! Add the 1 tablespoon of neutral cooking oil to your hot wok or skillet. Add the minced garlic and ginger and stir-fry for about 30 seconds until fragrant. Don’t let them burn! If you’re adding scrambled eggs, push the aromatics to one side, pour in the beaten eggs, and scramble them quickly. Once cooked, break them up and mix them with the garlic and ginger.
Step 5: Prepare Filling
Add your mixed vegetables to the wok. Stir-fry for 2-3 minutes until they are crisp-tender. You want them cooked through but still with a slight bite. If you’re using pre-cooked protein (like diced chicken or shrimp), add it now and stir-fry for another minute just to heat through. If you opted out of the scrambled eggs earlier, this is when you’d add your cooked protein.
Step 6: Layer & Swirl
Push all the ingredients to one side of the wok or skillet. Add the cold, day-old rice to the empty side. Let it heat up for about a minute, then start breaking it up and gently stirring it around. Now, pour your prepared sauce mixture all over the rice and other ingredients. Stir everything together vigorously, ensuring the sauce coats every grain of rice and mixes well with the vegetables and protein. Keep stir-frying for about 3-5 minutes, until the rice is heated through and starting to get slightly toasted. This is where the magic happens, and you’ll start to smell that incredible aroma!
Step 7: Bake
Actually, we’re not baking this! We’re stir-frying. So, Step 7 is actually about continuing to stir-fry until everything is perfectly combined and heated through. You’ll know it’s ready when the rice grains are separate and lightly browned in places, and the vegetables are still vibrant. Taste and adjust seasoning if needed. If you want it a little saltier, add a splash more soy sauce; if it’s too salty, a tiny pinch more sugar can balance it out. The key is constant movement in the pan to prevent sticking and ensure even cooking.
Step 8: Cool & Glaze
This step isn’t applicable here as the glaze is added during the stir-frying process in Step 6. We’re stir-frying it all together!
Step 9: Slice & Serve
Once everything is beautifully combined and heated through, remove the wok from the heat. Give it a final stir. Serve immediately in bowls. Garnish with a sprinkle of chopped green onions or toasted sesame seeds if you like. The steam rising from the bowl, carrying that amazing aroma, is pure bliss. It’s best enjoyed piping hot!
What to Serve It With
This fried rice recipe is wonderfully adaptable, and that extends to how you serve it! For a simple, quick BREAKFAST, I love topping a bowl with a perfectly fried egg (runny yolk, please!) and a dash of sriracha. It’s a hearty way to start the day. For BRUNCH, especially when we have friends over, I’ll serve it alongside some steamed dumplings or spring rolls. It feels a bit more celebratory, and the presentation is elevated with a sprinkle of fresh cilantro. As a light DESSERT, believe it or not, a smaller portion of subtly sweetened fried rice can be surprisingly delightful, especially if you omit the savory sauces and add a touch of honey and perhaps some finely diced fruit like mango. My absolute favorite casual COZY SNACK pairing is with a simple cup of green tea or a cold beer. It’s the perfect late-night indulgence or a comforting bite on a rainy afternoon. My family also loves having this as a side dish to grilled teriyaki chicken or a light miso soup. It rounds out any meal beautifully!
Top Tips for Perfecting Your Fried Rice
Over the years, I’ve learned a few tricks that make this fried rice recipe truly shine, and I’m happy to pass them on. First, ZUCCHINI PREP is vital if you choose to add it. While not in this basic version, if you’re adding other veggies like zucchini, squeeze out as much moisture as possible after grating it. Excess water will steam the rice. Use a fine grater for a better texture. Regarding MIXING ADVICE, the biggest tip is to avoid over-stirring once the rice is in the pan. Gentle but consistent tossing is key. You want to heat the rice through and coat it, not break it down into mush. You’ll feel when the rice grains start to separate and get that slight sizzle – that’s your cue. SWIRL CUSTOMIZATION isn’t really a thing with this recipe as it’s more about evenly distributing the sauce. However, if you’re adding different colored vegetables, the goal is an even distribution so every bite is a delightful mix. For INGREDIENT SWAPS, if you don’t have soy sauce, tamari is an excellent gluten-free alternative. For vegetarian options, replace oyster sauce with a vegetarian mushroom stir-fry sauce or simply add a little more soy sauce and a pinch of MSG if you’re comfortable with it. Baking Tips aren’t applicable here, but for stir-frying, ensure your pan is hot and don’t overcrowd it. Cook in batches if necessary. For GLAZE VARIATIONS, a dash of fish sauce can add an extra layer of savory depth, or a little chili garlic sauce can provide a nice kick. Experiment and find what you love!
Storing and Reheating Tips
The best part about this fried rice is how well it keeps! For ROOM TEMPERATURE storage, it’s best to let it cool slightly and then cover it loosely. I wouldn’t leave it out for more than two hours to maintain freshness and safety. For REFRIGERATOR STORAGE, transfer the cooled fried rice to an airtight container. It will stay delicious for about 3-4 days. Honestly, though, it rarely lasts that long in my house! When it comes to FREEZER INSTRUCTIONS, this recipe freezes surprisingly well. Let it cool completely, then portion it into freezer-safe containers or bags. Remove as much air as possible to prevent freezer burn. It can last up to 2-3 months. To thaw, the best method is to transfer it to the refrigerator overnight. GLᴀᴢᴇ Tɪᴍɪɴɢ Aᴅᴠɪᴄᴇ is crucial: I always add the glaze during the stir-frying process. For leftovers, you can gently reheat it in a skillet with a tiny splash of water or broth, or even in the microwave, stirring halfway through. If it seems a bit dry after reheating, another tiny splash of soy sauce or a drizzle of sesame oil can revive it beautifully.
Frequently Asked Questions
Final Thoughts
I truly hope you’ll give this fried rice recipe a try. It’s one of those dishes that has become a staple in my kitchen because it’s reliable, incredibly satisfying, and always brings smiles to the table. The combination of simple ingredients, straightforward steps, and that unbeatable flavor makes it a winner for any night of the week. It’s the kind of recipe that proves you don’t need hours in the kitchen to create something truly delicious and comforting. If you enjoyed this recipe, you might also love my quick and easy stir-fried noodles or my flavorful chicken and broccoli stir-fry for more weeknight dinner inspiration. I can’t wait to hear what you think! Please leave a comment below to let me know how yours turned out, or share any fun variations you came up with. Happy cooking!
Easy Fried Rice Recipe
Ingredients
Main Ingredients
- 2 cups cooked rice preferably day-old
- 1 tablespoon vegetable oil
- 0.5 cup diced onion
- 2 eggs lightly beaten
- 1 cup frozen peas and carrots
- 0.5 cup cooked diced chicken or shrimp optional
- 2 tablespoons soy sauce
- 1 teaspoon sesame oil
Instructions
Preparation Steps
- Heat vegetable oil in a large skillet or wok over medium-high heat. Add diced onion and cook until softened, about 2-3 minutes.
- Push the onions to one side of the skillet and pour in the beaten eggs. Scramble the eggs until cooked, then break them into pieces.
- Add the cooked rice, frozen peas and carrots, and optional chicken or shrimp to the skillet. Stir-fry for 3-5 minutes, breaking up any clumps of rice.
- Pour in the soy sauce and sesame oil. Stir well to combine and coat the rice evenly. Cook for another 1-2 minutes until heated through.
- Serve hot and enjoy!


