


What is the best way to trick your husband into eating Brussels sprouts?What are some good brussel sprout chips? takes that whole saga to an entirely new level. Growing up, Brussels sprouts were always that boiled, slightly sulfurous side dish that my mom insisted we eat, usually met with groans and creative hiding tactics under Mashed Potatoes. Fast forward to adulthood, and my palate (thankfully!) evolved, but I still struggled to make them truly *exciting*. Then, one crisp autumn afternoon, experimenting in my kitchen, a revelation hit: what if I treated them like kale chips? And let me tell you, the result was nothing short of miraculous. These aren’t just good; they’re addictive. Seriously, think of them as the sophisticated, healthier cousin to your favorite potato chip, but with an earthy, savory depth that will have you reaching for handful after handful. My kids, who once looked at a Brussels sprout like it was the enemy, now beg for these crispy oven-baked brussel sprout chips. It’s a total game-changer, and I can’t wait for you to try them!
What is my Crispy Oven-Baked Brussel Sprout Chips with Zesty Garlic Aioli?
So, what exactly are these magical morsels I’m raving about? Well, my Crispy Oven-Baked Brussel Sprout Chips aren’t your average roasted veggie. Instead of keeping the sprouts whole, we meticulously peel off each individual leaf, creating tiny, wafer-thin pieces of brussel sprout goodness. These leaves are then lightly tossed in olive oil and a super simple, yet incredibly flavorful, seasoning blend before being baked at a high temperature until they transform into unbelievably crunchy, golden-brown chips. Think of it as nature’s crisp, a surprisingly light and airy snack that still packs a punch of savory goodness. The name might sound a little fancy, but the concept is beautifully simple: take a humble vegetable, unleash its hidden potential, and pair it with a bright, zesty garlic aioli that ties everything together perfectly. It’s essentially a guilt-free indulgence that’s perfect for just about any occasion, from a quick afternoon snack to an impressive side dish.
Why you’ll love this recipe?
Honestly, where do I even begin with why you’ll fall head over heels for these brussel sprout chips? It’s not just a recipe; it’s a revelation! What I love most about this particular rendition is how it manages to make a vegetable that many people historically shun, utterly irresistible. Here’s why this recipe stands out in my kitchen, and why I’m convinced it will in yours too:
- Flavor that Pops: These chips are a symphony of taste! You get that slightly earthy, nutty flavor of the Brussels sprout, beautifully caramelized and intensified by the roasting process. Then, there’s the savory blend of garlic and onion powder, often rounded out with a hint of smoky paprika that just makes your taste buds sing. Each bite offers a delightful crispiness, followed by a burst of savory goodness that’s genuinely satisfying. And when you dip it in that zesty garlic aioli? Oh, pure culinary bliss!
- Deceptively Simple: Don’t let the “chips” part intimidate you. This recipe is ridiculously easy to make. While peeling the leaves takes a few minutes, the rest is truly hands-off. It’s perfect for those busy weeknights when you want something homemade and delicious without a lot of fuss. I’ve made these countless times when I’m short on time, and they never fail to deliver.
- Budget-Friendly Goodness: Brussels sprouts are generally quite affordable, especially when they’re in season. You’re using basic pantry staples for the seasoning and a homemade aioli that costs pennies compared to store-bought dips. It’s a fantastic way to enjoy a gourmet-tasting snack or side without breaking the bank.
- Unbelievably Versatile: While I call them chips, their uses go far beyond just snacking. These are incredible as a healthy side dish to almost any main course – think grilled salmon, roasted chicken, or a hearty lentil stew. They also make an absolutely phenomenal topping for salads, adding a textural crunch that blows croutons out of the water. We even sometimes crumble them over scrambled eggs for an unexpected savory breakfast kick! They’re like the unsung hero of healthy, crispy foods, far surpassing even the best baked kale chips in my book.
This recipe truly changed how my family views Brussels Sprouts, transforming them from a “have-to-eat” to a “want-to-eat” vegetable. My kids actually ask for seconds, which, as any parent knows, is the highest compliment a vegetable can receive! Trust me on this one; you’ll be making these brussel sprout chips again and again.
How to Make My Crispy Oven-Baked Brussel Sprout Chips with Zesty Garlic Aioli
Quick Overview
Making these crispy brussel sprout chips is genuinely one of the easiest and most rewarding kitchen adventures you can embark on. The process is straightforward: you’ll prep your sprouts by peeling them into individual leaves, give them a good dry (this is CRUCIAL!), toss them with a flavorful blend of olive oil and spices, then bake them until they’re perfectly golden and crisp. While they’re doing their magic in the oven, you’ll whip up a quick, tangy garlic aioli that just elevates everything to gourmet status. It’s really just three simple steps – prep, season, bake – but the magic that happens in your oven is truly spectacular. I always do this when I need a quick, impressive snack that tastes like it took ages but was actually super simple!
Ingredients
Here’s what you’ll need to make these addictively delicious brussel sprout chips. Don’t skimp on quality, especially for the sprouts!
For the Crispy Brussel Sprout Chips:
- 1 pound fresh Brussels sprouts: Look for firm, bright green sprouts. Fresher sprouts mean easier peeling and better flavor!
- 2 tablespoons olive oil: A good quality extra virgin olive oil works wonders here for flavor and crispiness.
- 1/2 teaspoon flaky sea salt: My personal preference! It adheres beautifully and gives a lovely crunch. Regular fine sea salt works too, about 1/4 teaspoon.
- 1/4 teaspoon freshly ground Black Pepper: Adds a nice aromatic kick.
- 1/2 teaspoon garlic powder: Essential for that savory, irresistible flavor.
- 1/4 teaspoon onion powder: Complements the garlic perfectly.
- 1/4 teaspoon smoked paprika (optional, but highly recommended!): This is my secret weapon for an extra layer of savory depth and a beautiful golden color.
For the Zesty Garlic Aioli (My Go-To Dip!):
- 1/2 cup good quality mayonnaise: Use your favorite brand. I often opt for avocado oil mayo for a richer taste.
- 1-2 cloves fresh garlic, minced: Adjust to your garlic preference! Fresh is key here for that zesty punch.
- 1 tablespoon fresh lemon juice: Don’t use bottled! Freshly squeezed brightens everything up.
- Pinch of cayenne pepper (optional): For a very subtle kick, if you like a little heat.
- Salt and freshly ground Black Pepper to taste: Start with a small pinch and adjust as needed.
Step-by-Step Instructions
Step 1: Preheat & Prep Pan
Alright, let’s get this party started! First things first, go ahead and preheat your oven to a nice hot 400°F (200°C). While that’s warming up, line two large baking sheets with parchment paper. Trust me, parchment paper is your best friend here; it prevents sticking and makes cleanup a breeze. Plus, it helps those delicate brussel sprout chips get super crispy without welding themselves to the pan. Don’t skimp on the space, you’ll see why in a bit!
Step 2: Prep the Sprouts
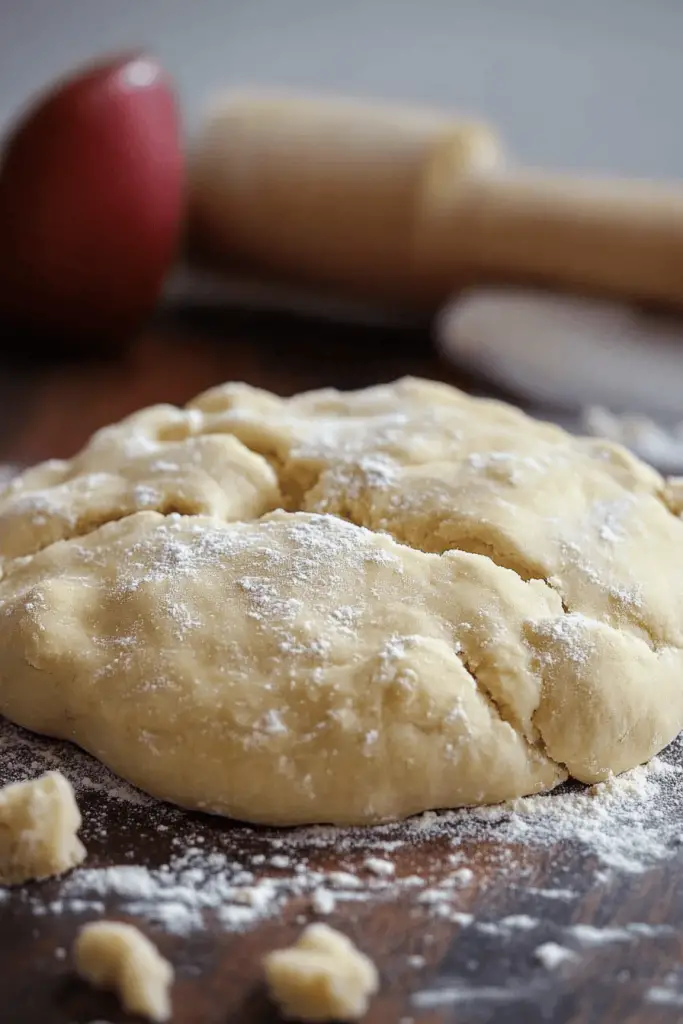
Now for the fun part – prepping our star ingredient! Start by thoroughly washing your Brussels sprouts under cold water. The next step is the most crucial for truly crispy brussel sprout chips: DRY THEM! I mean, really, really dry them. Excess moisture is the enemy of crispiness. Use a salad spinner if you have one, then spread them out on clean kitchen towels and pat them dry. Once dry, trim off the very bottom of each sprout’s stem. Then, carefully begin peeling off the individual leaves. The outer leaves will come off easily. As you get closer to the core, you might need to make a small cut to loosen the leaves. Don’t worry if some leaves are smaller or tear a little; they’ll still crisp up beautifully. Just discard the very dense inner core once you can’t peel any more viable leaves.
Step 3: Season the Leaves
Transfer all your beautiful, dry brussel sprout leaves to a large mixing bowl. Drizzle them with the olive oil. Now, using your clean hands, gently toss the leaves until they’re all lightly coated. You don’t want them drenched, just glistening. Next, sprinkle in your salt, black pepper, garlic powder, onion powder, and if you’re using it, the smoked paprika. Toss again, ensuring every single leaf gets a good, even coating of those delicious spices. This step is where all that amazing flavor really starts to build!
Step 4: Arrange on Baking Sheets
This is arguably the most important step for achieving perfectly crispy brussel sprout chips, so listen up! Arrange your seasoned brussel sprout leaves in a single layer on your prepared baking sheets. And here’s the kicker: make sure they have plenty of space between them. If you overcrowd the pan, the sprouts will steam instead of roast, and you’ll end up with soggy, sad leaves instead of glorious chips. If you have too many leaves for two sheets, use a third, or roast in batches. It’s worth the extra effort for that unparalleled crispiness, trust me!
Step 5: Bake
Slide your baking sheets into your preheated 400°F (200°C) oven. Now, baking time can vary a bit depending on your oven and the thickness of your leaves, but generally, they’ll need about 10-15 minutes. Around the 7-8 minute mark, I like to gently flip the leaves with a spatula to ensure even browning and crisping on both sides. Keep a close eye on them, especially towards the end, as they can go from perfectly golden to burnt quite quickly. You’re looking for a deep golden brown color and a lovely crisp texture. They’ll shrink a bit, and those edges will get beautifully browned and delicate. I usually rotate the pans halfway through, too, if my oven has hot spots.
Step 6: Make the Zesty Aioli
While your brussel sprout chips are doing their thing in the oven, let’s whip up that incredible zesty garlic aioli! In a small bowl, combine the mayonnaise, minced fresh garlic, and fresh lemon juice. Stir everything together until it’s smooth and well combined. Add a tiny pinch of cayenne pepper now if you like a little heat. Taste it and adjust the seasoning – add more salt, pepper, or lemon juice until it’s just perfect for your palate. This aioli is truly the perfect tangy counterpoint to the savory chips, and it’s always a lifesaver on busy nights when I want something quick and flavorful to dip into!
Step 7: Cool Slightly & Serve
Once your brussel sprout chips are gloriously golden brown and crispy, carefully remove them from the oven. Let them cool on the baking sheets for just 2-3 minutes. This slight cooling period helps them crisp up even further. Then, transfer them to a serving bowl or platter. Serve them immediately while they’re still warm and wonderfully crisp, alongside your zesty garlic aioli. The crunch and flavor are at their peak right out of the oven! My kids usually gather around the moment the smell hits the kitchen, so I rarely get a chance to even properly plate them!
What to Serve It With
These crispy brussel sprout chips are so versatile, they fit into almost any meal or snacking scenario you can imagine! While they’re phenomenal simply eaten straight off the tray with a dab of that zesty garlic aioli (my absolute favorite way!), here are some other ideas to get your culinary creativity flowing:
For a Quick Snack:
Honestly, this is their natural habitat. Hot out of the oven, with a generous dollop of that tangy garlic aioli, they disappear in minutes at my house. They’re perfect for that 3 PM slump when you’re craving something savory and crunchy, but want to keep it on the healthier side. My kids ask for these all the time after school!
As a Side Dish:
These brussel sprout chips make an incredible, elevated side dish. They pair beautifully with a simple roasted chicken, grilled fish (especially salmon!), or a perfectly cooked steak. They add a lovely textural contrast and a burst of savory flavor that complements almost any protein. They’re also a fantastic accompaniment to vegetarian mains like a hearty lentil loaf or a wild rice pilaf.
For Salad Topping:
Forget soggy croutons! Crumble these crispy brussel sprout chips over your favorite salad – think a vibrant kale salad, a classic Caesar, or even a simple mixed green salad. They add an amazing crunch and an unexpected depth of flavor that will totally transform your greens. It’s such a delicious way to sneak in extra veggies!
For Cozy Snacks/Appetizers:
Having friends over for game night? Need a healthier option for a party platter? These brussel sprout chips are always a hit. Arrange them artfully around a bowl of the aioli (or even a couple of different dips!) and watch them vanish. They’re lighter than traditional fried apps but just as satisfying. I’ve served these at countless gatherings, and people are always surprised by how much they love them, even the sprout skeptics!
The beauty of these chips is how they adapt. They truly are a testament to how incredible simple, well-prepared vegetables can be. You won’t believe how often you’ll find yourself craving them!
Top Tips for Perfecting Your My Crispy Oven-Baked Brussel Sprout Chips with Zesty Garlic Aioli
I’ve made these brussel sprout chips countless times, and I’ve learned a few tricks along the way to ensure they turn out perfectly crispy and flavorful every single time. Consider these my personal “lessons learned” for getting the absolute best results:
Sprout Prep is CRUCIAL:
- Dry, Dry, DRY! I cannot emphasize this enough. Moisture is the arch-nemesis of crispiness. After washing your sprouts, use a salad spinner to get rid of most of the water, then spread them out on clean kitchen towels and gently pat them until they are completely dry. Any lingering water will steam the leaves instead of crisping them.
- Peel, Don’t Chop: The magic of these chips comes from using individual leaves. Trimming the stem slightly can help loosen the outer leaves, making them easier to peel. Don’t worry about perfection; smaller, torn leaves still crisp up beautifully, sometimes even better than the larger ones.
Mixing Advice:
- Lightly Coat, Don’t Drench: You want just enough olive oil to lightly coat each leaf and help the seasonings stick, but not so much that they become greasy. Too much oil can make them heavy and prevent true crispiness.
- Season Generously and Evenly: Don’t be shy with the seasonings! Toss them really well to make sure every single brussel sprout chip gets its share of flavor. I sometimes use my hands for this to ensure an even distribution.
Arrangement for Maximum Crisp:
- Give Them Space: This is probably the second most important tip after drying. Overcrowding your baking sheets is a recipe for steamed, soggy sprouts. Use two large baking sheets, or even three if needed, to ensure the leaves are in a single layer with plenty of space around each one. Air circulation is key for that perfect crunch.
- Parchment Paper is a Must: It prevents sticking and helps with even cooking, making cleanup effortless.
Baking Tips:
- Hot Oven is Key: A 400°F (200°C) oven is my sweet spot. It’s hot enough to crisp them quickly without burning them too fast. Lower temperatures can lead to steaming.
- Keep an Eye On Them: Brussel sprout chips can go from perfectly golden to burnt in a flash! Start checking them around the 8-minute mark. Rotate the pans and gently flip the leaves halfway through baking for even browning.
Ingredient Swaps & Variations:
- Spice it Up: Feel free to experiment with your seasoning blend! A pinch of chili powder, a dash of cumin, or even some nutritional yeast for a cheesy flavor are all delicious additions.
- Citrus Zest: Sometimes, I’ll add a little orange or lime zest to the aioli for an extra layer of brightness.
- Balsamic Glaze: If you want a sweet and tangy finish, drizzle a little balsamic glaze over the chips *after* they come out of the oven. It’s divine!
Following these tips will ensure your brussel sprout chips are always the star of the show. I’ve learned these tricks after years of making these, and they truly make all the difference!
Storing and Reheating Tips
Okay, let’s be real for a moment: these brussel sprout chips are so incredibly delicious right out of the oven that they rarely last long enough to even think about storing! My family devours them almost immediately. However, on those rare occasions when you might have a few leftovers, here’s how to handle them to preserve as much of that glorious crispiness as possible.
Room Temperature:
I don’t really recommend storing these at room temperature for very long. They start to lose their crispness almost immediately as they cool, and within a couple of hours, they’ll be pretty soft. Honestly, these brussel sprout chips are so good, they rarely last beyond the serving bowl!
Refrigerator Storage:
If you do happen to have some leftovers, store them in an airtight container in the refrigerator for up to 1-2 days. Be aware that they will soften considerably and lose their initial crunch. It’s just the nature of delicate roasted leaves. They won’t be quite the same as fresh, but they’ll still be flavorful, perhaps a bit chewier.
Freezer Instructions:
I honestly wouldn’t recommend freezing these. The texture would be completely compromised upon thawing, resulting in very soggy and unappealing brussel sprout chips. This recipe is definitely best enjoyed fresh from the oven!
Reheating Tips:
If you want to bring some life back to your refrigerated brussel sprout chips, an oven or an air fryer is your best bet. A microwave is a definite no-go, as it will just make them sad and rubbery.
- Oven: Spread the softened chips in a single layer on a baking sheet. Pop them into a preheated oven at 350-375°F (175-190°C) for about 5-7 minutes, or until they’ve re-crisped to your liking. Keep a close eye on them, as they can burn quickly.
- Air Fryer: This is my preferred method for reheating small batches! Place the chips in a single layer in your air fryer basket. Air fry at 350°F (175°C) for 3-5 minutes, shaking the basket once or twice, until they’re crispy again.
Aioli Storage:
The zesty garlic aioli, on the other hand, stores beautifully! Keep it in an airtight container in the refrigerator for up to 3-4 days. It’s actually quite nice to have on hand for other sandwiches or as a dip for raw veggies. So, while the chips themselves are a “eat them now!” kind of deal, the aioli is a planner’s dream!
Frequently Asked Questions
Final Thoughts
Well, there you have it, my friends! My ultimate recipe for Crispy Oven-Baked Brussel Sprout Chips with Zesty Garlic Aioli. This isn’t just a recipe; it’s a testament to how incredible vegetables can be when given a little love and the right treatment. It took Brussels sprouts from being the dreaded dinner guest to the absolute life of the party in my kitchen. The satisfying crunch, the savory depth, and that bright, tangy aioli all come together in a way that truly delights the senses. If you’ve ever been on the fence about Brussels sprouts, or even if you’re a seasoned fan, I genuinely encourage you to give these brussel sprout chips a try. You might just find your new favorite snack, side dish, or salad topper! I can’t wait to hear how yours turn out – please share your photos and tell me about your favorite variations in the comments below. Happy cooking, and get ready to fall in love!

brussel sprout chips
Ingredients
Main Ingredients
- 1.5 lbs brussels sprouts (stemmed + halved)
- 7 oz shredded parmesan cheese
- 1 tbs olive oil
- garlic powder (to taste)
- salt (to taste)
- pepper (to taste)
Instructions
Preparation Steps
- Preheat your oven to 400℉. Line a 12x17 inch metal sheet pan with parchment paper. Sprinkle the parmesan cheese on the pan to form an even layer, covering the bottom of the pan. Place the brussels sprouts cut side down, close to each other but not touching. Lightly brush each one with olive oil and sprinkle a little salt, pepper and onion powder on them. Bake for 15-18 minutes or until the cheese turns golden brown in the middle. Allow to cool for a few minutes and then tear/break apart with your hands. Enjoy!


