


Oh, you guys. I am SO excited to share this apple bread recipe with you today. It’s one of those recipes that just feels like a warm hug, you know? I remember my mom making something similar when I was a kid, and the smell would just waft through the house, making everyone gather in the kitchen. This isn’t just any apple bread, though. This is the one I’ve tinkered with over the years, the one that’s become my absolute go-to when I need a little something sweet but don’t have hours to spend baking. It’s incredibly moist, perfectly spiced, and that hint of streusel on top? Pure magic. If you love a good quick bread, especially one loaded with fruit like my popular banana bread recipe, you are going to fall head over heels for this apple bread. It’s that perfect balance of comforting and a little bit fancy, and believe me, it disappears fast!
What is Apple Bread?
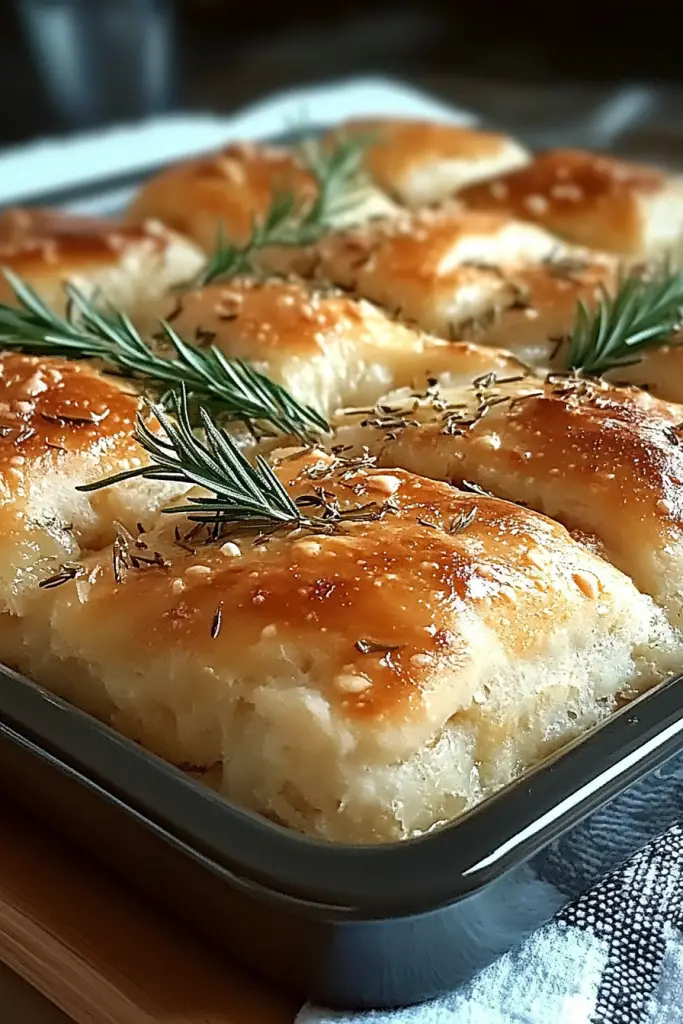
So, what exactly is this glorious creation we call apple bread? Think of it as a wonderfully moist, cake-like loaf packed with tender chunks of apple, warm spices, and often a delightful streusel topping or a sweet glaze. It’s not quite a cake, and it’s definitely not a dense, heavy bread. It’s its own delightful thing! The name itself is pretty straightforward – it’s bread that’s bursting with apples. My version, though, has a few little secrets that make it extra special. It’s essentially a forgiving, one-bowl (mostly!) wonder that delivers incredible flavor without fuss. It’s the kind of baked good that makes your kitchen smell like autumn, even in the middle of summer, and it’s perfect for a quick breakfast treat, a satisfying snack, or even a simple dessert.
Why you’ll love this recipe?
Honestly, where do I even begin? There are so many reasons why this apple bread recipe has earned a permanent spot in my recipe binder. First off, the flavor is just *unreal*. We’re talking tender, sweet apples mingled with cozy cinnamon and nutmeg. It’s not overwhelmingly sweet, which I really appreciate, letting the natural goodness of the apples and the warm spices shine through. Then there’s the texture – it’s incredibly moist and tender, thanks to a few smart ingredient choices and techniques I’ll share with you. And speaking of techniques, the simplicity is a huge win. You can literally whip this up in about 15-20 minutes of active time, which is a lifesaver on busy weeknights or weekend mornings when you want something homemade but don’t have a ton of time. It’s also surprisingly budget-friendly. Apples are usually quite affordable, and the rest of the ingredients are pantry staples for most home bakers. And the versatility! This apple bread is fantastic on its own, but it’s also amazing with a dollop of Cream Cheese, a smear of butter, or a drizzle of caramel sauce. It’s the kind of recipe that makes you feel like a baking rockstar with minimal effort. What I love most about this is that it’s foolproof. Even if you’re new to baking, you can follow these steps and end up with a stunning loaf that tastes like it came from a fancy bakery.
How do I make apple bread?
Quick Overview
This apple Bread Recipe is designed for ease and maximum flavor. You’ll start by prepping your apples, then quickly mix up a simple batter. The apples are folded in, and then it’s just a matter of baking until golden and fragrant. The whole process is remarkably straightforward, emphasizing simple techniques to create a moist, flavorful loaf. It’s designed so you don’t need any fancy equipment, just basic mixing bowls and a loaf pan. This method ensures you get that perfect balance of tender apple chunks throughout the cakey bread.
Ingredients
For the Main Batter:
Let’s talk ingredients! For the batter, you’ll need:
- 2 cups all-purpose flour: I always use unbleached all-purpose flour for the best texture.
- 1 teaspoon baking soda: This is crucial for getting a good rise and that tender crumb.
- 1/2 teaspoon salt: Just a little bit to balance the sweetness and enhance all the other flavors.
- 1 teaspoon ground cinnamon: Freshly ground is best if you have it! It makes a difference.
- 1/4 teaspoon ground nutmeg: A little whisper of nutmeg goes a long way.
- 1/2 cup unsalted butter, softened: Make sure it’s truly softened, not melted! This makes creaming it much easier and creates a better texture. If you forget, you can cut it into small cubes and let it sit for about 10-15 minutes.
- 3/4 cup granulated sugar: This gives it a lovely sweetness.
- 2 large eggs: At room temperature is ideal for better emulsification.
- 1 teaspoon vanilla extract: Pure vanilla extract, please! It’s worth the splurge.
- 1/2 cup unsweetened applesauce: This is my secret weapon for extra moisture! It adds flavor and keeps the bread tender without making it greasy.
- 1/4 cup milk: Whole milk is great, but I’ve tested this with almond milk and it actually made it even creamier! So use what you have.
For the Filling:
This is where the star of the show comes in!
- 2 cups peeled and diced apples (about 2 medium apples): I love using a mix of sweet and tart apples, like Honeycrisp, Gala, or Granny Smith. Dice them into about 1/2-inch pieces.
- 1 tablespoon granulated sugar: Just a little to toss with the apples.
- 1 teaspoon ground cinnamon: To amp up that apple-cinnamon goodness.
For the Simple Glaze (Optional, but highly recommended!):
This is super easy and adds a lovely finish.
- 1 cup powdered sugar: Sifted, if you want it extra smooth.
- 2-3 tablespoons milk or apple juice: Start with 2 and add more until you reach your desired drizzling consistency. Apple juice adds another layer of apple flavor!
Step-by-Step Instructions
Step 1: Preheat & Prep Pan
First things first, let’s get the oven preheated to 350°F (175°C). Then, grease and flour a standard 9×5 inch loaf pan. I like to use butter for greasing and then a light dusting of flour, tapping out any excess. If you’re feeling fancy or just want extra insurance against sticking, you can also line the pan with parchment paper, leaving some overhang on the sides to help lift the bread out later.
Step 2: Mix Dry Ingredients
In a medium bowl, whisk together the 2 cups of all-purpose flour, 1 teaspoon baking soda, 1/2 teaspoon salt, 1 teaspoon cinnamon, and 1/4 teaspoon nutmeg. Give it a good whisk to make sure everything is evenly distributed. This ensures your leavening agents and spices are spread throughout the batter, preventing any pockets of salt or baking soda. You want a lovely, uniform mix.
Step 3: Mix Wet Ingredients
In a large bowl, cream together the 1/2 cup of softened unsalted butter and 3/4 cup granulated sugar until light and fluffy. This usually takes a couple of minutes with an electric mixer, or a bit longer by hand. Beat in the 2 large eggs, one at a time, mixing well after each addition. Stir in the 1 teaspoon of vanilla extract and the 1/2 cup of unsweetened applesauce until well combined. It might look a little lumpy at this stage, and that’s totally fine.
Step 4: Combine
Now, it’s time to bring the wet and dry ingredients together. Gradually add the dry ingredients to the wet ingredients, alternating with the 1/4 cup of milk. Begin and end with the dry ingredients. Mix on low speed or stir by hand until just combined. Be careful not to overmix here! Overmixing develops the gluten in the flour, which can lead to a tough, dense loaf. We’re aiming for a thick batter, and a few small lumps are perfectly okay. Just mix until you don’t see any streaks of dry flour.
Step 5: Prepare Filling
While the batter is resting slightly, quickly toss your 2 cups of diced, peeled apples with 1 tablespoon of sugar and 1 teaspoon of cinnamon in a small bowl. This helps to coat the apples and bring out their natural sweetness and flavor, plus it gives them a little head start on becoming tender during baking.
Step 6: Layer & Swirl
Gently fold about two-thirds of the prepared apples into the batter. Now, pour about half of the batter into your prepared loaf pan. Sprinkle the remaining diced apples over the top. Then, carefully spoon the rest of the batter over the apples, spreading it to cover them as much as possible. If you want a really nice swirl effect, you can gently run a knife or skewer through the batter a few times, but don’t overdo it. The goal is to distribute the apples and create visual interest, not to thoroughly mix them in.
Step 7: Bake
Place the loaf pan in your preheated oven and bake for 50-65 minutes. The exact time will depend on your oven. You’ll know it’s done when a wooden skewer or toothpick inserted into the center comes out clean, or with just a few moist crumbs attached (no wet batter!). The top should be golden brown and the edges should be pulling away slightly from the sides of the pan.
Step 8: Cool & Glaze
Once baked, remove the loaf from the oven and let it cool in the pan for about 10-15 minutes. This allows it to set up properly. Then, carefully invert the loaf onto a wire rack to cool completely. If you’re adding the glaze, whisk together 1 cup of powdered sugar with 2-3 tablespoons of milk or apple juice in a small bowl until smooth and drizzle-able. Once the bread is completely cool, drizzle the glaze over the top. If you try to glaze it while it’s warm, the glaze will just melt off!
Step 9: Slice & Serve
Once the glaze has set slightly, slice your beautiful apple bread with a serrated knife. It’s delicious served at room temperature, but I’m also a big fan of warming up a slice slightly and serving it with a pat of butter. Enjoy!
What to Serve It With
This apple bread is so wonderfully versatile, it can truly fit into any meal or occasion. It’s not just for dessert! Here are some of my favorite ways to serve it:
For Breakfast: This is my absolute favorite way to start the day on a weekend. A thick slice of warm apple bread is perfect with a steaming mug of coffee or a glass of fresh orange juice. I sometimes toast it lightly and add a thin smear of Cream Cheese for a little tang. It feels indulgent but it’s so easy!
For Brunch: Elevate your brunch spread by including this apple bread. Serve it on a pretty platter with other brunch favorites like scrambled eggs, bacon, and fresh fruit salad. It adds a lovely sweet and spiced element that balances out the savory dishes. A nice cup of tea or a mimosa would pair beautifully.
As Dessert: For a lighter dessert option, a slice of this apple bread is divine. I love serving it slightly warmed with a scoop of vanilla bean ice cream or a dollop of freshly whipped cream. A drizzle of caramel sauce takes it over the top and makes it feel extra special.
For Cozy Snacks: This is perfect when you’re craving something sweet at 3 pm but don’t want to bake a whole cake. It’s wonderful with a glass of cold milk, or just on its own when you need a little pick-me-up. It’s the kind of snack that satisfies without being too heavy. My kids ask for this all the time when they get home from school!
Top Tips for Perfecting Your Apple Bread
I’ve made this apple bread more times than I can count, and over the years, I’ve picked up a few tricks that I think make all the difference. These are the things I always do when I’m making it to ensure it turns out perfectly every single time.
Zucchini Prep: Okay, wait, I meant *Apple* Prep! My apologies, sometimes my brain is still in zucchini bread mode! For the apples, make sure they are peeled and diced into roughly uniform, 1/2-inch pieces. This ensures they cook evenly throughout the bread. If you chop them too small, they can become mushy; too large, and they might not cook through. Also, tossing them with the sugar and cinnamon right before adding them to the batter helps to keep them from sinking to the bottom and gives them a nice flavor boost.
Mixing Advice: The absolute biggest tip I can give you for any quick bread is to NOT overmix the batter once you add the flour. Mix only until the ingredients are just combined and you don’t see any dry streaks of flour. A few small lumps are fine; in fact, they’re preferable to a tough loaf. Overmixing develops gluten, which is what makes bread chewy, and we’re going for tender and cakey here.
Swirl Customization: While this recipe doesn’t technically have a separate swirl layer, if you want to get fancy, you can reserve about 1/4 of the batter, mix it with an extra teaspoon of cinnamon and a tablespoon of brown sugar, and then layer that in. Or, as mentioned, gently swirl the apples into the batter in the pan with a skewer. It’s mostly for visual appeal and doesn’t drastically change the flavor, but it looks pretty!
Ingredient Swaps: I’ve experimented with a few things! If you don’t have unsweetened applesauce, you can substitute an equal amount of plain, unsweetened yogurt or sour cream for added moisture. For the milk, any plant-based milk will work, or even buttermilk if you have it on hand. For a more complex flavor, try swapping out half the granulated sugar for brown sugar. And for the spices, feel free to add a pinch of ground cloves or allspice if you love a deeper, warmer spice profile.
Baking Tips: Ovens can be wildly different! If you find your bread is browning too quickly on top before the center is cooked, tent the loaf loosely with aluminum foil for the last 15-20 minutes of baking. I always use the toothpick test, but I also like to gently press the top of the loaf. If it springs back, it’s a good sign it’s done. If you’re not sure, err on the side of slightly underbaked rather than overbaked for maximum moistness. Just let it cool completely!
Glaze Variations: The glaze is simple, but you can play with it! If you prefer a more robust flavor, use apple cider instead of milk for a more intense apple note. For a lemon-twist, add a teaspoon of lemon zest to the glaze. If you’re not a fan of powdered sugar, a simple dusting of powdered sugar once cooled is lovely, or even a drizzle of melted caramel. Just make sure the bread is completely cool before adding any toppings!
Storing and Reheating Tips
This apple bread is best when it’s fresh, but it keeps really well, which is another reason I love it. Here’s how I store it to keep it delicious for days:
Room Temperature: Once the bread is completely cool (and this is important – warm bread will steam and get soggy!), I wrap it tightly in plastic wrap or place it in an airtight container. It will stay fresh and moist on the counter for about 2-3 days. This is perfect for when you know you’ll be enjoying slices throughout the first couple of days.
Refrigerator Storage: If you live in a warmer climate or know you won’t get through it in 2-3 days, the refrigerator is your best bet. Wrap it tightly in plastic wrap, then in aluminum foil, or place it in a good quality airtight container. It will keep well in the fridge for up to a week. The texture might firm up slightly, but it’s easily remedied with a quick reheat.
Freezer Instructions: This apple bread freezes beautifully! Once completely cooled and sliced, you can wrap individual slices or the whole loaf tightly in plastic wrap, then in a layer of aluminum foil, and finally place them in a freezer-safe bag or container. It will last in the freezer for up to 3 months. Thaw overnight in the refrigerator or at room temperature, or you can reheat directly from frozen (see below).
Glaze Timing Advice: If you plan to store the bread for more than a day, I often recommend leaving off the glaze until you’re ready to serve. If you do glaze it and plan to refrigerate or freeze, the glaze might become a bit sticky or slightly less vibrant. However, it still tastes delicious! For freezing, it’s often best to glaze after thawing.
Reheating: To revive a slice from the fridge or freezer, the microwave is the quickest way – just 15-30 seconds is usually enough to warm it through and soften it. For a slightly crispier edge, pop a slice in a toaster oven or a regular oven at around 300°F (150°C) for about 5-10 minutes.
Frequently Asked Questions
Final Thoughts
There you have it, my friends! My absolute favorite apple bread recipe. It’s the kind of bake that brings people together, fills your home with incredible aroma, and most importantly, tastes utterly delicious. It’s a recipe that feels like it came from generations of love and careful tweaking, and I’m so thrilled to share it with you all. Whether you’re looking for a comforting breakfast treat, a delightful snack, or a simple dessert, this apple bread delivers every single time. It’s proof that you don’t need complicated steps or fancy ingredients to create something truly special. If you love this, you might also enjoy my spiced pear cake or my blueberry crumble muffin recipes for more fruity baked goodness! I can’t wait to hear how yours turns out! If you give this apple bread recipe a try, please leave a comment below and let me know what you think, or share your own tips and variations. Happy baking!
Apple Bread Recipe
Ingredients
Apple Bread Dough
- 4 cups all-purpose flour
- 1 teaspoon kosher salt
- 0.5 teaspoon instant yeast
- 1.75 cups cool water
Apple Filling
- 2.5 cups chopped Granny Smith apples peeled, cored, and chopped
- 2 tablespoons granulated sugar
- 1 teaspoon ground cinnamon
Maple Butter
- 1 cup unsalted butter 2 sticks
- 0.25 cup brown sugar
- 0.25 cup pure maple syrup
- 1 teaspoon ground cinnamon
Instructions
Apple Bread Dough
- In a large bowl that is not metal, mix the flour, salt, yeast, and water. Stir, and then use your hands or a dough whisk to mix and form a sticky dough. (You will want to work the dough just enough to incorporate all the flour.)
- Cover the bowl with plastic wrap, and let it rest at room temperature for 8 hours, up to overnight. It will become bubbly and rise quite a bit.
After Dough Has Proofed
- Prepare your apples. Peel and dice 2-3 apples so that you have 2.5 cups of apple pieces. Place pieces in a medium bowl and add the granulated sugar and cinnamon. Stir and make sure each piece is coated.
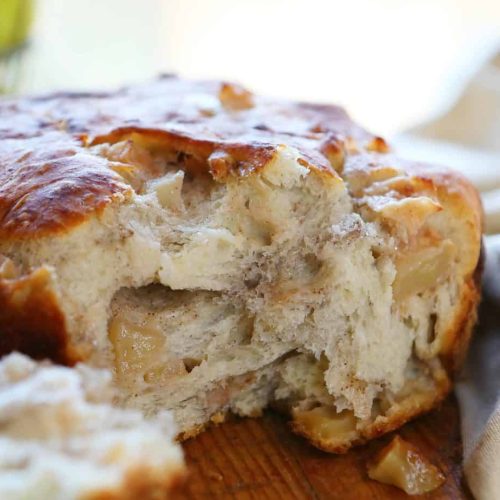
- Pour the apple pieces into the bowl with the bread dough and use your hands to knead the apple pieces into the dough. Some pieces will not incorporate and that's okay.
- Pour the apple dough into a lightly greased 5-quart Dutch oven or French oven.
- Place the lid on the Dutch oven and let the dough rise at room temperature for about 2 hours, or until it's puffy. It should rise noticeably, but not as much as the first rise.
When You Are Ready to Bake
- With the lid on the Dutch oven, place the bread in a COLD oven. Now set the oven temperature to 425°F.
- Bake the bread for 40 to 45 minutes. Then remove the lid and continue to bake for another 10 to 15 minutes, or until the top is deeper brown in color.
- Carefully remove the bread from the oven. Turn it out onto a rack to cool.
Maple Butter
- In the bowl of a stand mixer, mix together the butter, brown sugar, maple syrup, and cinnamon until well blended, about 5 minutes on medium-high speed.
- Remove from mixer bowl and drop onto a clean piece of plastic wrap. Wrap the butter tight and chill in the refrigerator for at least 30 minutes.
- Spread the chilled butter on a piece of bread. Enjoy!


