


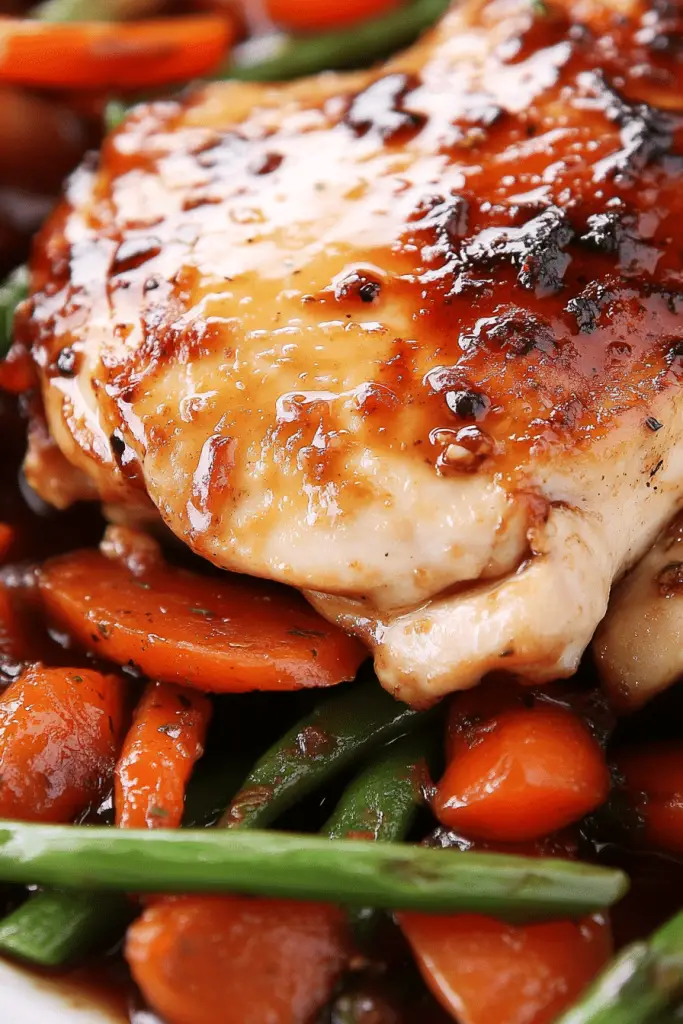
There’s something incredibly comforting about Baked Chicken that fills my kitchen with that warm, homey aroma the minute it goes into the oven. I can’t tell you how many times this recipe has saved dinner for me—whether it was a hurried weeknight or a lazy Sunday when I just wanted something effortless but totally satisfying. My kids literally ask for this baked chicken all the time, and it’s funny because it’s not flashy, just pure good flavor with juicy tenderness that somehow hits all the right notes. It reminds me a bit of my mom’s roast chicken but way easier and quicker to put together, which is why I always keep the essential ingredients stocked. Plus, there’s no dousing in sauces or frying, so it cooks up clean but incredibly flavorful. This baked chicken is a total crowd-pleaser and one of those go-to dishes I’ve made so many times, it feels like second nature now.
What is baked chicken?
Alright, let’s talk about Baked Chicken in plain terms. Think of it as chicken cooked gently and evenly in the oven—no frying, no heavy sauces, just simple seasoning and a good bake that locks in all that juicy goodness. The “baked” part just means it spends time in the oven, often seasoned with herbs and spices, sometimes with a little oil or butter to keep things moist and golden. It can be a whole bird, bone-in pieces, or boneless cuts—whatever you have on hand. It’s essentially one of the most straightforward ways to get a delicious, crowd-friendly meal on the table without sweating over complicated steps or fancy ingredients. And honestly, that’s one thing I love about it: it’s approachable for home cooks at all levels and easy enough to tweak for whatever mood you’re in.
Why you’ll love this recipe?
Let me tell you why this Baked Chicken recipe has earned a permanent spot in my rotation. First off, the flavor. It hits that perfect balance between savory and aromatic with just a hint of herbs that make it feel special without being over the top. Whenever I bake it, my kitchen fills with this wonderful smell that makes everyone gather around, sniffing the air as if dinner is already served. What I love most about this is how incredibly simple it is to make. You don’t need any fancy kitchen gadgets or hours of prep—just a handful of staple spices and chicken pieces, and you’re good to go.
It’s also super budget-friendly. Chicken thighs and drumsticks are usually pretty affordable, and that’s what I often use. Plus, there’s minimal waste; you can bake skin-on for that extra crispy finish or skinless if you want to keep it lighter. Another thing that makes this recipe a lifesaver is how versatile it is. I’ll jazz it up with different herbs, a squeeze of lemon, or a dusting of smoked paprika depending on what I’m craving or what I have in the pantry. It pairs brilliantly with almost anything, from simple roasted veggies to a fresh salad or even some buttery mashed potatoes. If you’ve ever tried something like baked salmon or roasted pork, this kind of Baked Chicken fits right into that easy, sheet-pan-style dinner vibe—but with flavors that feel like home.
How do I make Baked Chicken?
Quick Overview
Here’s the scoop—this Baked Chicken recipe is all about seasoning, gentle oven heat, and patience. You start by prepping your chicken pieces with a blend of spices that you love, then roast them on a baking sheet or dish until the skin is golden and the meat juicy. What’s lovely about this method is that you don’t have to fiddle constantly with the stove; you prep, pop it in the oven, and let it work its magic while you get dinner sides ready or just steal a few minutes for yourself. I always tell my friends, this method is foolproof once you get your oven temp and timing down.
Ingredients
For the Baked Chicken:
- 4-6 bone-in, skin-on chicken thighs or drumsticks (I prefer thighs for juiciness)
- 2 tablespoons olive oil or melted butter (for browning and moisture)
- 1 teaspoon kosher salt (or to taste)
- 1/2 teaspoon freshly ground black pepper
- 1 teaspoon garlic powder
- 1 teaspoon smoked paprika (adds a beautiful subtle smokiness)
- 1 teaspoon dried thyme or rosemary (fresh if you can get it!)
- Optional: a squeeze of fresh lemon juice for brightness
For the Accompaniment (Optional but Highly Recommended):
- 2 cups of your favorite veggies (I usually go with baby potatoes, carrots, and green beans)
- 1 tablespoon olive oil
- Salt and pepper to taste
Step-by-Step Instructions
Step 1: Preheat & Prep Pan
First things first, preheat your oven to 425°F (220°C). This higher heat is my secret weapon for getting beautifully crispy, golden skin without drying out the chicken. Meanwhile, line a baking sheet with foil or parchment to save on cleanup, or just use a cast-iron skillet if you have one. I usually make sure there’s enough space so the chicken pieces don’t sit too close and steam instead of crisp up.
Step 2: Mix Dry Ingredients
In a small bowl, whisk together salt, pepper, garlic powder, smoked paprika, and thyme. This mix is simple but packs a punch. The smoked paprika really gives it a warm, hearty flavor that feels cozy in the best way. If you’re using fresh herbs, chop them finely and add them right before rubbing the chicken.
Step 3: Mix Wet Ingredients
Next, pour your olive oil or melted butter into a large bowl. This is your moisture jacket for the chicken. The fat not only helps transmit flavor but also encourages that gorgeous caramelization on the skin. If you like a little citrus zing, this is when I add a squeeze of lemon juice—it brightens everything up, trust me.
Step 4: Combine
Now, add your chicken pieces to the bowl with the oil (and lemon if you used it) and toss until each piece is coated nicely. Then sprinkle your dry spice mix over the chicken and toss again, making sure every nook and cranny gets covered in that delicious, savory goodness. Be gentle but thorough—this step sets the tone for flavor so don’t rush it!
Step 5: Prepare Filling
If you’re going for the veggie accompaniment, toss your veggies in olive oil, salt, and pepper in a separate bowl while the chicken’s marinating with spices. I love baby potatoes tossed with rosemary and a pinch of garlic powder here too. Simple is best. Sometimes I add them around the chicken pieces on the same pan to roast all together—it’s a one-pan dream come true.
Step 6: Layer & Swirl
Arrange the chicken pieces skin-side up on your prepared pan, spacing them out evenly. Nestle your veggies around them if you’re doing one-pan roasting. You want everything to roast evenly without overcrowding, so they crisp instead of steam. No swirling needed here, just a neat layout for maximum browning.
Step 7: Bake
Pop it in the center rack of your preheated oven and bake for about 35-45 minutes, depending on your chicken size and oven quirks. Use a meat thermometer if you have one (165°F internal temp is your friend). Halfway through, I like to check on my veggies and stir them around for even roasting. The skin should be golden and crisp; if it’s not quite there, a quick broil for 2-3 minutes will do the trick—just watch it closely!
Step 8: Cool & Glaze
Once baked, let the chicken rest for about 5-10 minutes off the heat. This helps the juices redistribute, making every bite juicy and tender. I don’t usually glaze chicken, but sometimes I drizzle a little warm honey or a squeeze of lemon right before serving for that extra touch of brightness or sweetness. It’s little finishes like this that make the whole thing sing.
Step 9: Slice & Serve
Serve your baked chicken whole or slice it up for plates alongside your roasted veggies. I love to garnish with a little fresh parsley or thyme for a pop of color. It’s best enjoyed warm, straight from the oven, but honestly, leftovers heated up the next day are just as good—sometimes even better for sandwiches or salads.
What to Serve It With
For Breakfast: If you’ve got leftover baked chicken, pop it alongside scrambled eggs and toasted sourdough. A cup of freshly brewed coffee with a dash of cream makes the perfect morning pairing, and that crispy chicken skin? Total game changer to wake you up.
For Brunch: An elegant platter with slices of baked chicken, a light arugula salad drizzled with lemon vinaigrette, and crusty bread plus a glass of chilled white wine or sparkling water with mint makes brunch feel special without the fuss.
As Dessert: Okay, baked chicken and dessert don’t usually go hand in hand, but if you want to lead into a sweet finish smoothly, keep your chicken simple and mild, paired with a delicate fruit compote or a light sorbet to refresh the palate.
For Cozy Snacks: This chicken works beautifully shredded on top of warm nachos or tossed into quesadillas with melted cheese for a lazy afternoon bite. My kids love this “snack hack” after school—super easy and delicious.
My family traditions often revolve around easy meals like this—something we can all gather around without stress. I never get tired of those crispy edges paired with tender meat that’s just bursting with flavor. There’s magic in simplicity, honestly.
Top Tips for Perfecting Your Baked Chicken
Chicken Prep: Pat your chicken dry before seasoning; this little step makes a huge difference in getting that crispy skin you dream of. Too much moisture and you’ll end up with soggy skin instead of that golden crunch. Also, room temperature chicken bakes more evenly, so I usually take mine out of the fridge 20 minutes before cooking.
Mixing Advice: When tossing your chicken with the oil and spices, use your hands for the best coverage. Brushes are fine, but fingers get into every crevice. Just be sure to clean up right after!
Roasting Technique: Give your chicken space on the pan—crowding causes the chicken to steam instead of roast, and that’s a texture killer. If you don’t have space, bake in batches instead of squeezing everything in.
Flavor Variations: I’ve swapped thyme with tarragon or oregano depending on the season; each herb adds a unique personality. Smoked paprika can be swapped for chili powder if you want a hint of heat. Play around! Adding a splash of white wine or chicken broth to the pan before baking adds wonderful moisture and aroma.
Oven Know-How: Every oven is a bit different—some run hot, some cool. I learned this the hard way by drying out chicken multiple times! Invest in a good meat thermometer and start checking your chicken a little early to avoid surprise overcooking.
Glaze and Finishing Touches: While optional, a honey-lemon glaze brushed on right after baking feels like a luxury. If you want something savory instead, a dash of soy sauce or a sprinkle of Parmesan right out of the oven is incredible too. I’ve also drizzled balsamic reduction for a tangy twist—yum!
Storing and Reheating Tips
Room Temperature: If you’re serving right away but want to rest the chicken, cover loosely with foil for up to 30 minutes to keep it warm without steaming the skin.
Refrigerator Storage: Store leftover baked chicken in an airtight container for up to 3-4 days. To preserve moisture, I like to drizzle a tiny bit of olive oil on reheating to avoid drying out. Enjoy cold on salads or reheated gently.
Freezer Instructions: You can freeze baked chicken, but make sure it’s completely cooled first. Wrap individual pieces tightly in plastic wrap then place in a freezer bag for up to 3 months. Thaw overnight in the fridge and reheat in the oven at 350°F to restore crispiness.
Glaze Timing Advice: If you plan to glaze with something like honey or lemon, wait until right before serving if storing leftovers. Applying glaze prior to freezing can change texture and flavor balance. Trust me, it’s better fresh!
Frequently Asked Questions
Final Thoughts
If you’re looking for a baked chicken recipe that feels like comfort food but doesn’t weigh you down with endless steps, welcome to your new favorite. I’ve lost count of how many times this dish has filled my kitchen with its warmth and pulled my family to the table. It’s reliable, simple, and incredibly tasty—those golden, crispy skin bits paired with juicy meat really do the trick every time. If you enjoy this recipe, I’d encourage you to explore other easy oven-baked meals like sheet-pan roasted salmon or herb-crusted pork tenderloin—they’re just as fuss-free and heartwarming. So, grab your chicken, dust on those spices, and let your oven do the magic. Can’t wait to hear how yours turns out—drop your stories or your own twist in the comments below, and don’t forget to share with a friend who needs an easy, delicious dinner idea. Happy baking!

Baked Salsa Chicken
Ingredients
Main Ingredients
- 1 pound boneless skinless chicken breasts
- 1 large egg beaten
- 1 cup dried breadcrumbs
- 1 tablespoon taco seasoning
- 0.75 cup salsa thicker salsa preferred
- 1 cup shredded Monterey Jack or Cheddar cheese
Instructions
Preparation Steps
- Preheat oven to 450°F. Spray a baking dish with nonstick cooking spray.
- If chicken breasts are not even thickness, pound them to an even thickness.
- Place beaten egg in a shallow dish.
- In another shallow dish, combine dried breadcrumbs and taco seasoning.
- Dip each chicken breast in the beaten egg, then coat both sides with the breadcrumb mixture. Place the chicken in an even layer in the baking dish.
- Bake chicken for 15-20 minutes until golden and crisp. Do not turn.
- Pour salsa evenly over the chicken and sprinkle with shredded cheese. Continue baking for 5-10 minutes until sauce is bubbly and chicken is cooked through.


