


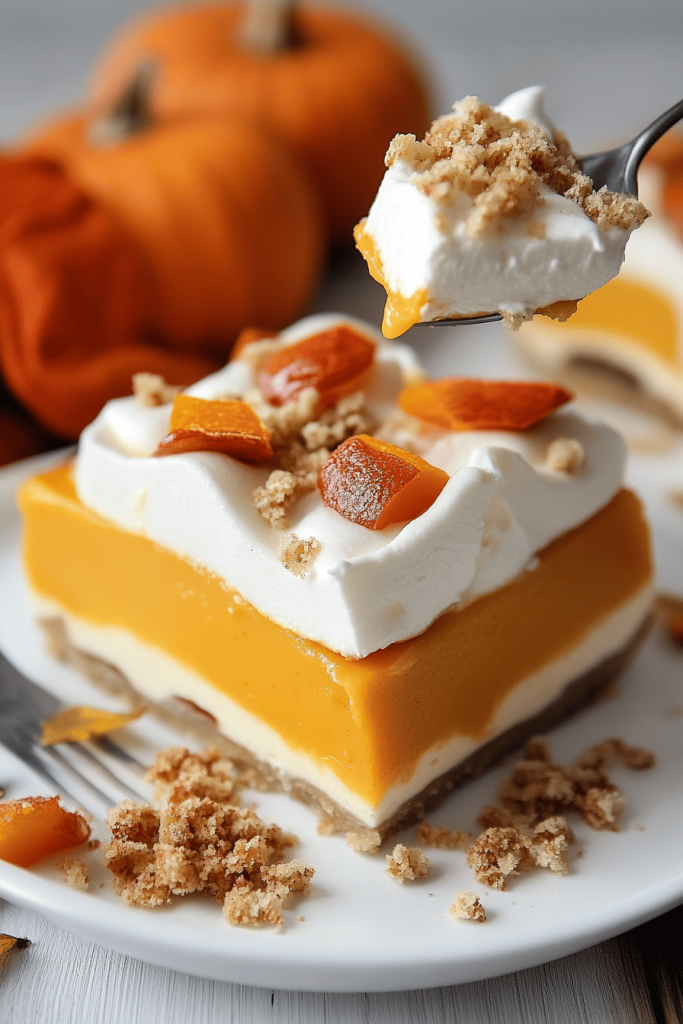
You know, there are some recipes that just feel like a warm hug in food form. This one, for my pumpkin doughnut holes, is definitely one of them. It’s that time of year again – the air gets crisp, the leaves start to turn those glorious shades of red and gold, and suddenly, all I can think about is anything pumpkin-flavored. I’ve always been a sucker for anything pumpkin, ever since I was a kid. My grandma used to make the most amazing pumpkin pie, and the smell of cinnamon, nutmeg, and baked pumpkin would fill our whole house. These pumpkin doughnut holes? They bring back all those cozy feelings, but with a fun, bite-sized twist! They’re so incredibly moist and tender, with just the right amount of Pumpkin Spice. Honestly, if you’re looking for a treat that’s a little bit special but surprisingly easy to whip up, these are it. They’re like a less fussy, more fun version of a classic doughnut, and they disappear faster than you can say “trick or treat!”
What Are Pumpkin Doughnut Holes?
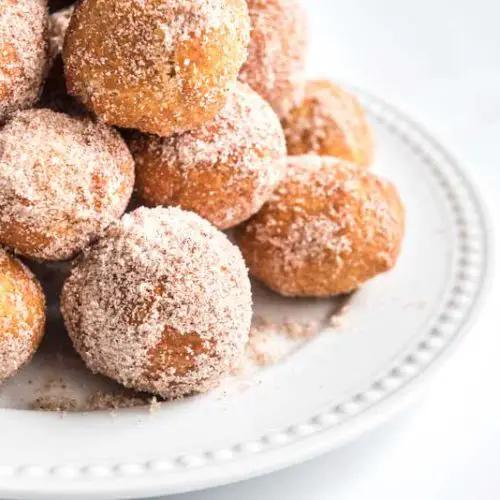
So, what exactly are these little gems? Think of them as mini, cake-like doughnuts, infused with that unmistakable warm, comforting flavor of pumpkin. They’re not fried, which makes them so much easier and less messy to make at home, especially for a quick weekend bake or even a weeknight treat. We bake them in a mini muffin tin (or a doughnut hole pan if you have one, but a muffin tin works like a charm!) until they’re perfectly golden brown and wonderfully tender. The magic really happens with the spices – that perfect blend of cinnamon, nutmeg, ginger, and cloves that just screams autumn. They’re essentially a delightful little cake bite that happens to taste like your favorite fall flavors, all in one perfect, portable package. It’s the sort of thing you can pop in your mouth without a plate, making them perfect for busy mornings or when you just need a little sweet pick-me-up.
Why you’
Oh, where do I even begin with why you’ll adore these pumpkin doughnut holes? First off, the flavor is just *divine*. They have that rich, moist crumb you expect from a good cake, but with the warm, aromatic hug of pumpkin and spices that’s pure autumnal bliss. It’s not overly sweet, which I really appreciate, allowing the natural flavors of the pumpkin and the spice blend to really shine through. And the texture? Absolutely perfect. They’re soft, tender, and have this delightful slight chewiness that is just so satisfying. Plus, they are unbelievably simple to make. Seriously, I can whip up a batch on a Saturday morning while the kids are still half-asleep and have them ready to enjoy with our coffee. No complicated steps, no fussy techniques, just mix and bake. It’s a lifesaver when you want something homemade and delicious without spending hours in the kitchen. And let’s talk about cost-effectiveness! Most of the ingredients are pantry staples, and a can of pumpkin puree is so affordable. You get so many little treats from one batch, making them incredibly budget-friendly. They’re also surprisingly versatile. You can serve them plain, roll them in cinnamon sugar, or drizzle them with a simple glaze. They’re fantastic for breakfast, a mid-afternoon snack, or even as a little dessert after dinner. My family devours them no matter what, and I love that they’re a crowd-pleaser that feels a little bit fancy but is so down-to-earth.
How do I
Quick Overview
This recipe is all about effortless autumn deliciousness. We’ll combine our wet and dry ingredients to create a wonderfully moist batter, then spoon it into a prepared pan. A quick bake later, and you’ll have tender, Spiced Pumpkin bites ready for a dusting or glaze. It’s really that simple, making it perfect for any level of baker looking for a taste of fall.
Ingredients
For the Main Batter:
2 cups all-purpose flour (I always start with unbleached for a better texture)
1.5 teaspoons baking soda (this is key for that lovely rise!)
1 teaspoon ground cinnamon
0.5 teaspoon ground nutmeg
0.5 teaspoon ground ginger
0.25 teaspoon ground cloves (just a pinch to round out the spice)
0.5 teaspoon salt
1 cup granulated sugar (you can reduce slightly if you prefer less sweetness)
2 large eggs (at room temperature, it really helps with incorporation)
1 cup pumpkin puree (make sure it’s pure pumpkin, not pie filling!)
0.5 cup vegetable oil (or any neutral-flavored oil)
0.25 cup buttermilk (if you don’t have buttermilk, a tablespoon of lemon juice or vinegar in regular milk for 5 minutes works like a charm!)
For the Cinnamon Sugar Coating (Optional, but highly recommended!):
0.5 cup granulated sugar
1 tablespoon ground cinnamon
For the Simple Glaze (Optional):
1 cup powdered sugar
2-3 tablespoons milk (or even a little bit of the pumpkin puree for extra flavor)
0.5 teaspoon vanilla extract
Step-by-Step Instructions
Step 1: Preheat & Prep Pan
First things first, preheat your oven to 350°F (175°C). This is super important for even baking. Grab a mini muffin tin (or a doughnut hole pan) and generously grease it. I like to use a baking spray with flour in it, or a good old-fashioned butter and flour combo. Make sure you get into all the nooks and crannies so those precious doughnut holes don’t stick. You want them to pop out beautifully!
Step 2: Mix Dry Ingredients
In a large bowl, whisk together the all-purpose flour, baking soda, cinnamon, nutmeg, ginger, cloves, and salt. Give it a good whisking to make sure all the spices are evenly distributed and there are no clumps of baking soda. This step ensures every single bite gets that perfect spice balance and lift.
Step 3: Mix Wet Ingredients
In a separate medium bowl, whisk together the granulated sugar and eggs until well combined and slightly lighter in color. Then, stir in the pumpkin puree, vegetable oil, and buttermilk. Mix until everything is smooth and beautifully combined. The mixture will be a gorgeous autumnal orange!
Step 4: Combine
Now, pour the wet ingredients into the bowl with the dry ingredients. Gently fold them together with a spatula until *just* combined. It’s really important not to overmix here! A few streaks of flour are okay; they’ll disappear as you bake. Overmixing can make your doughnut holes tough, and we want them to be super tender and delicate.
Step 5: Prepare Filling
This step is for the optional cinnamon sugar coating or glaze. If you’re doing cinnamon sugar, simply whisk together the 0.5 cup sugar and 1 tablespoon cinnamon in a shallow bowl. For the glaze, whisk together the powdered sugar, 2 tablespoons of milk (you can add more if needed for thinner consistency), and vanilla extract in a small bowl until smooth. You can always add a tiny bit of pumpkin puree to the glaze for an extra flavor boost!
Step 6: Layer & Swirl
Carefully spoon the batter into the prepared mini muffin cups, filling each about two-thirds full. You can use a cookie scoop for this – it makes it so much easier and more consistent! Don’t overfill, as they will puff up a bit as they bake.
Step 7: Bake
Bake for 15-18 minutes, or until a wooden skewer or toothpick inserted into the center of a doughnut hole comes out clean. Keep an eye on them, as mini muffins can bake quickly. You don’t want them to get too dark; a lovely golden brown is perfect.
Step 8: Cool & Glaze
Let the doughnut holes cool in the pan for about 5-10 minutes. This helps them firm up a bit before you try to remove them. Then, carefully transfer them to a wire rack to cool completely. If you’re using the cinnamon sugar coating, wait until they’re still slightly warm (but not hot!) and gently roll them in the cinnamon sugar mixture. If you’re glazing, make sure they’ve cooled almost completely before drizzling or dipping them.
Step 9: Slice & Serve
Once cooled and coated (or glazed!), these little pumpkin doughnut holes are ready to be enjoyed! They’re perfect served warm or at room temperature. I love arranging them on a cute platter – they look so festive!
What to Serve It With
These pumpkin doughnut holes are so versatile, they fit right in at almost any occasion! For a lovely breakfast, they are simply divine alongside a steaming mug of coffee or a spiced chai latte. The warmth of the coffee perfectly complements the pumpkin spice. For a more elaborate brunch spread, I love to serve them alongside some fresh fruit salad and maybe some crispy bacon or a savory quiche. They add that sweet, festive touch without being too heavy. As a dessert, they’re a fantastic lighter option. I’ll sometimes serve them with a dollop of whipped cream or a small scoop of vanilla bean Ice Cream. They’re also just wonderful for cozy snacks! My kids always grab a couple (or three!) after school with a glass of cold milk. A personal family tradition we have is to have them on a crisp autumn evening while watching a family movie, all snuggled up on the couch. It just feels like the ultimate cozy indulgence. They pair beautifully with any warm beverage, really – hot chocolate, mulled cider, you name it!
Top Tips for Perfecting Your Pumpkin Doughnut Holes
I’ve made this recipe more times than I can count, and over the years, I’ve picked up a few tricks that really make a difference. First, about the pumpkin puree: make sure you’re using *pure* pumpkin puree and not Pumpkin Pie filling. Pie filling has added sugar and spices, which will throw off the flavor balance. Also, and this is a big one, make sure your pumpkin puree isn’t too watery. If it seems a little thin, you can actually spoon it into a fine-mesh sieve lined with cheesecloth and let some of the excess moisture drain off for about 30 minutes. This helps ensure a really tender crumb. When you’re mixing the wet and dry ingredients, listen to your gut (and your spatula!). You really want to stop mixing as soon as you don’t see big streaks of flour. A few small ones are fine; they’ll bake out. Overmixing is the enemy of tender baked goods, and we want these to be melt-in-your-mouth delicious. For the cinnamon sugar coating, it’s best to do it when the doughnut holes are still slightly warm. They’ll hold onto the coating better, and the warmth will melt the sugar just a touch, creating this wonderful slightly crunchy, slightly gooey exterior. If you’re using the glaze, definitely make sure they are almost completely cool before dipping or drizzling. If they’re too warm, the glaze will just melt off. For ingredient swaps, I’ve experimented a bit! If you’re out of buttermilk, as I mentioned, regular milk with a splash of lemon juice or vinegar is a fantastic substitute and works just as well to give you that tender texture. I’ve also tried using a mix of whole wheat and all-purpose flour, but you might need to add a touch more liquid, and the texture will be a bit denser, which isn’t quite what we’re going for here. For baking, ovens can be so different! My oven runs a little hot, so I sometimes shave a minute or two off the baking time. Always do the toothpick test to be sure. If your doughnut holes are browning too quickly on top before the inside is cooked, you can loosely tent them with foil for the last few minutes of baking. And for the glaze consistency, remember you can always add more powdered sugar for a thicker glaze or more liquid (milk or even a little bit of orange juice for a twist!) for a thinner one. It’s all about finding what you love!
Storing and Reheating Tips
Storing these little delights is pretty straightforward, but a few things can help keep them tasting their best. If you’ve made them and they’re not glazed (just cinnamon-sugared or plain), they’ll keep nicely at room temperature in an airtight container for about 2-3 days. Just make sure they’ve cooled completely before you seal them up, otherwise, you’ll end up with condensation and a soggy bottom – nobody wants that! If you’ve glazed them, it’s often best to store them in the refrigerator. The glaze can get a little sticky at room temperature, and refrigeration helps it set up nicely. They’ll stay good in the fridge for about 4-5 days. For longer storage, you can absolutely freeze these pumpkin doughnut holes. They freeze beautifully! Once they’re completely cooled, you can freeze them plain or cinnamon-sugared. I like to place them in a single layer on a baking sheet and freeze them until firm, then transfer them to a freezer-safe bag or container. They’ll last for up to 2-3 months in the freezer. To thaw, just let them sit at room temperature for about 30 minutes. If you want to reheat them a bit, you can pop them in a warm oven (around 300°F or 150°C) for a few minutes until they’re slightly warmed through. For glazed ones, it’s best to reheat them uncovered to prevent the glaze from getting too melty. Honestly, though, they’re so good at room temperature, I rarely bother reheating them!
Frequently Asked Questions
Final Thoughts
There you have it – my beloved recipe for pumpkin doughnut holes! I truly hope you give these a try. They’re more than just a treat; they’re a little slice of autumn comfort that’s so easy to bring into your own kitchen. The way they smell while baking is enough to make anyone feel warm and happy, and the taste… well, the taste is pure bliss. They’re perfect for those cozy weekends, a fun baking project with the kids, or just when you need a little something sweet to brighten your day. If you love this recipe, you might also enjoy my Spiced Apple Crumble Bars or my Easy Pumpkin Bread – they have that same cozy fall vibe! I can’t wait to hear what you think. Please, if you make them, let me know in the comments how yours turned out! I love seeing your creations and hearing your own personal twists. Happy baking, and enjoy every single bite!
pumpkin doughnut holes
Ingredients
Main Ingredients
- 2.25 cups flour
- 3 tablespoons sugar
- 4 teaspoons baking powder
- 1 teaspoon pumpkin pie spice
- 0.5 teaspoon salt
- 4 tablespoons butter, melted
- 1 large egg
- 0.5 cup pumpkin puree
- 0.5 cup milk
For Frying
- oil for frying
For Coating
- 1 cup sugar
- 4 teaspoons pumpkin pie spice
Instructions
Preparation Steps
- In a small saucepan, heat oil 1-2 inches deep over medium high heat until 375 degrees.
- Line a large plate with paper towels and set aside.
- Mix 1 cup of sugar and 4 teaspoons of pumpkin pie spice for coating in a small bowl and set aside.
- Meanwhile mix flour, sugar, baking powder, pumpkin pie spice and salt in a large mixing bowl.
- Add egg, butter, pumpkin and milk and stir until combined.
- Roll dough into 1 inch balls. (If batter is too sticky add a tablespoon of flour at a time until you can roll it-up to 1/4 cup.)
- Fry doughnut holes 5-6 at a time until golden brown on each side.
- Remove doughnut holes from oil with a spider strainer or slotted spoon and place immediately in sugar mixture to coat.
- Remove to paper towel lined plate.


