


Nothing beats the smell of toasted hazelnuts roasting gently on the stove, that warm, nutty aroma curling through the kitchen and tempting everyone within sniffing distance. It instantly takes me back to my childhood mornings, when my mom would quietly whip up a batch of hazelnut spread to slather on fresh toast—it felt like a little ritual, a cozy start to a busy day. If you’re like me and have always loved those creamy chocolate-hazelnut spreads but wished for something less processed and more personal, this recipe is for you. It’s got that luscious, velvety texture, a balance of sweet and toasty, with none of the artificial stuff. Plus, I swear it beats store-bought jars any day. Whether you’re sneaking it on pancakes, swirling it into oatmeal, or just grabbing a spoonful when nobody’s looking, this homemade hazelnut spread will quickly become your secret weapon in the kitchen.
What is hazelnut spread?
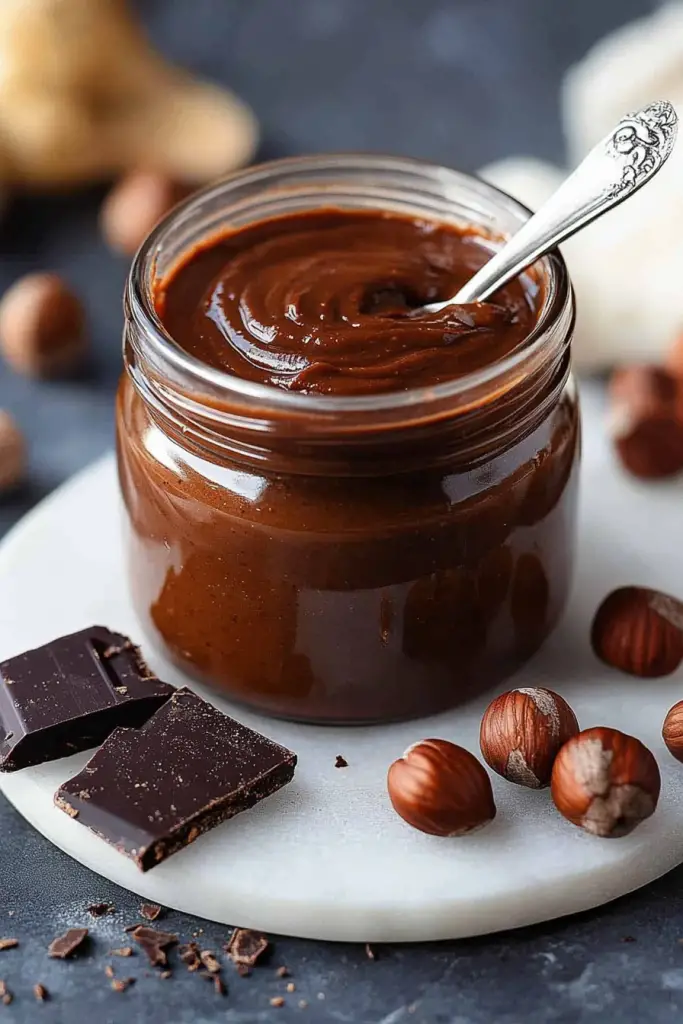
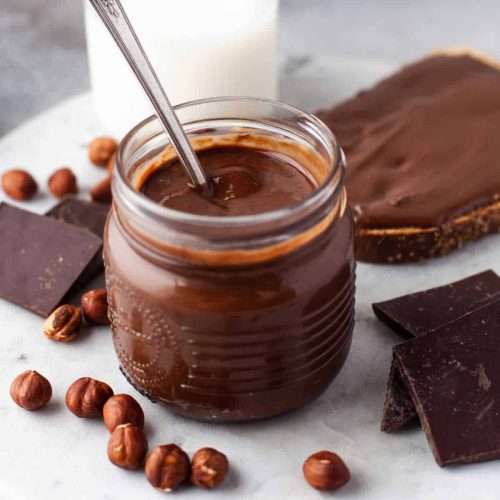
Think of hazelnut spread as a gloriously creamy mixture made from toasted hazelnuts blended into a silky paste, often combined with cocoa and a touch of sweetness. It’s essentially a flavored nut butter, but with a chocolatey kick that feels indulgent yet familiar. The origin story is pretty fun—European families have cherished this combo for decades, especially in Italy with that iconic duo of hazelnuts and chocolate. It’s like peanut butter’s elegant cousin, fancy yet accessible, perfect for all kinds of snacks and treats. You don’t need to be a pro baker or have loads of fancy equipment, either. It’s just good nuts, a pinch of sweetness, and a little patience making magic right in your blender or food processor. If you adore spreads that add layers of flavor to your breakfasts or snacks, this one’s bound to make regular appearances in your kitchen.
Why you’ll love this recipe?
I have to admit, what I love most about this homemade hazelnut spread is how it completely transforms everyday moments. You’re not just spreading a generic sweetness on your bread—you’re adding a burst of rich, toasty flavor that feels crafted with love. The balance here is everything: not too sweet, just enough silky chocolate, and that irresistible crunch-turned-smooth from the hazelnuts. And don’t let the idea of “making your own spread” scare you—this recipe is surprisingly forgiving and straightforward. It doesn’t require fancy gadgets, just a sturdy food processor and some good ingredients.
Let’s be real, store-bought spreads are okay, but they often come loaded with palm oil and a ton of sugar. This homemade version lets you skip all that—and you can tweak it however you like. Want it thicker? Add more nuts. Prefer it sweeter? Add a bit more maple syrup. Need it vegan? Swap the milk powder for coconut milk powder or skip it altogether. Another thing I adore? It’s cost-effective. When you buy great hazelnuts in bulk, this little batch costs less than a single gourmet jar and makes way more—your future self will thank you.
Also, versatility is the name of the game here. We use this stuff in so many ways: drizzled over pancakes, dolloped into smoothie bowls, melted into homemade hot chocolate, or heck, straight off the spoon late at night. It’s like a little jar of happy that makes even the busiest mornings feel special.
How do you make hazelnut spread?
Quick Overview
Making this hazelnut spread is all about simple steps with a bit of love and patience. First, you toast the hazelnuts until they’re golden and fragrant—that’s where half the magic happens! Then blitz them in your food processor until they turn buttery smooth, adding the cocoa powder and sweetener slowly to get that perfect balance. A touch of vanilla adds warmth, and a pinch of salt brings everything together beautifully. From start to finish, it takes just about 20 minutes, and you don’t have to be a kitchen superstar to nail it.
Ingredients
For the main spread: For the main spread: For the main spread: For the main spread: For the main spread: For the main spread: For
- 1 ½ cups raw hazelnuts (I like to buy them shelled, organic if you can!)
- 2 tablespoons unsweetened cocoa powder (Dutch processed gives a richer flavor)
- ¼ cup powdered sugar or maple syrup (depending on how natural or sweet you want it)
- 2 tablespoons neutral oil (like hazelnut oil, grapeseed, or light olive oil for creaminess)
- 1 teaspoon pure vanilla extract (trust me, it makes a difference!)
- ½ teaspoon fine sea salt
Optional Add-Ins:
- 1 tablespoon cocoa nibs for texture
- 1 tablespoon hazelnut milk powder for extra nutty creaminess
- A pinch of cinnamon or espresso powder for a flavor twist
Step-by-Step Instructions
Step 1: Toast Your Hazelnuts
Start by preheating your oven to 350°F (175°C). Spread the hazelnuts on a baking sheet in a single layer and toast for about 10–12 minutes or until their skins start to crack and they smell irresistibly nutty. It’s a good idea to check them at the 8-minute mark just to avoid burning—the smell will guide you. Once toasted, seal them in a clean kitchen towel and rub vigorously to remove most of the skins. Don’t worry if a few patches stay on; that just adds character!
Step 2: Blend the Nuts
Pop the toasted nuts into your food processor. Pulse first to break them down, then switch to continuous blending. You’ll notice a few stages: first crumbs, then a sandy texture, then a clumping paste, and finally a smooth butter after about 8-10 minutes. Scrape down the sides every couple of minutes to keep it even. Don’t rush this part—this slow transformation is key to that creamy texture.
Step 3: Add the Flavors
Once your nuts are buttery smooth, add your cocoa powder, powdered sugar (or maple syrup), sea salt, and vanilla. Blend again until everything’s fully incorporated and glossy. Depending on your desired spreadability, drizzle in the oil bit by bit and pulse until you get that perfect consistency. If you like it thick, use less oil; if you want it spreadable off the spoon, add more. Taste as you go—that’s the fun part!
Step 4: Adjust & Customize
If you’re feeling adventurous, toss in any optional add-ins like a sprinkle of cinnamon or a spoonful of hazelnut milk powder and give it another quick blend. If you prefer a little crunch, stir in chopped toasted hazelnuts after blending. This step lets you make the spread truly yours.
Step 5: Store & Enjoy
Transfer your finished hazelnut spread to a clean glass jar with a tight lid. It can stay fresh at room temperature for up to two weeks or refrigerated for about a month (just bring it back to room temp before spreading). The richness intensifies the longer it sits—it’s like the flavors get cozier together!
What to Serve It With
For Breakfast: I love doling this spread onto warm, buttery toast first thing in the morning paired with a creamy latte—my kids call it their “magic fuel” to start the day. You can also swirl it into yogurt bowls or oatmeal for a chocolate-nut twist that feels like a treat but still gives you energy.
For Brunch: This spread shines beautifully when paired with fresh berries and flaky croissants. Drizzle a little extra on top and serve with chai or your favorite herbal tea to impress guests without any fuss. A dollop on waffles or pancakes? Always a crowd pleaser.
As Dessert: Try using it as a layer in parfaits, dolloped on top of vanilla ice cream, or melted down slightly to drizzle over fresh fruit. It also makes for a dreamy dip when paired with pretzels or wafer cookies—perfect for after-dinner nibbling.
For Cozy Snacks: Don’t underestimate the power of a spoonful right out of the jar when you’re curled under a blanket with a book or binge-watching your favorite show. It’s that comforting little moment that feels indulgent but is actually wholesome.
Top Tips for Perfecting Your Hazelnut Spread
Hazelnut Toasting: Take extra care here; fresh, properly toasted nuts are everything. I learned the hard way when I tried skipping this step—the flavor was just “meh.” Even odd bits of burned skin left on add a lovely rustic note but be sure it’s not bitter.
Blending Technique: Patience is your best friend! Use a food processor with a strong motor and plan for a good 8-10 minutes of blending. Scraping down often prevents uneven chunks. If your processor is small, taking it slow in batches works, too.
Texture Tweaks: Want that silky smoothness? Add the oil gradually and keep blending—too much oil too soon can make it runny. For a toothier spread, blend less or fold in chopped toasted hazelnuts at the end.
Sweetener Swaps: Powdered sugar creates a fine texture, but I’ve had lovely results with maple syrup or honey for a more natural taste. Just keep in mind liquids will thin the spread slightly, so reduce oil accordingly.
Baking Variations: Sometimes I sneak in a hint of espresso powder to deepen the chocolate notes—it’s subtle but powerful. Cinnamon or a dash of cayenne for a kick also earned me rave reviews at breakfast!
Storage & Serving: If refrigerated, the spread firms up—warm it up gently by letting it sit at room temp or placing the jar in warm water before using. Mixing in a splash of warm milk or hazelnut milk also revives that spreadable goodness.
Storing and Reheating Tips
Room Temperature: If you plan to eat your hazelnut spread within 1-2 weeks, store it in an airtight jar on the kitchen counter out of direct sunlight. This keeps the creamy texture just right, especially during cooler months.
Refrigerator Storage: For longer keeping, refrigerate it—it’ll last up to a month this way. Just know the oils firm up with cold, so it’s best to take it out 30 minutes before use or warm it gently by swirling the jar in warm water.
Freezing Instructions: Yes, you can freeze hazelnut spread, but texture might change slightly. Freeze in a tightly sealed container for up to 3 months. Thaw overnight in the fridge, then bring to room temp with gentle warming before use.
Glaze Timing Advice: If you’re using this spread in baked goods or as a glaze, apply it once things are cooled to avoid breaking the smooth texture. For homemade desserts, heating it gently with a splash of milk creates the perfect drizzle.
Frequently Asked Questions
Final Thoughts
Honestly, this hazelnut spread has become one of those little joys in my kitchen that I keep coming back to time and again. It’s comfort in a jar—the sweet smell of toasted nuts, the rich, creamy texture, the way it elevates a simple piece of toast into an experience. I love that it’s something I can make from scratch with ingredients I trust, and tweak to suit my mood and taste buds. If you’ve ever thought about trying a homemade chocolate-nut spread but hesitated, trust me on this one: it’s totally worth it. Give it a go, play around with flavors, and share it with your people. I can’t wait to hear how yours turns out! And hey, if you try adding a pinch of spice or swirling it into batter, don’t be shy—come back and let me know what you loved. Happy spreading!
hazelnut spread
Ingredients
Main Ingredients
- 1 cup hazelnuts
- 0.33 cup powdered sugar
- 1 tbsp unsweetened cocoa powder
- 1 tsp vanilla extract
- 1.5 tbsp coconut oil melted
- 0.75 cup semisweet chocolate chips melted
- 0.25 cup milk chocolate chopped and melted
Instructions
Preparation Steps
- Toast the hazelnuts in a dry skillet over medium-high heat for 8 to 10 minutes, stirring constantly until skins start to darken and nuts are fragrant.
- Remove the hazelnuts from heat and transfer to a clean kitchen towel. Rub the nuts to remove as much skin as possible.
- Place the toasted hazelnuts in a food processor or high-powered blender and blend until they release their oils and form a creamy butter.
- Add powdered sugar, cocoa powder, vanilla extract, and melted coconut oil to the hazelnut butter. Blend until smooth and well combined.
- Melt the semisweet and milk chocolate in short intervals in the microwave, stirring in between to avoid burning.
- Pour the melted chocolate into the hazelnut mixture and blend again until fully combined.
- (Optional) Strain the spread through a fine mesh sieve or cheesecloth to remove any remaining solids for an extra smooth texture.
- Transfer the hazelnut spread to a clean jar and let cool completely. Store refrigerated for up to 1 month.


