


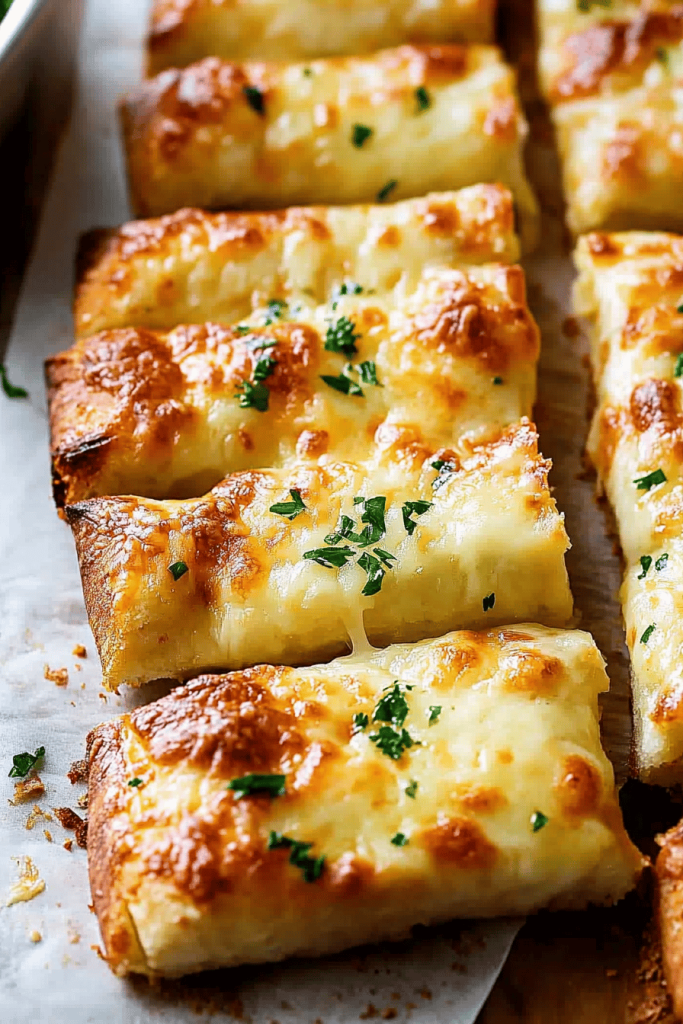
You know those moments? The ones where friends are coming over unexpectedly, or you’re planning a relaxed weekend get-together and you want something impressive but, honestly, also easy? My mind immediately goes to a beautiful cheese board. It’s not just about slapping some crackers and cheese on a plate; it’s an art form, a conversation starter, and frankly, my secret weapon for looking like I’ve got it all together, even when I’ve just scrambled to tidy up the living room. I remember one Saturday afternoon, my sister called and said she was popping by with the kids in an hour, and my pantry was looking a little sad. I panicked for a second, then I thought, “Cheese board!” Within 45 minutes, I had a spread that looked like it came from a fancy magazine, and everyone raved. It’s truly the ultimate crowd-pleaser. Thinking about delicious cheese board ideas can feel overwhelming at first, but once you get the hang of it, it’s a lifesaver.
What is a cheese board?
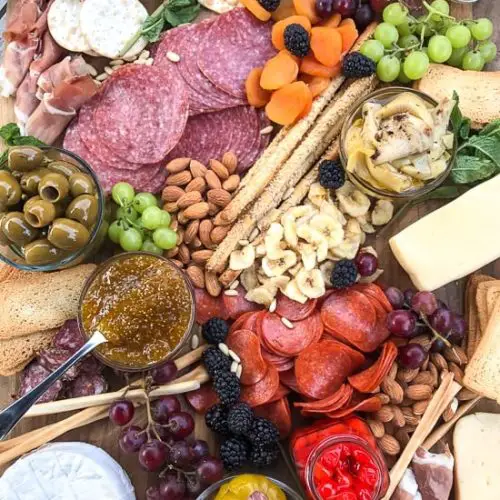
At its heart, a cheese board is simply a curated collection of cheeses, accompanied by a variety of complementary foods, presented beautifully on a platter, board, or even a large piece of slate or marble. Think of it as a grazing platter, but with a sophisticated touch. The “board” itself can be anything from a rustic wooden cutting board to a sleek marble slab. It’s essentially a delicious landscape of flavors and textures designed for sharing. It’s not about perfection, it’s about abundance and variety. It’s the perfect way to start any meal or serve as the main event for a casual get-together. It’s approachable, adaptable, and always feels a little bit special, making it one of my favorite cheese board ideas to share.
Why you’ll love this recipe?
Okay, so why does a cheese board hold such a special place in my culinary heart? Let me count the ways! Firstly, the sheer *flavor explosion* is incredible. You’ve got creamy, sharp, nutty, sweet, salty – it’s a party in your mouth with every bite. Then there’s the *simplicity*. Honestly, if you can buy cheese and arrange it, you can make a fantastic cheese board. There’s no actual cooking involved, which is a huge win in my book, especially on busy weeknights. It’s also surprisingly *cost-efficient* when you think about what you get for the money. You can easily tailor it to your budget, choosing a mix of familiar favorites and a couple of more unique options. What I love most, though, is its incredible *versatility*. A cheese board can be a light appetizer before a big meal, a hearty supper for two, or the star of a larger party. It’s adaptable to dietary needs too – you can easily add gluten-free crackers or vegan cheese alternatives. It’s one of those things that just *works* every single time, and it’s so much more exciting than just a bag of chips!
How do you make a cheese board?
Quick Overview
Creating a stunning cheese board is all about thoughtful selection and appealing presentation. You’ll want to choose a variety of cheeses, then add accompaniments like charcuterie, fruits, nuts, crackers, and spreads. The key is balance – hitting different flavor profiles and textures. Arrange everything artfully on your chosen board, filling in gaps and creating visual interest. It’s less about following a strict recipe and more about an intuitive, delicious assembly. Trust me, it’s easier than it sounds!
Ingredients
For the Cheeses: What are some good cheeses?
* A Soft Cheese: Think creamy brie, camembert, or a decadent goat cheese. I always opt for something spreadable. My personal favorite is a good quality triple-cream brie – it’s so luxurious!
* A Semi-Hard Cheese: Something like a sharp cheddar, Gruyère, or gouda. Cheddar is a classic for a reason, and a good aged one has such a satisfying bite.
* A Hard, Aged Cheese: Parmesan-Reggiano, Pecorino Romano, or an aged Manchego. These add a salty, nutty punch. I love a chunk of Parmesan-Reggiano that I can break off in little crystalline shards.
* Something Blue (Optional but recommended!): A mild blue cheese like Gorgonzola Dolce or a sharper Stilton can be a fantastic addition if your guests are adventurous. If not, you can skip this!
* A Unique or Local Cheese: This is where you can have fun! Maybe a cheese infused with herbs, a smoked cheese, or something from a local dairy. It adds character.
For the Charcuterie (Optional but highly recommended!):
* Cured Meats: Prosciutto, salami (various types like genoa or soppressata), capicola. I like to have at least two different kinds. Roll or fold them to make them look pretty and easy to grab.
* Terrine or Pâté: A smooth chicken liver pâté or a rustic country pâté adds another layer of richness.
For the Fruit:
* Fresh Fruit: Grapes (red and green are beautiful!), berries (strawberries, raspberries, blueberries), figs (fresh or dried), apple or pear slices. Seasonal is always best here!
* Dried Fruit: Apricots, dates, cranberries, figs. These add a lovely chewy sweetness.
For the Crunch:
* Crackers: A variety is key! Water crackers, seeded crackers, artisanal breadsticks, or even some toasted baguette slices.
* Nuts: Almonds, walnuts, pistachios, Marcona almonds. Lightly toasting them really brings out their flavor.
For the Sweet & Savory Accents:
* Olives: A mix of Kalamata, Castelvetrano, or Marinated olives.
* Cornichons or Pickles: For a briny, acidic counterpoint.
* Honey or Maple Syrup: A small drizzle over a soft cheese is divine.
* Jam or Chutney: Fig jam, apricot preserves, or an onion chutney are perfect pairings.
* Mustard: A grainy Dijon or a whole-grain mustard.
Step-by-Step Instructions
Step 1: Choose Your Board
Select a spacious board, platter, slate, or marble slab. Make sure it’s clean and dry. I love using my large wooden cutting boards because they have a nice rustic feel, but a simple baking sheet works in a pinch too!
Step 2: Select Your Cheeses
Aim for 3-5 different types of cheese, considering a mix of textures and milk types (cow, goat, sheep). Let them come to room temperature for about 30-60 minutes before serving for the best flavor and texture. This is a crucial step I learned early on – cold cheese just doesn’t have the same magic!
Step 3: Prepare Your Charcuterie (If Using)
Slice salami thinly. Fold or roll prosciutto. Arrange them in appealing piles or waves around where you plan to place your cheeses.
Step 4: Add Your Spreads & Accents
Place small bowls of olives, cornichons, jams, honey, and mustards around the board. Don’t overfill; these are accents.
Step 5: Arrange the Cheeses
Start by placing your cheeses on the board, leaving space between them. If you have a wedge of brie, cut a small piece off to expose the creamy interior, making it inviting.
Step 6: Fill in the Gaps with Fruit & Nuts
Artfully arrange clusters of fresh grapes, berries, and slices of fruit. Scatter nuts in small piles. This is where you start to fill out the board and add color.
Step 7: Add Crackers & Bread
Fan out crackers and bread slices in a few different spots, often near their intended cheese pairings, but also accessible from different sides of the board.
Step 8: Garnish & Final Touches
Add a few sprigs of fresh rosemary or thyme for visual appeal and a touch of fragrance. Ensure everything is easily accessible and looks abundant.
Step 9: Serve Immediately
Your cheese board is ready to impress! It’s best enjoyed right away while the cheeses are at their ideal temperature.
What to Serve It With
This is where the fun really begins! A cheese board is so adaptable. For a casual **Breakfast**, I love serving it with some fresh coffee and maybe a basket of warm croissants. It feels incredibly indulgent. For a more elegant **Brunch**, I’ll plate it up with some sparkling mimosa or a light rosé. I often add some mini quiches or a fresh fruit salad to round it out. When serving it as **Dessert**, I’ll focus on sweeter cheeses like a honey-infused goat cheese or a fruit-laden brie, pairing it with port wine or a dessert wine. A drizzle of dark chocolate sauce can be amazing too. And for those impromptu **Cozy Snacks**? This is where it shines! I’ll pair it with a craft beer or a glass of Red Wine, perhaps add some gourmet popcorn. My family often asks for a smaller version for movie nights – just a few cheeses, some salami, and a big bowl of olives. It’s the perfect, low-effort way to make an evening feel special.
Top Tips for Perfecting Your Cheese Board
After creating countless cheese boards over the years, I’ve picked up a few tricks that really elevate the experience. When it comes to selecting cheeses, my biggest piece of advice is to go for variety in milk type and texture. Don’t just stick to cheddar! Try to include a soft, a semi-hard, and a hard cheese. And if you’re feeling brave, a little bit of blue cheese can be a game-changer. For the accompaniments, I always try to hit a balance of sweet, salty, crunchy, and tangy. This means always having some fruit (fresh and dried are great!), some nuts for crunch, something briny like olives or cornichons, and a sweet element like jam or honey. I’ve learned that presentation is half the battle – don’t just plop everything down. Think about color and shape. Fan out your crackers, arrange your meats in little rosettes, and scatter grapes in visually appealing clusters. I’ve also found that using small bowls for wet items like olives or honey prevents them from making other items soggy and keeps things tidy. For *charcuterie*, slicing it thinly and then folding or rolling it not only makes it look prettier but also makes it easier for guests to pick up without it all falling apart. A little tip I love is to lightly toast nuts; it really enhances their flavor and aroma. If you’re worried about cheeses drying out, you can always cover them with a dome or plastic wrap just before serving, but let them sit out for about 30 minutes to an hour beforehand so they reach room temperature – it makes a huge difference in flavor and texture! And for those who don’t eat meat, I always make sure to have plenty of delicious vegetarian options like roasted red peppers, marinated artichoke hearts, and a good selection of cheeses. It’s all about making sure everyone feels catered to and can create their perfect bite.
Storing and Reheating Tips
Once your cheese board has been enjoyed, you might have some delicious leftovers! For storing **Room Temperature** items like hard cheeses or cured meats, wrap them tightly in plastic wrap or place them in an airtight container. They should be good for a day or two, but I always recommend refrigerating them as soon as possible to maintain freshness. **Refrigerator Storage** is key for most items. Cheeses should be re-wrapped well – I find beeswax wraps work wonderfully for hard cheeses, and parchment paper followed by plastic wrap is good for softer ones. They can last anywhere from a few days to a couple of weeks, depending on the cheese type. Keep olives and pickles in their brine in sealed containers. For **Freezer Instructions**, it’s generally best to freeze cheeses with higher fat content, like cheddar or gouda. Wrap them very well in several layers of plastic wrap and then a layer of foil to prevent freezer burn. They can last for up to 3-6 months. Thawing should be done slowly in the refrigerator overnight. Soft cheeses like brie and goat cheese don’t always freeze well and can become crumbly. For any cooked items like pâté, ensure they are well-sealed and can be frozen for a couple of months. I usually avoid freezing crackers and nuts as they can lose their crispness. For **Glaze Timing Advice**, if you’ve got leftover honey or jam, just seal the jars tightly and store them in the fridge – they’ll be good for ages. It’s always best to taste and check for quality before serving leftovers.
Frequently Asked Questions
Final Thoughts
Creating a cheese board is one of those culinary endeavors that feels both impressive and incredibly rewarding, without requiring hours in the kitchen. It’s about bringing people together over delicious, shareable food. The joy comes from seeing your friends and family marvel at the spread, discovering new favorite pairings, and simply enjoying each other’s company. I’ve found that the best cheese boards are the ones that reflect your own taste and what’s in season. Don’t be afraid to experiment! If you love this approach to entertaining, you might also enjoy my posts on Easy Appetizer Ideas or Weekend Brunch Inspiration. They all share that same spirit of creating memorable moments with delicious, accessible food. I truly hope you get to put these cheese board ideas into practice soon. I can’t wait to hear how yours turns out – share your favorite combinations in the comments below! Happy grazing!
cheese board ideas
Ingredients
Main Ingredients
- 1 pound variety of sliced cured meats and salumi (such as Sopressata, prosciutto, pepperoni)
- 1.5 pound variety of soft and hard cheese options (such as Brie, Havarti, Gouda, Mozzarella, Provolone, Blue Cheese)
- 1 cup cured olives and colorful antipasti
- 0.5 cup spreads, jams and mustards
- 1 bag variety of crackers and bread sticks
- 2 cups colorful variety of fresh and dried fruit (such as grapes)
- 1 cup variety of nuts (such as pignoli, pistachios and almonds)
- 0.25 cup fresh herb sprigs (such as mint or rosemary)
Instructions
Preparation Steps
- Gather a large platter or two. You can use cutting boards, ceramic platters, slate cheese boards, or marble slabs.
- Artfully arrange where you want your cheese selection and jars, bowls of olives, jams, and antipasti to go. Then, place varieties of meat slices and rolled-up meats around them.
- Scatter crackers and bread sticks to fill up any remaining space. Finally, add your fruit, nuts, and herbs to balance the colors and create a beautiful presentation.


