


There’s something so comforting about layers of creamy, sweet goodness drenched in chocolate and cream—but what if I told you that you can have that same layered magic without even turning on your oven? I discovered this no-bake dessert lasagna a few years back when I was desperate to whip up a treat without heating up the whole kitchen in the middle of summer. It became an instant game-changer. It’s one of those recipes that smells utterly divine as you build it, yet it’s almost effortless to pull together. If you’ve made a classic tiramisu or layered parfaits, you’ll find this one just as rich but way less fussy—plus, no baking means way less waiting! Honestly, this no-bake dessert lasagna has saved me on more than one busy evening, and my kids actually ask for it by name. Nothing fancy, just delicious layers of creamy, chocolatey, and crunchy textures that make dessert feel like a cozy hug.
What is no bake dessert lasagna?
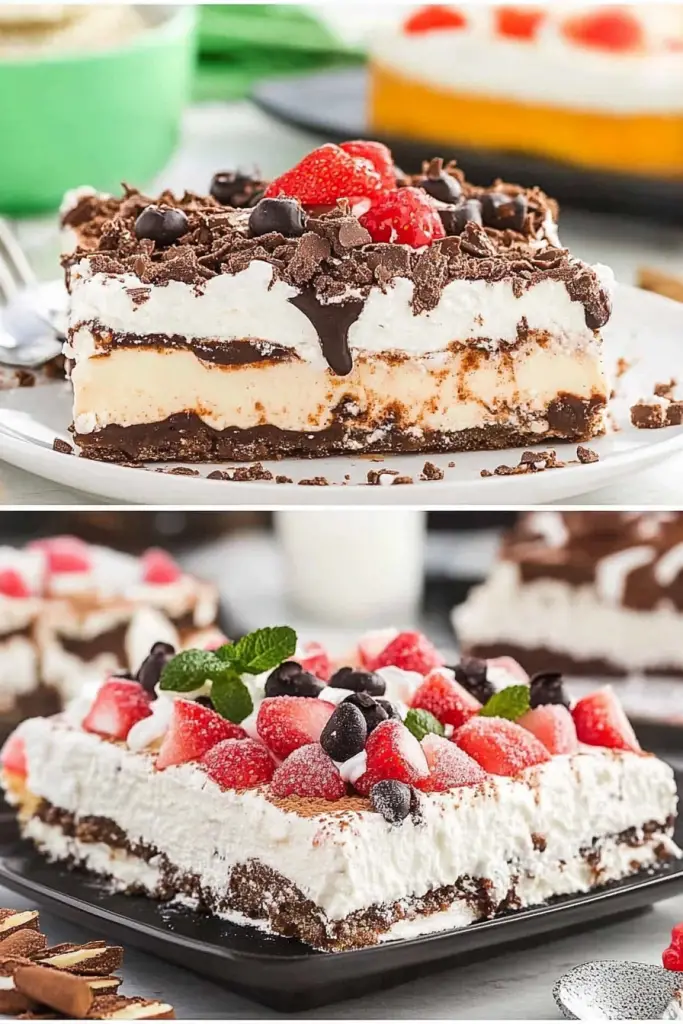
Think of no-bake dessert lasagna as the cool cousin of traditional lasagna, except instead of pasta, tomato sauce, and cheese, you’re stacking layers of creamy fillings, cookies or graham crackers, and sometimes fruity or chocolatey add-ins. It’s essentially a dessert built in layers—each one bringing a different texture and flavor. The “lasagna” part comes from how it’s assembled: you layer those different ingredients in a dish just like you would with pasta sheets. Instead of baking to melt cheese and cook noodles, you chill this baby so the flavors meld together beautifully. It’s super approachable, especially if you’re already familiar with no-bake cheesecakes or layered trifles. Plus, since you don’t have to heat up the oven, it’s a dream for warmer months or when you just want a quick, indulgent treat without the wait.
Why you’ll love this recipe?
What I love most about this no-bake dessert lasagna is how it’s the perfect balance of dreamy and doable. First, the flavor is just pure joy—creamy layers that melt in your mouth, rich chocolate goodness, and a hint of vanilla that keeps everything feeling fresh. Every bite has that irresistible contrast between silky, crunchy, and soft. Then there’s the simplicity factor. If you’ve ever worried about a dessert turning out “wrong,” this one’s pretty forgiving. No ovens to babysit, no exact bake times—just a good whisk, some layering, and a bit of patience while it chills. This also means it’s budget-friendly; most ingredients are pantry staples or easy to grab on a grocery run, and it doesn’t require any fancy equipment.
Versatility sells this recipe for me, too. You can dress it up with berries, nuts, or drizzle caramel over the top, or keep it classic with just chocolate and cream. Looking for something seasonal? Swap in pumpkin spice or peppermint extracts, and voila—instant festive flavor. It shares some vibes with no-bake cheesecakes and layered parfaits I’ve tried, but the lasagna layering gives it this special, elegant look that’s fun to serve at family get-togethers or casual dinner parties. Honestly, the best part is how everyone thinks you spent hours on it—when you barely got your hands dirty. It’s a total crowd-pleaser that brings warmth and smiles every single time.
How do I make no bake Lasagna?
Quick Overview
Making this no-bake dessert lasagna is like building a delicious little tower with your favorite sweet ingredients. You prepare your creamy layers, soak your cookies or crackers just right, and then alternate them in a dish for that classic layered effect. The magic happens when it chills and those layers meld together into something rich and velvety. The process is straightforward, and the best part? No baking, no stress, just pure layering joy. Trust me, even if you’re not a dessert pro, this will turn out tasting like a dream.
Ingredients
For the Main Batter:
- 8 oz cream cheese (softened) – full-fat gives the best richness
- 1 cup powdered sugar – sifted for smoothness
- 2 cups heavy whipping cream – whipped to stiff peaks
- 1 tsp vanilla extract – pure, not imitation
For the Filling:
- 1 package chocolate sandwich cookies or graham crackers – crushed or whole, depending on texture preference
- 1 cup chocolate pudding (store-bought or homemade) – thick and creamy
- Optional: 1 cup fresh berries or sliced bananas – adds a bright, fresh layer
For the Glaze:
- ½ cup semi-sweet chocolate chips – melted
- 2 tbsp heavy cream – to smooth out the glaze
- Pinch of salt – to balance sweetness
Step-by-Step Instructions
Step 1: Prepare Your Dish
I like using a 9×9 inch glass or ceramic dish because it lets you see the beautiful layers, but any similar size will do. Give it a quick wipe with a paper towel so the layers don’t get messy on the edges.
Step 2: Whip the Cream Cheese Batter
Start by beating the softened cream cheese with powdered sugar and vanilla extract until it’s smooth and lump-free. Then fold in a good amount of your whipped cream—gently now! You want to keep those fluffy peaks intact so your lasagna is light, not dense.
Step 3: Prepare the Chocolate Pudding
If you’re making pudding from scratch, make sure it’s cooled completely before layering. The ready-made kind works like a charm here and saves loads of time.
Step 4: Layer Your Dessert Lasagna
Start with a thin layer of the cream cheese mixture, then a layer of cookies or crackers. I like to dip the cookies quickly in milk to soften them but don’t let them get soggy. Spread a layer of pudding over the cookies next, then add your fruit if you’re using any. Repeat the layers until you’ve used up all your ingredients, finishing with a final creamy layer on top.
Step 5: Chill to Meld and Set
Cover it with plastic wrap and pop it into the fridge for at least 4 hours, but overnight is even better. This is when all the flavors marry together into something unforgettable. I always sneak a little spoonful here and there, and it’s glorious.
Step 6: Make the Glaze
Just before serving, melt your chocolate chips with cream and a pinch of salt in short bursts in the microwave, stirring in between to avoid burning. Drizzle this glaze over your chilled lasagna, letting it gently drip over the edges. It gives this fabulous shiny finish and a lovely contrasting texture.
Step 7: Slice and Serve
Use a sharp knife for clean cuts, wiping it down between slices. Serve chilled—it’s the perfect cool, creamy dessert after a hearty meal or just when you’re craving something sweet. Watch it disappear fast!
What to Serve It With
For Breakfast: Pair a small slice with strong black coffee or a lightly sweetened latte. The creamy layers feel indulgent but without the heaviness of a typical pastry, making mornings special without the crash.
For Brunch: Dress it up with a dusting of powdered sugar and fresh mint leaves. Serve alongside fresh orange juice or sparkling water with lemon for an elegant touch that feels festive but still casual enough for weekend chats.
As Dessert: I love to add a scoop of vanilla ice cream or a drizzle of caramel sauce on the side. Fresh berries on top bring color and a pop of tartness that balances the richness beautifully. When friends come over, I make this because the layers practically beg for appreciation—and the extra treats make it feel like a feast.
For Cozy Snacks: Nothing beats a slice with a cup of hot cocoa or chai tea on a chilly afternoon. It’s like dessert and snack meeting in perfect harmony—comfort food at its finest. My kids often grab this as an afternoon treat, especially on weekends when we’re all home and snuggled in.
Top Tips for Perfecting Your No-Bake Dessert Lasagna
Cookie Prep: Don’t skip the quick milk dip before layering the cookies—it softens them just enough to meld with the cream but keeps some bite. I learned the hard way that soggy cookies can turn the whole dessert mushy.
Mixing Advice: Be gentle folding the whipped cream into the cream cheese base. Overmixing kills the light texture, making it overly dense. Look for soft peaks and a thick consistency before stopping.
Swirl Customization: If you want a marbled effect, gently swirl your pudding and cream layers with a skewer before chilling. It’s a small touch that looks fancy but is super simple.
Ingredient Swaps: Tried this with almond milk for dipping cookies—it’s surprisingly creamy and a great dairy-free tweak. Greek yogurt works well in place of some cream cheese for a tangier layer, too, if you’re into that.
Chilling Tips: Overnight is best. If you’re in a rush, a few hours will work fine, but the flavors really deepen with time. I put mine on the lower shelf for even cooling.
Glaze Variations: Experiment with white chocolate or butterscotch glaze. Adding a splash of espresso or flavored liqueurs to the glaze can give it a grown-up twist that’s a hit at parties. Just keep your glaze thick but pourable for the best drizzle effect.
This recipe taught me to trust in chill time and layering patience—I used to rush it and missed out on that velvety harmony that makes this dessert glow. Don’t make that mistake!
Storing and Reheating Tips
Room Temperature: Since it’s a cream-based dessert, best enjoyed within 1-2 hours unrefrigerated. Cover it lightly with a dome or foil if serving outdoors, but don’t leave it too long—or you’ll lose that perfectly chilled texture.
Refrigerator Storage: Keep in an airtight container or cover tightly with plastic wrap. It’ll stay fresh and creamy for 3-4 days. I often prep mine a day ahead, and it tastes even better the next day. Just make sure to re-drizzle the glaze fresh if you stored it separately.
Freezer Instructions: I don’t usually freeze this one because the texture of whipped cream and pudding changes, but if you really need to, wrap tightly in plastic wrap and foil. Freeze up to 1 month and thaw in the fridge overnight. The texture will soften a bit, so it’s best for blending into smoothies or eating with a spoon.
Glaze Timing Advice: For best presentation, drizzle glaze right before serving so it stays glossy and doesn’t harden too much. If you’re prepping ahead, store glaze separately in the fridge and warm it gently before use.
Frequently Asked Questions
Final Thoughts
I swear, this no-bake dessert lasagna has become my little secret to impress guests and keep my evenings stress-free. It’s creamy and indulgent but doesn’t feel over the top—with flavors that balance richness and sweetness in a way that has my family gathering around the kitchen counter, spoons in hand, ready for seconds. If you’re someone who loves the idea of layered desserts but hates the long bake times or messing with fancy techniques, this one’s your new best friend. Seriously, the way those layers come together with no baking means you get more time to enjoy the good stuff—friends, family, and maybe that cup of coffee you were supposed to be drinking an hour ago. Give it a try, tweak it your way, and don’t forget to swing back here and tell me how it turned out! Happy layering and happy eating!

no-bake dessert lasagna
Ingredients
Main Ingredients
- 24 cookies Oreo cookies crushed, for crust
- 5 tablespoons butter melted, for crust
- 8 oz cream cheese softened
- 1 cup powdered sugar
- 2 cups whipped topping divided
- 3.5 oz instant chocolate pudding mix
- 2 cups cold milk
- 0.25 cup mini chocolate chips for topping
Instructions
Preparation Steps
- In a medium bowl, combine crushed Oreo cookies and melted butter. Press mixture firmly into the bottom of a 9x13 inch dish to form the crust.
- In a large bowl, beat softened cream cheese and powdered sugar until smooth and creamy. Fold in 1 cup of whipped topping. Spread this mixture evenly over the crust.
- In another bowl, whisk together instant chocolate pudding mix and cold milk for about 2 minutes until thickened. Spread pudding layer over the cream cheese layer.
- Spread the remaining 1 cup of whipped topping evenly over the pudding layer. Sprinkle mini chocolate chips on top.
- Refrigerate for at least 4 hours or overnight before serving to allow layers to set.


