


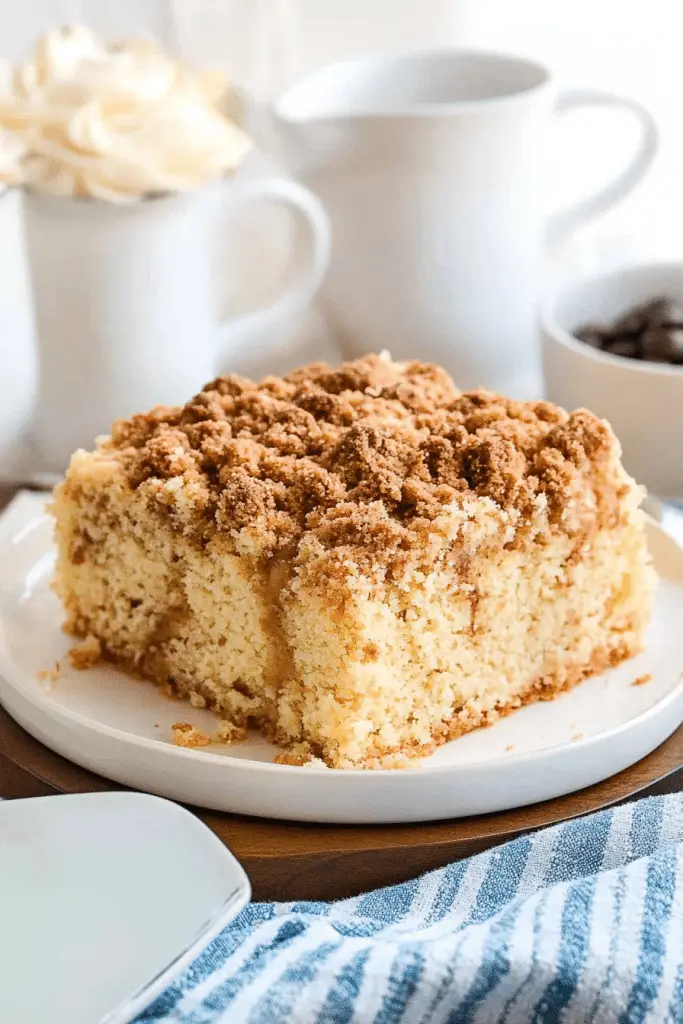
There’s something incredibly comforting about waking up to a slice of coffee cake fresh from the oven. The smell alone — warm cinnamon, buttery notes, and a hint of vanilla — can pull anyone out of a groggy morning haze. I first stumbled on this coffee cake recipe as a teenager when my grandma insisted it was *the* thing to bake for Sunday brunch. She was right, of course. It’s got this soft, tender crumb with just the right balance of cinnamon sugar swirled throughout, and topped off with a simple glaze that melts into every crevice. If you’re used to the occasional muffin or plain quick bread for breakfast, this coffee cake is a game changer—it’s a little more special but still easy enough for busy days. Trust me, once you try this, the classic cinnamon coffee cake might just become your go-to treat, whether it’s for a lazy morning or an afternoon pick-me-up with your favorite brew.
What is coffee cake?
Think of coffee cake as the perfect balance of tender cake and sweet, cinnamon-spiced crumb topping—made to pair perfectly with, well, a cup of coffee! It’s not cake flavored with coffee, but rather a cake that’s traditionally enjoyed alongside a coffee break. The roots go way back to European traditions where simple cakes were made to enjoy with hot drinks, and over time it evolved into this lovely lightly sweetened cake with a streusel or swirl that cuts through the softness with just enough crunch and spice. It’s essentially a quick bread layered or topped with cinnamon, sugar, and sometimes nuts or fruit, which means it’s easy enough for everyday baking but still feels like a small celebration. I love how it sits on the table inviting conversation, warming hands and hearts alike.
Why you’ll love this recipe?
What I love most about this coffee cake is how it nails that delicate balance between moist and fluffy, without ever feeling dry or heavy. The cinnamon sugar swirl is soft and just sweet enough—not overpowering, but just enough to make you want more. The crumb topping adds subtle crunch without stealing the show. I’ve made this countless times, sometimes switching up the fillings (hello, nutella or chopped apples!) but this classic version is the one my whole family asks for repeatedly—it makes breakfast feel like a treat, not just a routine.
Another thing—I always get compliments on how simple it is. No fancy ingredients, no complicated steps, and it comes together faster than you might expect for a cake that tastes this homemade and comforting. Plus, everything is super affordable: flour, sugar, cinnamon—basic pantry staples that never really run out in my house. Sometimes we spice it up by adding a handful of walnuts or pecans for a little crunch, but even plain it’s stunningly good.
If you’re into coffee-time sweets like cinnamon rolls or banana bread, this one fits right in but with less mess — no sticky icing or roll-outs, just that perfect crumb and swirl. And trust me, once you get the hang of the layering and swirling technique, it’s so fun to make. My kids actually ask for seconds, which is always my favorite measure of a hit recipe. Definitely a keeper!
How do I make a coffee cake?
Quick Overview
This coffee cake recipe is a breeze from start to finish—you mix up a simple batter, create a cinnamon sugar filling, layer it into your pan, then swirl it all together before baking it to golden perfection. What makes this method special is the balance of layers—the cake stays tender while the cinnamon swirl gets that melt-in-your-mouth texture everyone loves. No stand mixers needed, just a sturdy whisk and a spatula, making it perfect for whenever the craving hits, morning or night. And the glaze? It’s the cherry on top, bringing it all together with a subtle sweetness and just enough shine.
Ingredients
For the Main Batter:
- 1½ cups all-purpose flour (I always sift mine for extra lightness)
- ¾ cup granulated sugar (balances sweetness without being cloying)
- 2 teaspoons baking powder (for that perfect rise)
- ¼ teaspoon salt (to bring out flavors)
- ½ cup unsalted butter, melted and cooled (makes the crumb tender)
- ½ cup whole milk (or almond milk for a creamier texture!)
- 2 large eggs (room temperature for best mixing)
- 2 teaspoons vanilla extract (essential for that warm aroma)
For the Filling:
- ½ cup light brown sugar, packed (adds rich, molasses-like flavor)
- 2 tablespoons ground cinnamon (don’t skimp on this, it’s the star)
- 2 tablespoons unsalted butter, melted (helps the filling melt into the cake)
- Optional: ½ cup chopped walnuts or pecans (for crunch)
For the Glaze:
- 1 cup powdered sugar (sifted to avoid lumps)
- 1–2 tablespoons milk or cream (adjust to get a thick but pourable consistency)
- ½ teaspoon vanilla extract (for that classic flavor boost)
Step-by-Step Instructions
Step 1: Preheat & Prep Pan
First things first—preheat your oven to 350°F (175°C). I always grease a 9-inch square baking pan with butter, then dust it lightly with flour or use parchment paper for an extra non-stick guarantee. This helps the cake come out cleanly so you don’t lose all the good swirls on the sides.
Step 2: Mix Dry Ingredients
In a large bowl, whisk together the flour, sugar, baking powder, and salt. I like to mix these really well so the baking powder distributes evenly — it’s a little trick I learned to get consistent rising across the whole cake. Your dry mix should be smooth and uniform before you bring in the wet ingredients.
Step 3: Mix Wet Ingredients
In another bowl, whisk the melted butter, milk, eggs, and vanilla extract until everything feels cohesive and slightly frothy. The eggs at room temperature whisk better and help create a lighter cake. The texture at this point will be smooth and slightly runny, perfect to combine with the dry stuff.
Step 4: Combine
Pour the wet ingredients into the dry and fold gently with a spatula until just combined. This step is critical—overmixing can make the cake tough, so stop once you don’t see flour streaks but don’t worry about a few lumps. The batter should be thick but pourable, like a cross between pancake batter and muffin batter.
Step 5: Prepare Filling
Mix together the brown sugar, cinnamon, and melted butter in a small bowl until it looks like damp sand. If you’re adding nuts, fold them in here. Be generous with the cinnamon—it’s what makes the swirl shine! The filling should be spreadable but not overly liquid so it holds in place inside the cake.
Step 6: Layer & Swirl
Pour half of the batter into the prepared pan and spread it evenly. Sprinkle half of the cinnamon filling over the top. Pour the rest of the batter on top, smoothing gently, then add the remaining filling in dollops. Take a butter knife and swirl everything together with gentle circular motions—don’t overdo it or the swirl will disappear. It’s all about those elegant ribbons of cinnamon peeking through every bite.
Step 7: Bake
Bake the cake for about 35–40 minutes or until a toothpick inserted in the center comes out with just a few moist crumbs. Ovens vary (mine’s a little hot in the back), so start checking at 30 minutes—if it’s getting too dark on top, loosely tent it with foil. The cake will smell like heaven when it’s just right.
Step 8: Cool & Glaze
Let the coffee cake cool in the pan for 15–20 minutes before placing it on a wire rack (if you used parchment, this is easier!). While it’s cooling, whisk together the glaze ingredients until smooth. Drizzle the glaze evenly over the warm cake—the glaze will soak in just a bit, adding that extra touch of sweetness without being sticky.
Step 9: Slice & Serve
Once the glaze sets a little, slice the cake into squares with a sharp knife. It’s best served warm or at room temperature—pair it with your favorite coffee or tea and watch it disappear. The edges get slightly crisp while the middle stays soft, making every bite a perfect cozy moment.
What to Serve It With
For Breakfast: A steamy cup of your favorite coffee or latte is a classic pairing. If you’re feeling fancy, try serving it with fresh berries on the side or a dollop of whipped cream to balance the cinnamon sweetness.
For Brunch: Plate it alongside scrambled eggs, smoked salmon, or a fresh green salad with vinaigrette. A mimosa or freshly squeezed orange juice elevates the experience for guests or weekend indulgence.
As Dessert: Serve warm with a scoop of vanilla ice cream or drizzle some caramel sauce over the top. A dollop of mascarpone or creme fraiche also pairs wonderfully to cut the sweetness.
For Cozy Snacks: This coffee cake is my go-to for afternoon snacking. Wrapped in a picnic cloth with a thermos of hot tea or spiced cider, it’s the kind of simple, soul-soothing treat that makes chilly afternoons feel like a warm hug. My family has a tradition of sharing it after Sunday hikes — it’s amazing how the outdoors and sweet cake just click.
Top Tips for Perfecting Your Coffee Cake
Filling Prep: Make sure your cinnamon sugar filling is damp but not watery. If it’s too wet, it can make the cake soggy in spots. When adding nuts, toast them lightly to draw out flavor and crunch.
Mixing Advice: Don’t overmix the batter—this is the biggest rookie mistake I see. A few lumps are fine, and stirring just until combined keeps the crumb soft and tender. Use a gentle folding technique with a spatula rather than an electric mixer.
Swirl Customization: For bigger swirls, dollop larger spoonfuls of filling before swirling. For finer, more intricate patterns, use a skewer or toothpick in shorter strokes. I’ve even done a marbled effect by alternating plain and cinnamon batter.
Ingredient Swaps: I’ve swapped whole milk for almond or oat milk—both work surprisingly well and add a subtle richness. For butter, you can use melted coconut oil, which lends a slight tropical hint. Gluten-free? I recommend a 1:1 flour blend with xanthan gum to maintain texture.
Baking Tips: Bake in the center of your oven for even heat. If you have a fan oven, reduce temperature by 25°F. Always do the toothpick test—the cake should be moist but not wet.
Glaze Variations: For a twist, add a pinch of espresso powder or a splash of almond extract to the glaze. If you want something lighter, dust with powdered sugar or sprinkle with cinnamon sugar before baking for a crunchy top.
I learned over the years that patience while cooling makes a huge difference in slicing. Cutting into the cake too soon before it sets tends to make a mess, so give it a good 20 minutes post-glaze. These little tweaks transformed my cake from “meh” to “wow” with every batch.
Storing and Reheating Tips
Room Temperature: Wrap your coffee cake well with plastic wrap or place it in an airtight container. It stays fresh for up to 2 days. The glaze keeps it from drying out, so don’t skip it if serving soon!
Refrigerator Storage: Store in an airtight container for up to 5 days. Chilling can firm up the glaze nicely, but you might want to warm the cake slightly before serving to bring back the softness.
Freezer Instructions: You can freeze the cake slices individually in sandwich bags or wrapped tightly in plastic and foil for up to 3 months. Thaw overnight in the refrigerator or at room temp for a few hours. Warm it up gently in the microwave or oven to enjoy like fresh.
Glaze Timing Advice: If freezing, I recommend glazing after thawing to keep the texture perfect. For fridge or room temp storage, glaze right after the cake cools. If you want a thicker glaze, add less milk or let it set longer before slicing.
Frequently Asked Questions
Final Thoughts
This coffee cake is more than just a quick morning fix; it’s a little tradition in itself, one I’ve come back to time and again when I want that warm, cozy feeling baked right in. The way the cinnamon swirls melt into the buttery cake and the subtle sweetness of the glaze always brings a smile, whether it’s shared with family on Sunday mornings or a quiet treat to accompany your afternoon coffee. If you try this recipe, I hope it becomes as much of a favorite in your kitchen as it is in mine. And if you experiment—adding nuts, fruits, or swapping ingredients—tell me how it goes! I love hearing about your twists and memories around this coffee cake.
Happy baking and even happier eating!
coffee cake
Ingredients
Main Ingredients
- 2.5 cups all purpose flour
- 1 cup granulated sugar
- 0.5 teaspoons baking powder
- 0.5 teaspoons baking soda
- 0.25 teaspoons kosher salt
- 0.75 cups unsalted butter softened
- 3 large eggs
- 2 teaspoons vanilla extract
- 0.67 cups buttermilk
- 2 packages cream cheese softened, 8 ounces each
- 0.5 cups granulated sugar
- 1 large egg
Topping Ingredients
- 1 cups light brown sugar
- 0.33 cups granulated sugar
- 2 teaspoons ground cinnamon
- 0.25 teaspoons kosher salt
- 1 cups unsalted butter melted
- 3 cups all purpose flour
Instructions
Preparation Steps
- Grease and flour a 13x9 inch baking dish. In a bowl, beat flour, sugar, baking powder, baking soda, and salt on low speed to combine. Add softened butter and beat until mixture is crumbly. Beat in eggs, vanilla, and buttermilk until fluffy. Pour half of the batter into the baking dish and spread evenly.
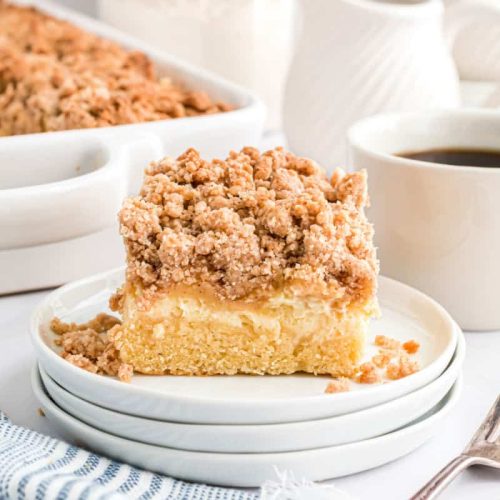
- In a separate bowl, beat cream cheese with 0.5 cup sugar and 1 egg until light and fluffy, about 3–5 minutes. Pour cream cheese mixture over the batter in the baking dish. Top with remaining half of cake batter.
- For the topping, mix light brown sugar, granulated sugar, cinnamon, and salt. Add melted butter and blend well. Add flour and mix with hands until fully combined into a crumbly texture.
- Sprinkle crumb topping evenly over the cake batter.
- Bake the cake at 325°F for about 45 minutes or until a toothpick inserted in the center comes out clean. Cool completely before serving.


