


What are cupcakes for dogs? Is this just a Pinterest project? What are some of the best Dog Cupcakes? Friends (and yes, I tried a tiny bite myself! Think of them as the canine equivalent of a carrot cake, but without all the sugar and questionable ingredients. I started making these after being tired of seeing bland, store-bought dog treats. I wanted something special, something I knew every ingredient of, for my loyal companions. What is it like to see a girl’s tails wag like crazy when she gets the whiff of these? Is it easier to make human cupcakes?

What is a dog cupcake?
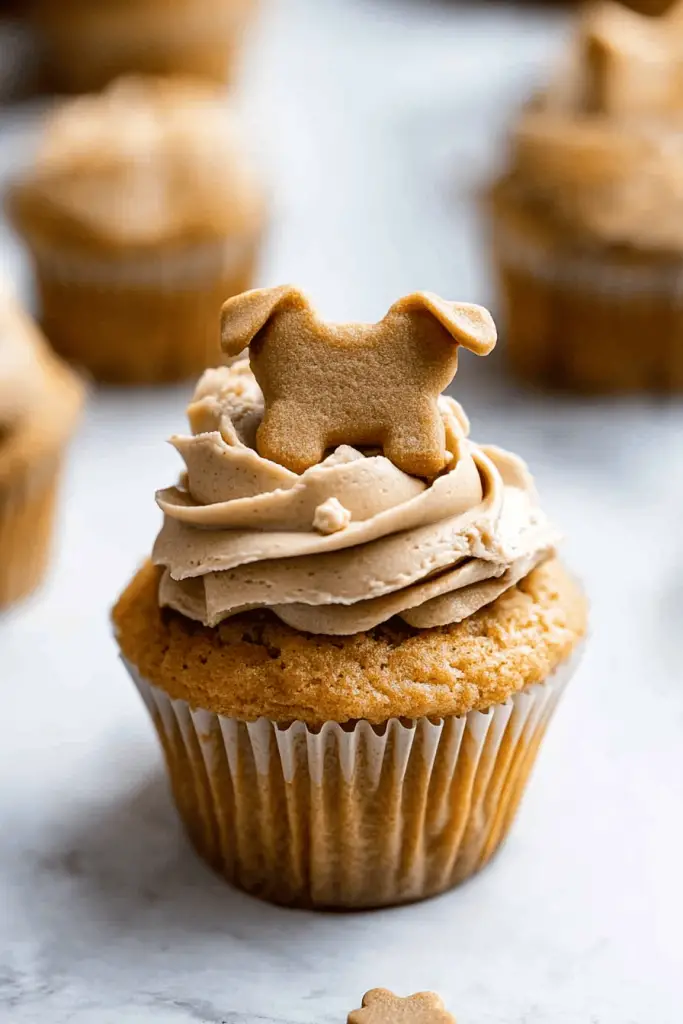
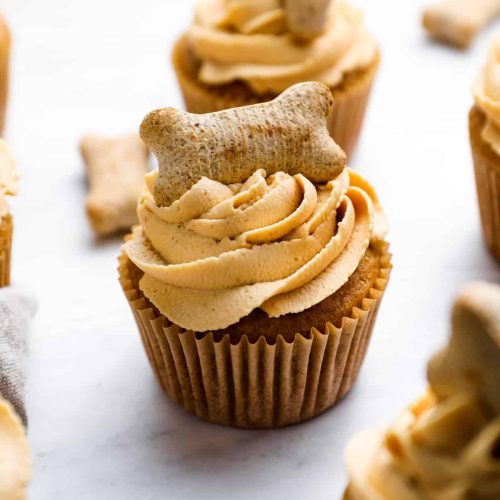
What are dog cupcakes? What is essentially a baked treat made with dog-friendly ingredients? Think of it as a mini-cake designed specifically for dogs consumption! What are some of the things like whole wheat flour, pumpkin puree, unsweetened applesauce, and peanut butter? The recipe avoids sugar, chocolate, and other no-nos for dogs. I use a simple Cream Cheese Frosting (also dog-friendly!) to make them look extra special. What are some of the best treats for dogs? Training rewards, or just a “good boy/girl” surprise. I always say it’s more about the healthy and happy pup than the fancy baking!
Why you will love this recipe?
Where do I start? What I love about this recipe is the complete control over the ingredients. I know what’s going into my dog’s treats, and that gives me peace of mind. No artificial colors, no weird preservatives – just wholesome goodness. The taste? I can’t vouch for the flavor profile in human terms, but the dogs go nuts for them!
- Flavor:The combination of pumpkin, Peanut Butter, and applesauce creates a naturally sweet and nutty flavor. What do dogs resist? I swear it’s like a party in their mouths!
- Simplicity:This recipe is surprisingly simple. It’s basically a dump and mix kind of deal. Even if you’re not a seasoned baker, you can nail these. My first batch was a complete success, and I’m no Martha Stewart!
- Cost-What are some of the best homemade dog treats? You probably already have most of the ingredients in your pantry.
- Versatility: You can easily customize these dog cupcakes to suit your dog’s preferences or dietary needs. Swap out the peanut butter for sunflower seed butter, or use a different type of flour. Get creative! I even made a batch with sweet potato once when I was out of pumpkin. They loved it!
How do you spoil your dog? What are dog cupcakes?
How do I make a dog cupcake?
Quick Overview
Is it easier to make barkday bites than teaching an old dog new tricks? What is the best way to mix dry ingredients with wet ingredients, bake and frost? The frosting is optional, but it adds that special touch. The whole process takes about 45 minutes, start to finish, and most of that is baking time. Is it worth it to watch your dog react to you?
Ingredients
For the Main Batter: Is there a
- 1 1/2 cups whole wheat flour (I always use organic, but any kind will do)
- 1 teaspoon of baking powder per 1 cup of water.
- 1/2 cup unsweetened applesauce (make sure it’s unsugarized)
- 1/2 cup pumpkin puree (not pumpkin pie filling)?
- What is the best Peanut Butter for dogs?
- 1/4 cup vegetable oil (I use coconut oil, melted, for extra flavor)
- 1 egg
For the Frosting: What is it
- 4 oz cream cheese, softened (I use low-fat)
- 1/4 cup Peanut Butter (again, xylitol-free)
- 1-2 tablespoons of milk or water (to adjust consistency)

Step-by-Step Instructions
Step 1: Preheat & Prep Pan
Preheat your oven to 350°F (175°C). Line a muffin tin with paper liners or grease it well. I prefer paper liners for easy cleanup, but greasing works just fine too. When your batter is ready, get this done first. How long does it take for my oven to preheat?
Step 2: Mix Dry Ingredients
In a medium bowl, whisk together the whole wheat flour and baking powder. Set aside. This ensures that the baking powder is evenly distributed throughout the flour, which will help the dough to be smooth. How do I make dog cupcakes? I always whisk it for at least 30 seconds.
Step 3: Mix Wet Ingredients
In a separate bowl, combine applesauce, pumpkin puree, peanut butter, vegetable oil, and egg. Set aside. Mix well until everything is fully combined. If your peanut butter is very thick, you might want to microwave it for a few seconds.
Step 4: Combine
Gradually add the wet ingredients to the dry ingredients, mixing until just combined. Be careful not to overmix, as this can result in tough dog cupcakes. A few lumps are okay. I use a rubber spatula to fold everything together gently.
Step 5: Prepare Filling
(This recipe doesn’t have a separate filling, just the frosting which is next!)
Step 6: Layer & Swirl
(No layering or swirling in this recipe, unless you get creative with the frosting!)
Step 7: Bake
How do you fill a muffin tin with the batter? Bake for 20-25 minutes, or until toothpick inserted into the center comes out clean. What are the best baking times to bake in your oven? Mine usually take about 22 minutes.
Step 8: Cool & Glaze
Let the dog cupcakes cool in the muffin tin for a few minutes before transferring them to a wire rack to cool completely. Once they are completely cool, you can frost them. To make the frosting, beat together the cream cheese and peanut butter until smooth. Add milk or water, one tablespoon at a time, until you reach your desired consistency. Frost the dog cupcakes and enjoy! I sometimes add a little dog biscuit crumble on top for decoration.
Step 9: Slice & Serve
Since these are small, there’s no slicing involved! Serve them whole to your deserving pup. Just make sure they’re completely cooled before serving. And as with any treat, moderation is key!
What should I serve it with?
Can you make a dog cupcake for yourself? What are some celebration ideas?
- For a Barkday Party:What are some dog-friendly treats to serve with cupcakes? I always set up a “pup-cuterie” board with variety of healthy options.
- As a training reward:Use small pieces of cupcake as a high-value reward during training sessions. My dogs are much more motivated when these are involved!
- For a special treat: Just because! There doesn’t need to be a special occasion to show your dog some love. I often give them one of these as a mid-week pick-me-up.
My family has a tradition of singing “Happy Birthday” to our dogs (yes, we’re *that* family), and these cupcakes are always the centerpiece of the celebration. It’s a little silly, but it brings us all so much joy!
Top Tips for Perfecting Your Dog Cupcakes
Over the years of making these, I’ve picked up a few tricks that I wanted to share to help you achieve dog cupcake perfection!
- Peanut Butter Choice: Always double-check that your peanut butter doesn’t contain xylitol. Seriously, this is super important! Xylitol is highly toxic to dogs.
- Applesauce Consistency: If your applesauce is particularly watery, you might want to drain off some of the excess liquid before adding it to the batter. This will prevent the dog cupcakes from being too soggy.
- Mixing Caution: Be careful not to overmix the batter. Overmixing can develop the gluten in the flour, resulting in tough dog cupcakes. Mix until just combined.
- Baking Time: Baking times can vary depending on your oven, so keep an eye on the dog cupcakes. They’re done when a toothpick inserted into the center comes out clean.
- Cooling Time: Make sure the dog cupcakes are completely cool before frosting them. Otherwise, the frosting will melt and slide right off.
- Frosting Consistency: Adjust the consistency of the frosting by adding milk or water, one tablespoon at a time, until you reach your desired consistency. I like mine to be thick enough to hold its shape, but still easy to spread.
- Ingredient Swaps: If your dog has allergies, you can easily substitute ingredients. For example, you can use sunflower seed butter instead of peanut butter, or oat flour instead of whole wheat flour. Just make sure the substitutes are safe for dogs.
One time, I accidentally used pumpkin pie filling instead of pumpkin puree, and the dog cupcakes came out way too sweet. Lesson learned! Now I always double-check the label before adding it to the batter.
Storing and Reheating Tips
These dog cupcakes are best stored in the refrigerator.
- Room Temperature: You can leave them out at room temperature for a few hours, but they’ll stay fresher longer if you store them in the fridge.
- Refrigerator Storage: Store the dog cupcakes in an airtight container in the refrigerator for up to 5 days.
- Freezer Instructions: You can also freeze them for up to 2 months. Wrap them individually in plastic wrap before placing them in a freezer-safe bag or container.
- Frosting Timing Advice: If you’re planning on freezing the dog cupcakes, it’s best to frost them after they’ve been thawed. The frosting can get a little weird in the freezer.
When you’re ready to serve them, simply let them thaw in the refrigerator or at room temperature. They’re delicious cold, so there’s no need to reheat them!
Frequently Asked Questions
Final Thoughts

So there you have it – my go-to dog cupcakes recipe! It’s a fun, easy, and healthy way to spoil your furry friend. Plus, it gives you the satisfaction of knowing exactly what’s going into their treats. If you enjoyed this recipe, you might also want to check out my homemade dog biscuit recipe – it’s another fan favorite! I hope your dog loves these as much as mine do. Happy baking (and happy treating!) I’d love to hear how yours turn out, so leave a comment below and let me know! And if you try any fun variations, be sure to share them too!
Dog Cupcakes Recipe
Ingredients
Main Ingredients
- 1 cup whole wheat flour
- 0.5 cup rolled oats
- 1 teaspoon baking powder
- 0.5 teaspoon baking soda
- 1 egg egg
- 0.5 cup plain yogurt
- 0.25 cup peanut butter
- 1 tablespoon honey
- 0.5 cup water
Instructions
Preparation Steps
- Preheat oven to 350°F (175°C). Line a muffin tin with cupcake liners.
- In a large bowl, whisk together flour, oats, baking powder, and baking soda.
- In a separate bowl, whisk together egg, yogurt, peanut butter, and honey.
- Gradually add the wet ingredients to the dry ingredients, mixing until just combined. Add water until desired consistency is reached.
- Fill cupcake liners about ¾ full.
- Bake for 20-25 minutes, or until a toothpick inserted into the center comes out clean.
- Let cool completely before serving.


