


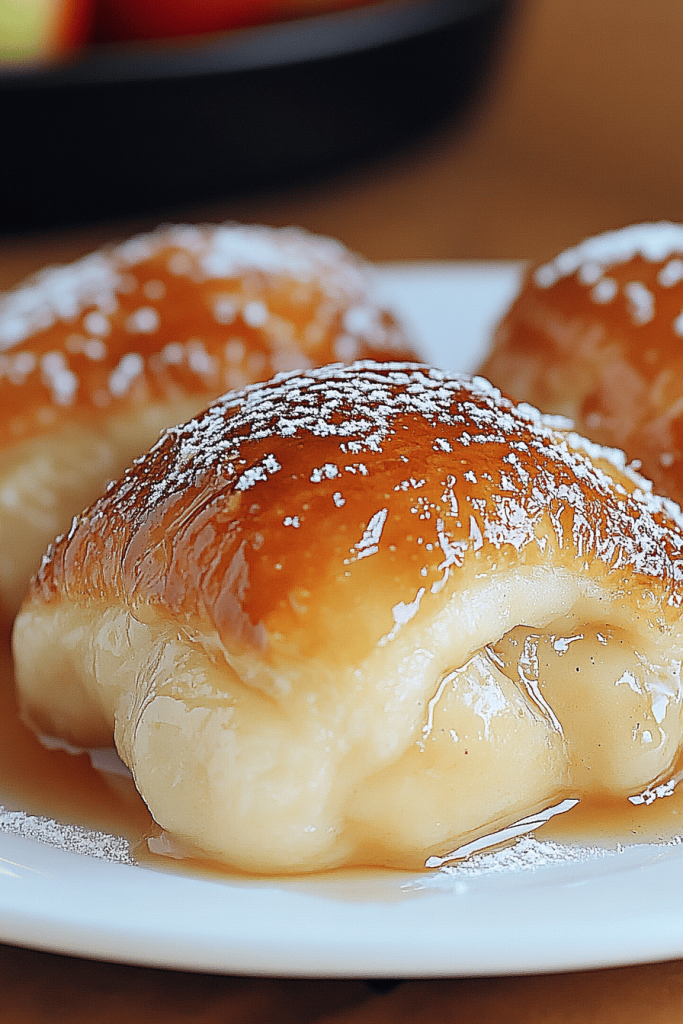
I’m sitting at the kitchen table with a mug of coffee, the window light just right, thinking about how this little Crescent Roll Apple pie magic came into my life. It started as a fast, comforting dessert for busy weeknights, when I needed something comforting but quick enough to serve after the kids finally stopped arguing about who had the last bite of apple. The crescent roll shortcut gives you a flaky, caramel-laced crust in minutes, and the apple filling tastes like autumn in a pan. Think of it as the cousin to a classic apple pie—same warm apple-spice embrace, but with a pastry shortcut that still feels special. This crescent roll apple pie is the kind of recipe you pull out when you’re short on time but want something that feels like a hug. The aroma alone will pull everyone to the kitchen, and trust me, you’ll be asked for seconds before you’ve even plated it. It’s a lifesaver on busy nights, and it always disappears in minutes at my house.
What is a crescent roll apple pie?
crescent roll apple pie is essentially a cozy, no-fuss dessert that uses refrigerated crescent roll dough to build a quick, irresistible crust around a sweet apple filling. Think of it as a dream-team shortcut: the buttery layers of crescent dough meet cinnamon-sugar apples, then bake into a golden, bubbly pie-flavored treasure. The name comes from crescents—those familiar triangular pastry shapes—and the familiar “pie” identity that all apple lovers recognize. It’s related to the idea of a Cinnamon Roll in spirit, but this version leans into apples, warm spice, and a final glaze that makes the surface gleam. It’s a product of lazy-yet-delicious cooking: you get the satisfying texture of a pie with the speed and ease of crescent dough. It’s essentially a small, dessert-for-everyone moment that you can whip up in under an hour without sweating over pie crust. My friends who never bake still feel comfortable making this crescent roll apple pie because the steps are intuitive and forgiving.
Why you’ll love this recipe?
What I love most about this crescent roll apple pie is how it hits the sweet spot between comforting nostalgia and practical cooking. The flavor is all about cinnamon-spiked apples that taste like a neighborhood bakery but prepared in your own kitchen. The glaze adds a glossy finish that makes the whole dish look like a showpiece, even though you barely spent time on it. The simplicity is genuine: you don’t need dry aged apples or a patchwork crust; you just layer, bake, and drizzle. It’s affordable, too—purchased crescent dough and a handful of apples make this a budget-friendly dessert that doesn’t feel cheap. Versatility is another big win: you can serve it warm with vanilla Ice Cream, or unwind with a cool slice on a quiet afternoon. If you’ve cooked through my other apple desserts, you’ll notice this one keeps the honest, homey flavor while letting you skip some of the fiddliness. What I love most about this crescent roll apple pie is that it’s a family favorite that’s easy enough for weeknights but special enough for weekend company. It’s a quick transformation from pantry staples into something that tastes like love in a pan.
How do I make a crescent roll apple pie?
Quick Overview
Here’s the simple arc: preheat, prep your pan, toss apples with a cinnamon-sugar whisper and a touch of lemon, lay crescent dough in a pan to form a crust, scatter the filling, top with more dough to create a layered, swirled top, bake until everything’s amber and bubbly, then glaze while it’s warm. It’s a shortcut with a big payoff: you get that flaky, buttery crust, the bright-tart apple filling, and a glossy glaze that ties it all together. The method is forgiving, meaning if you’ve got a short pan or extra apples, it’s easy to adapt. The result is a Crescent Roll apple pie that tastes like it took longer than it did—perfect for a cozy night after the kids are in bed or when friends drop by unexpectedly.
Ingredients
For the Main Dough:
8-count can of crescent roll dough (about 2 tubes), room temperature for easy handling, plus a light spray of nonstick cooking spray or a small pat of butter to grease the pan
For the Filling:
4 cups apples, peeled and thinly sliced (I like Pink Lady or Granny Smith for a little zing), 1/4 cup granulated sugar, 1 teaspoon ground cinnamon, 1/4 teaspoon ground nutmeg, 1 tablespoon lemon juice, pinch of salt, 1 tablespoon cornstarch or 1 teaspoon flour (to help thicken)
For the Glaze:
1/2 cup powdered sugar, 1–2 tablespoons milk or almond milk, 1/2 teaspoon vanilla extract, pinch of salt, optional 1/4 teaspoon lemon juice or maple for brightness
Step-by-Step Instructions
Step 1: Preheat & Prep Pan
Preheat your oven to 375°F (190°C). Lightly grease a 9-inch round or square baking dish. If you want crisper edges, you can line the pan with parchment, but I love the way the buttered edges caramelize directly on the pan too. If you’re using a dark-coated pan, start at 350°F and check around 25 minutes to prevent over-browning. I always give the pan a quick spritz of cooking spray once it’s ready so the dough releases cleanly after baking.
Step 2: Mix Dry Ingredients
In a small bowl, whisk the sugar with the cinnamon, nutmeg, and a pinch of salt. This is your spice backbone for the apple filling. I’ve learned that a little nutmeg goes a long way—don’t skip it, but don’t overdue it either. If you’re using cornstarch, toss it with the dry spices so it distributes evenly and doesn’t clump.
Step 3: Mix Wet Ingredients
In a separate bowl, toss the Apple Slices with lemon juice and vanilla. The lemon keeps the apples bright as they bake and helps prevent browning if you’re slicing ahead of time. If you’re not a vanilla fan, a light touch of almond extract can be lovely here, but I usually stick to vanilla for broad appeal.
Step 4: Combine
Sprinkle the dry mix over the apples and toss gently to coat. You’re aiming for even specks of cinnamon and just enough starch to give the filling some body as it bakes. If your apples are particularly juicy, you can add a teaspoon more cornstarch; you want the filling to hold its shape rather than oozing out.
Step 5: Prepare Filling
Let the mixture stand while you prep the dough. The resting moment lets the apple slices start to release their flavors, and the starching begins to set. If you like a tangier profile, add a splash more lemon juice. If you prefer a softer bite, you can slice the apples a touch thinner. This is the moment you can tailor the flavor—try a pinch of cinnamon-sugar on the apples for a treat with a more pronounced crust bite.
Step 6: Layer & Swirl
Unroll the crescent dough and lay the triangles in the greased pan to form a foundation crust. You’ll likely need to press and stretch the dough a bit to cover the bottom evenly. Spoon the apple filling over the crust, leaving a small border around the edge. If you want a more layered look, tuck a few small pieces of dough around the edge to create a ragged crust that bakes into a rustic, beautiful edge. Then lay the remaining crescent triangles on top, overlapping them slightly and gently pressing to seal. A quick swirl with a clean spatula or your fingers helps the top layer merge with the bottom, giving you a pie-like appearance without the fuss of making a traditional crust.
Step 7: Bake
Bake for 28–38 minutes, or until the top is deep golden brown and the filling is bubbling at the edges. If you notice the edges browning too quickly, tent with a sheet of foil for the last 5–7 minutes. Oven temperatures vary, so start checking around the 25-minute mark. The center should spring back lightly when touched. The sounds tell the story: you’ll hear a gentle sizzle as the apples soften and the dough bakes into a flaky, honeyed crust.
Step 8: Cool & Glaze
Let the crescent roll apple pie cool for 15–20 minutes before glazing. A warm glaze tends to run, but a cool glaze sets nicely and shines. Whisk the powdered sugar with milk and vanilla until smooth. If you want a brighter finish, add a splash of lemon juice. Drizzle in a thin, steady stream over the warm surface, letting it pool in the crevices and along the edges. The glaze is optional, but I love how it ties the whole dish together and gives that restaurant-like finish that says, yes, you planned this and it paid off.
Step 9: Slice & Serve
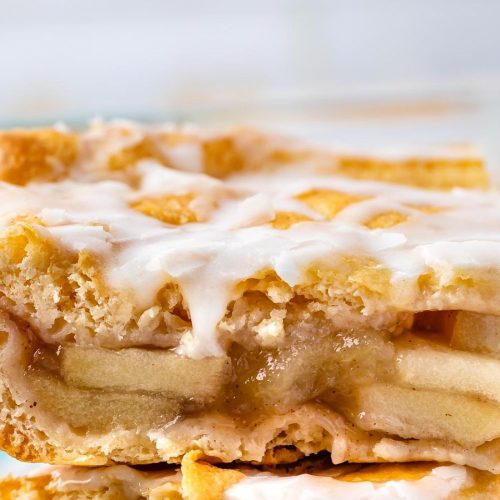
Slice with a sharp knife or a bench scraper for clean edges. This crescent roll apple pie is best served warm or at room temperature. A scoop of vanilla ice cream or a dollop of whipped cream adds a creamy counterpoint to the cinnamon notes, and you’ll notice the crust’s butteriness balances the apple’s slight tang. If you’re taking it to a potluck, a bar-style cut makes it easy to share and photograph for social after you’ve scooped a little extra glaze on top.
What to Serve It With
This crescent roll apple pie plays well across different moments, so here are a few ideas to keep the mood right for the occasion:
For Breakfast: Serve warm with a cup of black coffee or chai latte. The spice notes wake you up, and the crust satisfies that pastry craving without being overly heavy. A light dusting of cinnamon sugar on top makes it feel like a bakery item you snag on a weekend morning.
For Brunch: Present it with a scoop of cinnamon crème fraîche or a drizzle of maple syrup, plus a few micro-herbs of thyme if you’re feeling fancy. A sparkling apple cider compliments the flavors without overpowering them.
As Dessert: Warm slices with vanilla ice cream and a ribbon of caramel or toffee sauce gives you that “just baked” vibe. I love serving this during family dinners with a side of coffee or dessert wine—the contrast is comforting and celebratory.
For Cozy Snacks: Cut into smaller squares for a quick treat with tea in the afternoon. A sprinkle of coarse sugar or a pinch of sea salt on top adds a little counterpoint to the sweetness and makes the crust extra irresistible. This is a favorite after-school pick-me-up in our house, especially when the apples are at their best in late fall.
Top Tips for Perfecting Your crescent roll apple pie
These little refinements have saved me more evenings than I can count. They’re the kind of details that make a simple crescent roll apple pie feel truly special:
Apple Prep: Use a mix of tart and sweet apples for depth. If you only have one kind, slice them thinner so they cook evenly and won’t stay crunchy. Toss with lemon juice as soon as you cut them to prevent browning and to brighten flavor.
Moisture Control: If your apples are especially juicy, add a touch more starch to the dry mix or give the filling a brief rest before baking to help it set. Too much liquid can make the crust soggy; you want a balance that keeps the crust crisp at the edges.
Mixing & Texture: Don’t overwork the dough when you layer; you want those flaky layers not a dense sheet. If you’ve got extra dough, you can crisscross some strips on top to create a gentle lattice that signals “pie” to the eye.
Swirl Customization: For a more marbled top, you can press a few dollops of filling into the top layer before finishing the bake. A quick swirl with a knife can create pattern interest without breaking the dough’s layers.
Ingredient Swaps: For a gluten-free version, swap the crescent dough for a gluten-free crescent option and adjust bake time as needed. If you’re dairy-free, use a plant-based butter substitute in the filling and glaze. The structure holds, and you still get that satisfying crust bite.
Baking Tips: If your oven tends to run hot, consider placing the pan on a lower rack and checking earlier. If you want crisper edges, place the dish on a preheated baking stone or a heavy steel pan to distribute heat evenly.
Glaze Variations: Add a touch of maple, almond, or citrus zest to the glaze for a flavor upgrade. You can also skip the glaze and finish with a light dusting of powdered sugar and a sprinkle of cinnamon to keep things simple.
Lessons learned from years of making this: the joy is in the balance—crisp edges, tender apples, and a glaze that sings without overpowering. When I let the dough breathe for a minute before the final bake, the crust becomes extra flaky and the bottom stays less soggy. It’s those tiny adjustments that make this crescent roll apple pie feel timeless while still being refreshingly easy.
Storing and Reheating Tips
Storing this crescent roll apple pie is simple, and reheating doesn’t dull its charm. Here’s how I keep it at its best:
Room Temperature: The pie keeps beautifully for up to 2 days covered loosely with foil. You’ll still get flaky edges, and the filling will stay cohesive if you let it sit a bit after slicing.
Refrigerator Storage: If you’ve got leftovers beyond a day, store slices in an airtight container for up to 4 days. Reheat gently in a 325°F (165°C) oven for 8–12 minutes or microwave in short bursts to avoid sogginess.
Freezer Instructions: You can freeze baked slices, well wrapped, for up to 2 months. Thaw overnight in the fridge and rewarm in the oven or toaster oven until heated through and the crust regains a little crunch.
Glaze Timing Advice: If you’re freezing, you can keep glaze separate and apply after reheating for best texture. If you’re serving room temperature, a light glaze drizzle right before serving looks glossy and tastes fresh.
Quality indicators: the crust should be flaky, the filling should hold its shape, and the glaze should shine without pooling excessively. If any of those aren’t in place, adjust your bake time by 5–7 minutes or test the crust for doneness with a gentle press to ensure a light spring back.
Frequently Asked Questions
Final Thoughts
This crescent roll apple pie is a little treasure in my kitchen notebook. It’s the kind of dessert that makes you feel like you’ve got a secret shortcut to happiness, without sacrificing any of the homemade charm. The crust stays flaky, the apples stay juicy but not runny, and the glaze adds just enough gloss to keep people hovering near the cutting board. If you’re craving something that tastes like a hug after a long day, this recipe delivers. It’s versatile, forgiving, and friendly to a wide range of dietary needs with just a few simple swaps. I hope you’ll try it soon and tell me how your family devours it—share your tweaks, your favorite apples, and your own glaze variations in the comments. Happy baking!
crescent roll apple pie
Ingredients
Main Ingredients
- 2 cans crescent rolls 8 rolls per can, preferably seamless sheets
- 1 can apple pie filling 20 ounce can, any brand like Lucky Leaf or Comstock
Icing
- 0.5 cup powdered sugar
- 1 tablespoon heavy whipping cream add more as needed to thin icing
Instructions
Preparation Steps
- Preheat oven to 350°F. Spray a 9x13-inch pan with nonstick cooking spray.
- Open one can of crescent rolls and unroll dough (do not separate rolls). Lay the sheet of crescent roll dough in the bottom of the pan and press the seams together.
- Top with apple pie filling, spreading evenly over the bottom crust.
- Unroll second sheet of crescent rolls and press seams to adhere, then top the apple pie filling with the sheet, tucking the edges down to meet the bottom layer.
- Bake 30-40 minutes, or until the top is golden brown and the bottom is cooked through.
- Cool completely then make icing by whisking powdered sugar with 1 tablespoon heavy cream, adding more as needed. Drizzle over cooled pie.
- Store pie in refrigerator for up to 3 days. Pie can be frozen whole or in slices for up to 3 months.


