


Oh, friends, gather ’round! If there’s one recipe that instantly transports me back to cozy Christmases at Grandma’s house, it’s these Candy cane cream cookies. They’re not just cookies; they’re little pockets of pure, festive joy. You know those recipes that just feel like a warm hug? This is one of them for me. Every year, as soon as the air starts to get that crisp edge and the Christmas music starts playing, my kitchen calls for these. They’re surprisingly simple, which is a lifesaver during the holiday rush, and the combination of the creamy, slightly tangy cookie with that hint of peppermint? Absolutely divine. They remind me a little bit of my grandma’s famous shortbread, but with that extra special holiday sparkle. If you’re looking for a showstopper that’s actually achievable, you’ve found it. These candy cane cream cookies are my absolute go-to, and I’m so excited to share them with you.
What is candy cane cream cookie?
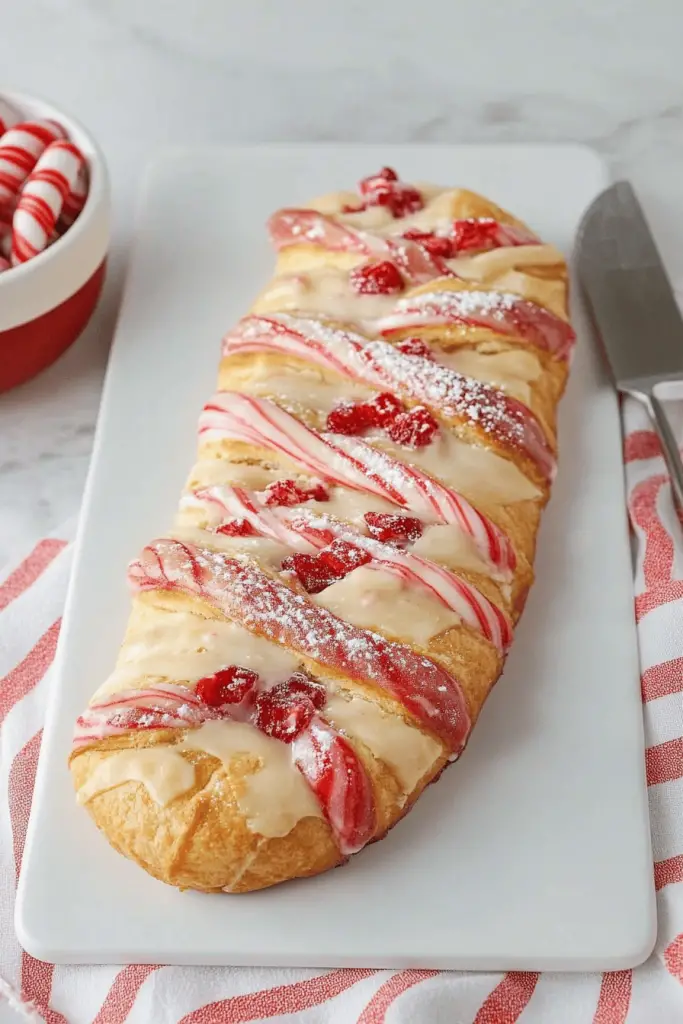
So, what exactly *are* these magical little treats? Think of them as a dream collaboration between a soft, tender sugar cookie and a delicate Cream Cheese cookie, all swirled with the festive zing of peppermint. The “cream” in candy cane cream cookies comes from a good dollop of cream cheese right in the cookie dough, which gives them an incredible tenderness and a subtle tang that perfectly balances the sweetness. Then, we swirl in that classic candy cane flavor and visual. It’s not an overpowering mint; it’s just enough to make you feel like you’re biting into a winter wonderland. The result is a cookie that’s soft, chewy in the center, slightly crisp on the edges, and just bursting with holiday cheer. They’re like a little holiday party happening right in your mouth, and honestly, who wouldn’t want that?
Why you
Okay, let me tell you why this recipe holds such a special place in my heart, and why I just know it’s going to become a favorite in your kitchen too. First off, the flavor profile is just out of this world. You get that comforting sweetness from the cookie base, a delightful little tang from the Cream Cheese that keeps them from being too cloying, and then BAM! That perfectly balanced peppermint swirl. It’s not harsh; it’s just bright and festive. And the texture! Oh, the texture is just heavenly. They’re not crunchy like a biscotti, nor are they super airy like a meringue. They have that perfect soft, chewy-in-the-middle, slightly-crisp-on-the-edges vibe that just melts in your mouth. My kids ask for these all the time, and they’re usually pretty picky!
Beyond the incredible taste and texture, the simplicity is a huge win. I’ve made countless batches of holiday cookies, and some can be really finicky. These candy cane cream cookies, though? They come together surprisingly quickly. The ingredients are all pretty standard pantry staples, which means you probably already have most of what you need. Plus, they’re incredibly cost-effective to make, especially when you’re trying to feed a crowd or whip up a bunch for holiday gifts. What I love most about this recipe, though, is its versatility. You can really play with the swirl, making it as bold or as subtle as you like. They look so festive on a cookie platter, and they’re perfect for sharing. Honestly, they’re a crowd-pleaser every single time.
How do I make candy cane cream cookies?
Quick Overview
This recipe is all about creating a tender, flavorful cookie dough and then infusing it with that classic peppermint swirl. We’ll cream together butter and Cream Cheese, add sugar, then eggs and vanilla. The dry ingredients are mixed separately and then gently combined. The magic really happens when we divide the dough, color one part red, and then swirl it all together before baking. It sounds like a few steps, but each one is super straightforward, and the visual reward at the end is totally worth it. You’ll be amazed at how easily you can create these beautiful, festive cookies!
Ingredients
For the
* 1 cup (2 sticks) unsalted butter, softened: Make sure it’s truly softened, not melted. This is key for getting that light, creamy texture. I always take mine out of the fridge about an hour before I plan to start.
* 4 ounces Cream Cheese, softened: Full-fat, block style is best here. It adds that lovely richness and chewiness. Don’t use the whipped kind in a tub!
* 1 1/2 cups granulated sugar: This gives us the perfect level of sweetness.
* 2 large eggs: Room temperature eggs incorporate better into the batter.
* 1 teaspoon vanilla extract: Pure vanilla extract makes a difference!
* 3 cups all-purpose flour: Spooned and leveled, not scooped. This ensures your cookies aren’t dry.
* 1 teaspoon baking powder: For a little lift.
* 1/2 teaspoon salt: Balances the sweetness beautifully.
* Red food coloring: Gel or liquid works fine. I prefer gel for a more vibrant color without adding too much extra liquid.
For the Filling:
* 1/2 teaspoon peppermint extract: This is where our candy cane flavor comes in! Start with 1/2 teaspoon, and if you’re a big peppermint fan, you can cautiously add a tiny bit more, but be careful not to overdo it. A little goes a long way.
* Crushed candy canes (optional, for garnish): This is totally optional, but it adds a lovely sparkle and crunch. I like to crush them in a zip-top bag with a rolling pin.
For the Glaze:
* 1 cup powdered sugar: Sifted, if you want a super smooth glaze.
* 2-3 tablespoons milk (or cream): You can also use water, but milk makes it a bit richer. Adjust the liquid until you get your desired drizzling consistency.
* 1/4 teaspoon peppermint extract (optional): If you want an extra punch of mint in the glaze.
Step-by-Step Instructions
Step 1: Preheat & Prep Pan
First things first, preheat your oven to 350°F (175°C). I like to line my baking sheets with parchment paper. This does two things: it prevents the cookies from sticking, and it makes cleanup a breeze. Honestly, the fewer dishes I have to wash during the holidays, the better!
Step 2: Mix Dry Ingredients
In a medium bowl, whisk together the flour, baking powder, and salt. Whisking them well ensures that the leavening agent and salt are evenly distributed, which is important for consistent cookies. Set this bowl aside for now.
Step 3: Mix Wet Ingredients
In a large bowl, cream together the softened butter and softened cream cheese until light and fluffy. This is where you want to get a good mixer going! You’re aiming for a smooth, well-combined mixture. Then, gradually beat in the granulated sugar until everything is combined and looks creamy. Next, beat in the eggs one at a time, making sure each one is fully incorporated before adding the next. Finally, stir in the vanilla extract.
Step 4: Combine
Now, gradually add the dry ingredients to the wet ingredients, mixing on low speed until just combined. Be careful not to overmix here! Overmixing can lead to tough cookies. You just want to mix until you don’t see any streaks of dry flour. The dough will be soft and a little sticky, which is exactly what we want.
Step 5: Prepare Filling
Take about half of your dough and place it in a separate bowl. To this half, add the peppermint extract. Mix it in gently until it’s evenly distributed. Now, take a small amount of red food coloring and add it to this peppermint-infused dough. Start with a few drops and mix until you achieve a nice, vibrant red color. You can always add more if you want it bolder. Be sure to wash your hands after handling the food coloring!
Step 6: Layer & Swirl
This is the fun part! Drop spoonfuls of both the plain white dough and the red peppermint dough onto your prepared baking sheets, alternating them. You don’t need to be too precise here – a rustic look is part of the charm! Then, take a knife or a toothpick and gently swirl the two colors together. You want to create a marbled effect, not completely mix them. Don’t go overboard with the swirling, or you’ll end up with pink cookies instead of a nice swirl. Just a few gentle passes will do.
Step 7: Bake
Bake for 10-12 minutes, or until the edges are lightly golden and the centers are set. The exact baking time will depend on your oven and the size of your cookies. I usually check mine around the 10-minute mark. They shouldn’t look overly brown; they’re meant to be soft and tender.
Step 8: Cool & Glaze
Let the cookies cool on the baking sheet for a few minutes before transferring them to a wire rack to cool completely. Once they’re totally cool, you can whip up the glaze. Whisk together the powdered sugar and milk (or water) until smooth. If you’re using the extra peppermint extract, stir that in now. Drizzle the glaze over the cooled cookies. If you’re using crushed candy canes, sprinkle them over the glaze before it sets. They look so pretty!
Step 9: Slice & Serve
Once the glaze is set, your candy cane cream cookies are ready to be enjoyed! I love them at room temperature. They’re perfect for gifting, for holiday parties, or just for a quiet moment with a cup of tea or coffee. They really do bring a smile to everyone’s face.
What to Serve It With
These candy cane cream cookies are so versatile, they fit into any holiday gathering or cozy moment. For breakfast, they are just delightful alongside a steaming mug of coffee or a warm cup of chai. The slight sweetness and hint of mint are a lovely gentle wake-up call. I love serving them on a cute little plate next to someone’s coffee cup as a surprise treat. For a more elaborate brunch spread, they make a beautiful addition. I often arrange them on a tiered stand with other pastries and fruit. The festive red and white swirl makes them look so elegant and inviting. They’re also fantastic as a simple dessert after a holiday meal. Paired with a scoop of vanilla ice cream or a rich hot chocolate, they’re just pure bliss. And for those quiet, cozy evenings when you just need a little something sweet, they’re the perfect companion. I’ll often just grab one (or two!) with a glass of milk while I’m curled up with a good book. My family also has a tradition of making a big batch and bringing them to our neighborhood holiday get-together, where they always disappear in minutes!
Top Tips for Perfecting Your Candy Cane Cream Cookies
After making these a gazillion times, I’ve picked up a few tricks that I think really make a difference. For the dough itself, the most crucial step is the creaming of the butter and cream cheese. You want it super light and fluffy. This is what gives the cookies their tender crumb and helps them spread just the right amount. If you don’t cream them enough, your cookies can end up dense. Don’t rush this part! When you’re mixing the dry ingredients into the wet, remember my rule: “just combined.” Seriously, overmixing is the enemy of tender cookies. As soon as you don’t see any dry flour, stop mixing. The dough will be soft, and that’s okay; it’s supposed to be. This ensures they don’t become tough.
The swirling technique is where you can really get creative. I like to use a butter knife and make just a few gentle passes through the dough. You want distinct swirls of red and white, not a uniform pink. If you over-swirl, you lose that beautiful marbling. For ingredient swaps, I’ve actually tested this with a dairy-free cream cheese alternative, and it worked surprisingly well, though the texture was slightly different – a bit softer, perhaps. If you’re not a huge fan of peppermint, you can absolutely skip the extract in the red dough and just use it for color, or even try a little almond extract for a different nutty flavor profile. Baking is all about getting to know your oven. My oven tends to run a little hot, so I often bake these closer to 10 minutes. Keep an eye on them, especially the first time you make them. You’re looking for lightly golden edges and a set center, not a deeply browned cookie. For the glaze, consistency is key. If it’s too thin, it’ll run off the cookies. If it’s too thick, it’ll be hard to drizzle. Start with 2 tablespoons of milk and add more, a tiny bit at a time, until it’s perfect for drizzling. And if you want a super smooth glaze, definitely sift your powdered sugar!
Storing and Reheating Tips
One of the best things about these candy cane cream cookies is how well they store, which makes them perfect for making ahead of the holiday madness! If you’re planning to enjoy them within a few days, you can store them at room temperature. Just pop them into an airtight container. I usually find they stay wonderfully soft and delicious for about 3-4 days this way. Make sure they’re completely cooled before sealing the container, or you might get some condensation, which can make them soggy.
If you need them to last a bit longer, the refrigerator is your friend. They’ll keep well in an airtight container in the fridge for up to a week. Just a heads-up, they might firm up a bit in the fridge, so if you prefer them softer, you can let them sit out at room temperature for about 15-20 minutes before serving. For really long-term storage, these cookies freeze beautifully! You can freeze them unglazed or even glazed, though I prefer to freeze them unglazed and add the glaze later. Place them in a single layer on a baking sheet in the freezer until firm, then transfer them to a freezer-safe bag or container. They’ll stay good in the freezer for up to 2-3 months. To thaw, just transfer them to the refrigerator overnight, and then bring them to room temperature. If you froze them unglazed, that’s the perfect time to add your glaze and any finishing touches like crushed candy canes. For reheating, if they’ve become a bit firm from refrigeration, a quick 10-15 second zap in the microwave on low power can sometimes soften them up, but usually, just letting them come to room temperature is best.
Frequently Asked Questions
Final Thoughts
So there you have it – my beloved candy cane cream cookies! I truly hope you give these a try. They’re more than just a sweet treat; they’re a little bit of holiday magic, a taste of nostalgia, and a whole lot of cozy comfort all rolled into one. The way the creamy cookie dough and the bright peppermint swirl come together is just perfection, and the fact that they look so stunning without a ton of fuss makes them a winner in my book. They’re perfect for sharing with loved ones, for holiday cookie exchanges, or simply for enjoying with a warm drink on a chilly evening. What I love most is seeing the joy they bring to my family and friends – that’s what baking is all about for me. If you love these, you might also adore my Frosted Sugar Cookies or my Spiced Gingerbread Cookies – they capture that same holiday spirit! I can’t wait to hear how your candy cane cream cookies turn out. Please leave a comment below and let me know your thoughts, or even share any fun twists you tried!
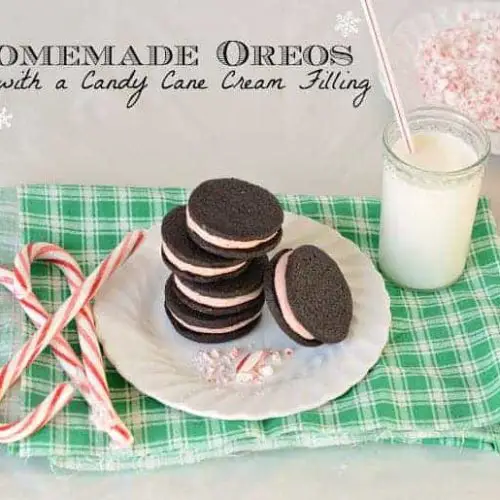
candy cane cream cookies
Ingredients
Main Ingredients
- 1.25 cup butter, at room temperature
- 2 cup powdered sugar
- 1 cup Dutch-processed cocoa powder or dark cocoa powder I used Hershey’s Special Dark
- 0.5 tsp salt
- 1 tsp vanilla extract
- 1.75 cup all-purpose flour
- 5.5 peppermint candy canes, crushed about 1 cup crushed, plus extra for garnish
- 0.75 cup butter, softened for filling
- 3 cup powdered sugar for filling
- 0.25 cup milk or cream for adjusting filling consistency
For Assembly
- cold milk for serving
Instructions
Preparation Steps
- In a stand mixer with a paddle attachment, cream the room-temperature butter and powdered sugar together on medium speed until light and fluffy, about 2 minutes. Add the cocoa powder, salt, and vanilla, and mix until fully incorporated. Gradually add the flour, half initially, then the rest 0.25 cup at a time, until a stiff, dry dough forms. Divide the dough in half, shape each into a disk, wrap in plastic wrap, and refrigerate for 15 minutes.
- Preheat oven to 350°F (175°C). Roll out one chilled dough disk between two sheets of parchment paper to 0.25 inch thickness. Use a 2-inch round cookie cutter to cut circles. Place on a parchment-lined baking sheet and bake for 9 minutes. Avoid overbaking to prevent bitterness. Cool completely on a wire rack. Repeat with remaining dough.
- While cookies cool, prepare the filling. Pulse the unwrapped candy canes in a food processor until fine dust. In a stand mixer, cream the softened butter, vanilla, and half of the powdered sugar until fluffy. Add the remaining powdered sugar and candy cane dust, mixing well. Add milk or cream gradually until the filling is thick but spreadable. Transfer to a piping bag with a large round tip.
- To assemble, pair cooled cookies by size. Pipe a quarter-sized ring of filling onto the flat side of one cookie. Top with its matching cookie, pressing gently until filling reaches the edges. Repeat for all remaining cookies. Let rest 10 minutes for filling to set.
- Serve candy cane cream cookies with cold milk. Best enjoyed same day; store leftovers in an airtight container at room temperature for up to 3 days.


