


Late at night, I brew a strong cup of coffee and the kitchen fills with chocolatey warmth—the kind of warmth you save for tired days or celebrations that don’t need a crowd. This is my go-to little moment of joy: a brownie in a mug that tastes like a bakery secret but is basically a cunningly quick hug in a cup. If you’ve ever wished for that fudgy, crackly-crust brownie fix after a long day, you’re in the right place. It’s incredibly forgiving, and yes, it’s the kind of treat you can pull together in the time it takes to steam your milk. This brownie in a mug is my shortcut to dessert bliss without turning on the oven for an hour. I’ve tested it with almond milk, Dark Chocolate chips, and a whisper of espresso powder—the result is always cozy, never dry, and so satisfying it earns a standing smile from my family. If you’re comparing it to a sheet-pan brownie, think of this as the intimate, single-serving version that still tastes like a celebration in disguise.
What is Brownie in a Mu
Think of brownie in a mug as a single-portion, fast-acting brownie that comes together in minutes and bakes in a mug or ramekin. It’s essentially a tiny chocolate loaf that sprints from bowl to mug to mouth with minimal cleanup. The name comes from the way it’s prepared—dry ingredients whisked together, wet ingredients folded in, and then zapped with heat until the edges set and the center stays gloriously fudgy. It’s the kind of treat I reach for when I’m craving something chocolatey but don’t want to commit to a full pan. My kids actually beg for it after school, and I love how you can customize each mug to match the mood—vanilla for a classic, espresso for a cafe twist, or a swirl of Cream Cheese for a cheesecake-like surprise.
Why you’ll love this recipe?
What I love most about this brownie in a mug is how it feels like a little secret you share with yourself. It’s got a deep chocolate flavor that somehow tastes richer than the minute you spend making it. The aroma alone—rich cocoa, a hint of vanilla, a warm note from the butter—pulls everyone toward the kitchen. It’s incredibly simple: you mix, you nuke or bake, you grin and dive in. It’s a lifesaver on busy nights, a post-dinner hug, and a midnight treat that won’t derail your entire day the way a full cake would. Budget-friendly ingredients mean you can whip this up for a cozy family moment without fuss. And the versatility is what keeps me coming back—swap in almond milk if you’re dairy-free, toss in chocolate chips for extra melt, or swirl in a tangy Cream Cheese center for a playful contrast. This brownie in a mug isn’t just a dessert; it’s a tiny ritual that quietly says, I’m glad you’re here.
How do I make a Brownie in
Quick Overview
If you’re new to mug brownies, here’s the quick version: whisk together the dry ingredients, whisk together the wet ingredients, combine until just blended, and either bake in a preheated oven or microwave in a mug until it’s set with a glossy top. The beauty is in its speed—in about 5 minutes you’ve got something that tastes way more indulgent than you’d expect for something that took so little time. No special equipment required, and you can tailor it to what you have on hand. The result is a fudgy, not-too-sweet cupful of dessert that feels like a hug in a mug.
Ingredients
For the Main Batter:
- 4 tablespoons all-purpose flour (or 3 tablespoons if you want a denser, more fudgy texture)
- 2 tablespoons unsweetened cocoa powder (preferably dutch-processed for a smoother flavor)
- 2–3 tablespoons granulated sugar (adjust to taste; you can go a touch less if you like it darker)
- 1/4 teaspoon baking powder
- Pinch of salt
- 3 tablespoons milk (dairy or non-dairy works; I like almond milk for a lighter feel)
- 1 tablespoon melted butter or oil (coconut oil also works well)
- 1/4 teaspoon vanilla extract
- Optional: a pinch of espresso powder or dark chocolate chips
For the Filling:
- Optional swirl ideas to surprise you:
- 1 tablespoon cream cheese, softened with a pinch of sugar
- 1 teaspoon Peanut Butter or hazelnut spread
- Extra chocolate chips tucked into the center
For the Glaze:
- 1 tablespoon powdered sugar
- 1–2 teaspoons milk or dairy substitute
- Optional: 1/4 teaspoon cocoa powder for a richer glaze
Step-by-Step Instructions
Step 1: Preheat & Prep Pan
If you’re using the oven, preheat to 350°F (175°C) and lightly grease a microwave-safe mug or a small ramekin. If you’re going the microwave route, you can skip the oven preheat, but you still want a clean, greased mug so the cake doesn’t stick. A quick spritz with pan spray or a smear of butter does the trick. Don’t fill past halfway; it loves room to rise a little.
Step 2: Mix Dry Ingredients
In a small bowl, whisk together the flour, cocoa powder, sugar, baking powder, and salt. I like to sift the cocoa first if I have a moment—it keeps the texture ultra-smooth and avoids any cocoa lumps that could leave you with a grainy bite.
Step 3: Mix Wet Ingredients
In another bowl, whisk the milk, melted butter (or oil), and vanilla until well combined. If you’re using espresso powder, whisk it in now to wake up the chocolate flavor.
Step 4: Combine
Pour the wet mixture into the dry and stir just until you don’t see dry flour. A few small lumps are totally fine; overmixing makes the texture tougher, and we want fudgy, not chewy. If you’re going for a silkier batter, you can whisk a little longer, but stop as soon as it looks cohesive.
Step 5: Prepare Filling
If you’re adding a filling swirl, drop small dollops onto the center of the batter. You’ll swirl a bit later to create marble patterns. If you’re keeping it simple, skip this step and let the batter stand as is.
Step 6: Layer & Swirl
Gently drop a few blobs of your cream cheese or Peanut Butter into the center. Use a toothpick or skewer to swirl it through the batter in a few quick moves. You’re aiming for ribbons of filling peeking through, not a full swirl—this keeps a lovely center surprise without turning the mug into a middle-filled mess.
Step 7: Bake
For oven-style baking, bake in the preheated oven for about 14–18 minutes, watching for a glossy top and a set edge with a slightly soft center. For microwave magic, cook on high for 1–2 minutes, checking at 1 minute. The top should look set but still have a fudgy jiggle in the center. Microwaves vary, so think of this as a starting point and adjust by 15–20 seconds if needed. If you notice it rising too much, give it a tiny poke with a clean utensil and nuke a little longer in short bursts.
Step 8: Cool & Glaze
Let it rest in the mug for a minute or two to finish setting. Then drizzle with the glaze if you like something a touch sweeter. For a glossy finish, whisk together powdered sugar and milk until you reach a pourable consistency, then drizzle lightly. A cocoa powder-tinted glaze adds depth. If you’re dairy-free, use a splash of almond or oat milk and a dash of vanilla instead.
Step 9: Slice & Serve
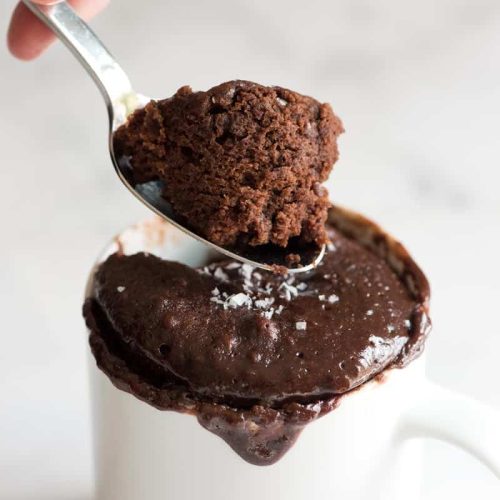
The best way to serve is warm, with a scoop of vanilla ice cream or a dollop of whipped cream if you’re feeling extra indulgent. If you want clean slices, wait a minute more for the mug brownie to slightly firm up, then use a sharp spoon to carve out wedges. The bite should be fudge-soft, a little crusty around the edges, and perfectly indulgent in the center. My family loves it with a little sea salt sprinkled on top for that sweet-salty balance.
What to Serve It With
There are so many ways to dress up this comforting mug brownie. It’s the kind of dessert that shines with simple, thoughtful pairings.
For Breakfast: A dab of marscapone or a light cream cheese spread can turn this into a decadent morning treat. Pair with a strong morning coffee or a latte with a hint of cinnamon to echo the chocolate notes.
For Brunch: Plate it with fresh berries and a dollop of vanilla yogurt, or serve in a mini glass with a drizzle of maple for a brunchy twist.
As Dessert: Serve warm with vanilla ice cream melting over the top, plus a sprinkle of flaky sea salt. A few shaved chocolate curls or a dusting of cocoa powder makes it feel extra special for a simple weeknight dessert.
For Cozy Snacks: A mug brownie pairs beautifully with a mug of hot cocoa or a glass of cold milk. It’s the perfect late-evening, screen-time treat when you want something comforting but quick.
There’s something special about how this little dessert shifts with mood and ingredients. This is my family’s after-dinner ritual, especially on chilly evenings when the house smells like cocoa and warmth. The recipe is forgiving—if you’re short on one ingredient, you can swap in something similar, and it still tastes like a tiny celebration. My kids love to customize their own mug with different mix-ins, and I love how the kitchen becomes a cozy corner of conversation and laughter with each mug we savor together.
Top Tips for Perfecting Your Brownie in a Mug
Let me share a few tricks I’ve learned over the years. Small tweaks make a big difference, and they keep this recipe reliably delicious every time.
Best Flour & Cocoa: Use a good-quality cocoa powder and, if you can, a 1:1 gluten-free flour blend to switch things up without losing that fudgy feel. Unsweetened cocoa powder gives the deepest flavor; Dutch-processed cocoa yields a silkier, less acidic finish.
Mixing Technique: Don’t overmix the batter once the wet hits the dry. A few lumps are okay. Overmixing activates gluten and can make the texture tougher. Stir just until the flour disappears and you’ve got a smooth, velvety batter.
Swirl Customization: The swirl is where the personality hides. Try a little almond butter, a pinch of cinnamon with the cocoa, or a swirl of cream cheese for a cheesecake-like surprise. For a striking marbling effect, layer half the batter, dollop the swirl, then top with the rest and swirl gently with a toothpick.
Ingredient Swaps: Dairy-free? Use almond or oat milk and a neutral oil instead of butter. You can swap half the flour for finely ground almonds for a nuttier bite. Want extra fudgy edges? Add another tablespoon of melted chocolate or chocolate chips.
Baking Tips: If you’re baking in the oven, keep an eye on it around 14 minutes; the center should still have a gentle jiggle. In the microwave, every watt is different—test at the 1-minute mark and add 15–20 seconds if needed. Use a larger mug if you want a taller cake with a more dramatic crust.
Glaze Variations: A simple glaze is bright and light, but you can go richer with a ganache by melting 1 tablespoon chocolate with 1 teaspoon coconut milk. A peppermint glaze or a tiny drop of orange zest in the glaze can transform the flavor profile for different occasions.
These notes come from countless late-night kitchen experiments. The best part is that this recipe has become a tiny, reliable ritual—the moment the mug goes into the heat, the room fills with the scent of melted chocolate and memory. I test new tweaks and, more often than not, they stick because they feel like they were always meant to be here in this easy, homey moment.
Storing and Reheating Tips
Leftover brownie in a mug? If there are any, you probably won’t have many, but I’ve got you covered for future moments.
Room Temperature: Best enjoyed fresh, but a wrap and a quick re-crisp in the toaster oven for a minute or two can revive a slightly softened center. Store in an airtight container for up to 24 hours if you must.
Refrigerator Storage: Not ideal, but if you must, store the cooled brownie in an airtight container for up to 2 days. Reheat gently in the microwave in 15-second bursts, checking after each until it’s warm and fudgy again.
Freezer Instructions: Freeze individual portions wrapped tightly in plastic and stored in a freezer bag for up to 1 month. Defrost in the fridge overnight, then reheat briefly in the microwave or a few minutes in a small skillet to restore texture.
Glaze Timing Advice: If you plan to store, skip the glaze until you’re ready to serve. Glazes can soften after refrigeration, so glaze just before serving for the crisply glossy finish you want.
Practically, this means you can make a batch of batter, freeze individual portions, and in a pinch, you’ve got almost-instant dessert ready with very little additional effort. The texture is best when it’s freshly heated, but the mug brownie holds up surprisingly well if you give it a little extra heat and a quick glaze refresh.
Frequently Asked Questions
Final Thoughts
This brownie in a mug is a small, reliable celebration—glorious in its simplicity and endlessly adaptable. It’s the kind of recipe you reach for when you want something comforting yet fast, something that feels like a hug but doesn’t demand a full kitchen saga. Family members love it because they can personalize their mug, while you love how it stays consistently delicious, no matter how many times you’ve made it. If you’re craving a little chocolate moment before bed or during a busy afternoon, this is your go-to. Try a few of the variations I mentioned, and I’d love to hear what you discover—your favorite fill-for-the-center, your best glaze, your best mug. Happy baking, friends, and may your mug be ever fudgy and bright! If you give it a try, drop a comment with how you customized yours, and don’t forget to rate the recipe. I can’t wait to see your twists.
brownie in a mug
Ingredients
Main Ingredients
- 2 tablespoon unsalted butter
- 1 tablespoon granulated sugar
- 2 tablespoon brown sugar
- 1 teaspoon vanilla extract
- 1 large egg yolk
- 1.5 tablespoon all-purpose flour
- 1 tablespoon unsweetened cocoa powder
- 0.5 teaspoon milk to adjust consistency
Instructions
Preparation Steps
- Add the butter to a microwave-safe mug and microwave for 20-30 seconds until fully melted.
- Add both sugars, vanilla extract, and egg yolk to the mug. Stir well with a spoon until fully combined.
- In a separate small bowl, mix the flour, cocoa powder, and salt. Add to the mug and stir until just combined and smooth.
- Pour in the milk to adjust thickness and stir gently. The batter should be thick but pourable.
- Microwave on high for 90 seconds. Check for doneness; if still undercooked, 15-second intervals until done. Be careful not to overcook.
- Let cool for 1-2 minutes before enjoying directly from the mug.


