


Oh, where do I even begin with these berry coconut rocket pops? They’re more than just a frozen treat; they’re a little burst of pure joy, a flashback to sticky-fingered summer days, and honestly, a secret weapon in my arsenal for those sweltering afternoons when everyone needs a little cooling down. You know those days, right? The ones where the heat just seems to seep into your bones and the thought of turning on the oven is just… nope. That’s when these beauties come to the rescue. They’re vibrant, they’re refreshing, and the combination of sweet berries and creamy coconut is just spot on. I’ve tried making a million different popsicles over the years, but there’s something so uniquely satisfying about these. They remind me a bit of those classic rocket pops we all grew up with, but with a much more grown-up, sophisticated flavor that even my picky eaters adore. Seriously, the smell alone when they’re blending makes my kids come running!
What are berry coconut rocket pops?
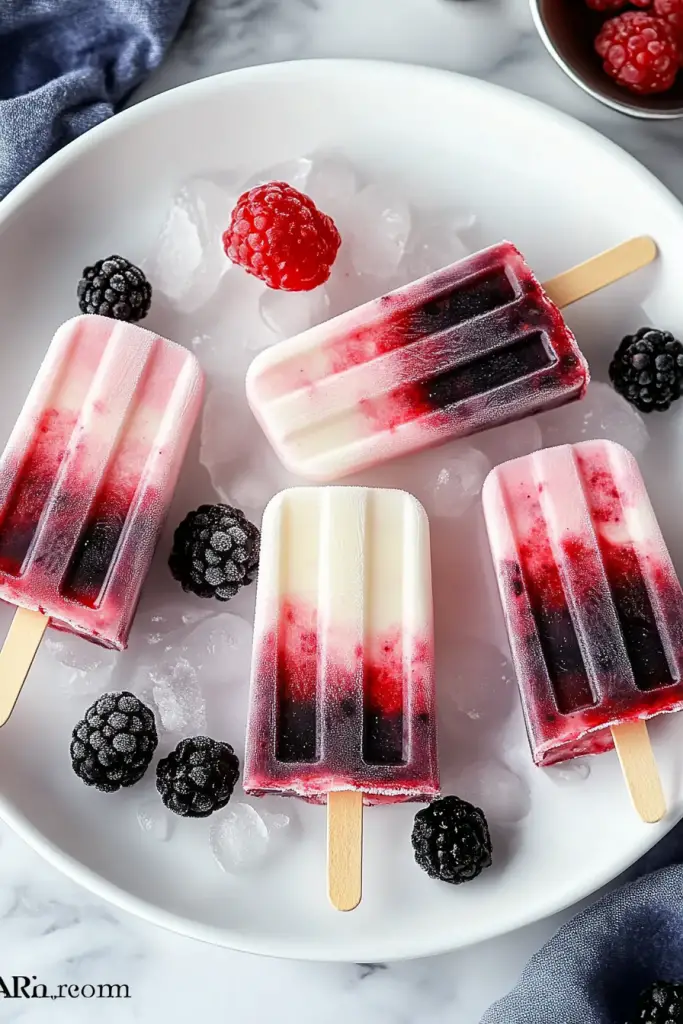
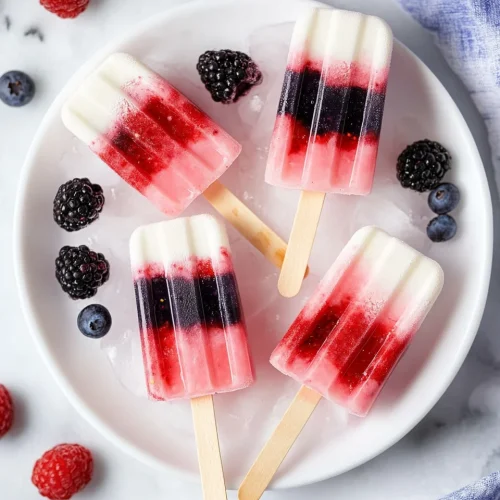
So, what exactly are these magical little pops? Think of them as an elevated, homemade version of those iconic, red-white-and-blue rocket pops you probably remember from your childhood. But instead of artificial colors and flavors, we’re talking real, juicy berries and luscious, creamy coconut milk. It’s essentially a three-layered dream: a vibrant strawberry layer at the bottom for that classic sweetness, a Creamy White coconut layer in the middle to add richness and a tropical vibe, and then a bright, zesty raspberry or mixed berry layer on top for a little tang. The “rocket” shape comes from the classic popsicle molds, giving them that nostalgic silhouette. It’s a simple concept, really – layering different fruit purees with coconut milk – but the magic is in the balance of flavors and the incredibly satisfying texture. It’s a whole lot more wholesome and a whole lot tastier than anything you’ll find in the grocery store freezer aisle.
Why you’ll love this recipe?
Let me tell you, there are so many reasons why this berry coconut rocket pops recipe has become a staple in my kitchen, and I just know you’re going to fall head over heels for it too. First off, the flavor! Oh my goodness, the flavor. It’s like a party in your mouth. You get the sweet, familiar taste of strawberries, followed by the smooth, almost custardy richness of the coconut layer, and then that bright, slightly tart berry explosion on top. It’s perfectly balanced – not too sweet, not too tart, just… *chef’s kiss*. And don’t even get me started on the texture. When they’re frozen just right, they have this incredible creamy-yet-icy consistency that’s just pure bliss on a hot day.
Then there’s the sheer simplicity of it all. You might look at the three layers and think, “This is going to be complicated,” but trust me, it’s surprisingly straightforward. We’re talking mostly blending and freezing. It’s the kind of recipe that makes you feel like a kitchen wizard without actually having to break a sweat. Plus, it’s ridiculously budget-friendly. Berries can sometimes be a splurge, but when you buy them in season or frozen, they’re quite economical, especially when you consider how many popsicles you get out of a single batch. And the coconut milk? That’s usually pretty affordable too.
Beyond the taste and ease, these pops are also incredibly versatile. You can swap out the berries for whatever you have on hand – blueberries, blackberries, even a mix! If you’re not a fan of coconut milk, I’ve experimented with other milks, and while coconut is my favorite for its creaminess, almond milk or even a good quality oat milk can work in a pinch. What I love most is how satisfying they are as a healthy-ish dessert. When I’m craving something sweet after dinner but don’t want to go overboard, these are my absolute go-to. They feel indulgent but are packed with real fruit and healthy fats. It’s a win-win-win, honestly!
How do you make a berry coconut rocket pop?
Quick Overview
Making these berry coconut rocket pops is a breeze, even with the three distinct layers. The process is essentially creating three separate fruit or milk mixtures, carefully pouring them into your rocket-shaped popsicle molds, and then letting the magic of the freezer do its thing. We’ll start by blending the bottom berry layer, then the creamy coconut middle, and finally the top berry layer. Each layer needs a little time to firm up before the next one is added, which ensures those clean, distinct stripes. It’s a patient process, but so worth it for the beautiful results. You’ll be amazed at how professional these look coming out of the mold!
Ingredients
For the Strawberry Layer (Bottom):
2 cups fresh or frozen strawberries, hulled
1-2 tablespoons maple syrup or honey (adjust to sweetness of berries)
1 tablespoon fresh lemon juice (optional, for brightness)
For the Coconut Layer (Middle):
1 can (13.5 oz) full-fat coconut milk, well shaken (important for creaminess!)
1-2 tablespoons maple syrup or honey
1/2 teaspoon vanilla extract
For the Raspberry/Berry Layer (Top):
2 cups fresh or frozen raspberries (or a mix of raspberries and blueberries/blackberries)
1-2 tablespoons maple syrup or honey (adjust to sweetness of berries)
1 tablespoon fresh lime juice (optional, for a zingy finish)
Step-by-Step Instructions
Step 1: Prepare Your Molds
Gather your rocket-shaped popsicle molds. If they’re new, give them a quick wash. Make sure you have enough molds for your batch, and if they come with a stand or a tray, get that ready so your molds stay upright in the freezer. It’s always a good idea to have the lids or sticks ready to go for when you start filling.
Step 2: Blend the Strawberry Layer
In your blender, combine the strawberries, 1-2 tablespoons of maple syrup (start with less and taste!), and the optional lemon juice. Blend until completely smooth. If you’re using frozen strawberries, you might need to add a tablespoon or two of water to get it going. The consistency should be like a thick smoothie. Taste and add more sweetener if needed. This vibrant red layer is the foundation of our rocket pops!
Step 3: Blend the Coconut Layer
Rinse out your blender. Add the full-fat coconut milk (give that can a good shake first!), 1-2 tablespoons of maple syrup, and the vanilla extract. Blend until smooth and creamy. This layer is our luscious white stripe. Taste and adjust sweetness if desired. The richness of the coconut milk is key here for a smooth texture.
Step 4: Blend the Raspberry/Berry Layer
Rinse the blender one last time. Add your raspberries (or berry mix), 1-2 tablespoons of maple syrup, and the optional lime juice. Blend until smooth. If you’re using frozen berries, you might need a tiny splash of water. This layer should be similar in consistency to the strawberry layer. Adjust sweetness and tanginess to your liking.
Step 5: Pour the First Layer
Carefully pour the strawberry mixture into the bottom of each rocket pop mold, filling them about one-third of the way up. Place the lids/sticks onto the molds, ensuring they stand upright. Place the molds into your freezer and let them freeze for about 45-60 minutes, or until the strawberry layer is firm to the touch but not rock solid.
Step 6: Pour the Second Layer
Once the strawberry layer is firm, carefully remove the molds from the freezer. Gently pour the coconut milk mixture on top of the strawberry layer, filling the molds to about two-thirds of the way full. Return the molds to the freezer and let this layer freeze for another 45-60 minutes, or until firm.
Step 7: Pour the Final Layer
When the coconut layer is firm, it’s time for the top berry layer! Carefully pour the raspberry or mixed berry mixture on top of the coconut layer, filling the molds almost to the very top. Make sure to leave a tiny bit of space as liquids expand when frozen. Place the lids/sticks back on securely.
Step 8: Freeze Completely
Return the filled molds to the freezer and let them freeze completely. This usually takes at least 4-6 hours, but it’s best to leave them overnight to ensure they are frozen solid. The anticipation is part of the fun!
Step 9: Unmold and Serve
When you’re ready to enjoy, carefully remove the rocket pops from their molds. If they’re sticking a little, you can run the outside of the mold under warm water for a few seconds. Serve immediately and watch them disappear!
What to Serve It With
These berry coconut rocket pops are pretty much a standalone star, but that doesn’t mean they can’t be part of a larger culinary celebration! For a leisurely breakfast, especially on a weekend when you have a bit more time, I love serving one alongside a fluffy stack of pancakes or some of my famous blueberry muffins. The cool, refreshing pop cuts through the richness of the breakfast treats beautifully. For a more elaborate brunch spread, picture these lined up next to mini quiches, a fresh fruit salad, and perhaps some mini croissants. They add such a festive splash of color to the table!
As a dessert, these are just dynamite. Serve them after a lighter meal like grilled chicken or a fresh salad. They’re also fantastic for a summer barbecue, acting as a delightful palate cleanser after smoky grilled mains. And for those lazy summer afternoons when the kids are home and the Ice Cream truck just isn’t cutting it? These are pure comfort. I often serve them with a side of fresh fruit, or sometimes, just on their own as a special afternoon treat. My kids also love to “decorate” their own pops with a little drizzle of melted dark chocolate if they’re feeling fancy. It’s these simple moments, sharing a sweet, cool treat together, that really make summer magical.
Top Tips for Perfecting Your Berry Coconut Rocket Pops
I’ve made these berry coconut rocket pops more times than I can count, and over the years, I’ve picked up a few tricks that really elevate them from good to absolutely spectacular. First off, the quality of your coconut milk makes a *huge* difference for that middle layer. Always go for full-fat canned coconut milk. The kind you find in a carton for drinking is too watery and won’t give you that creamy, luscious texture. Give that can a really good shake before you open it to ensure the cream and water are well combined.
When it comes to the berries, freshness is great, but frozen berries are often my secret weapon, especially if you’re making these outside of peak berry season. They’re usually picked at their prime and frozen, locking in all that wonderful flavor. Plus, they’re often more budget-friendly. Just make sure to blend them thoroughly to avoid any icy chunks. If your berries are on the tart side, don’t be afraid to add a little extra maple syrup or honey – taste as you go! It’s better to start with less and add more than to make them too sweet.
Patience is key when layering. You really want each layer to be firm before adding the next. If you pour the second layer onto a liquid first layer, they’ll just blend together, and you won’t get those beautiful distinct stripes. It might mean a quick trip back to the freezer between layers, but it’s worth every extra minute. For the swirls, I sometimes like to gently swirl a toothpick through the layers *very lightly* just as I’m adding them, but honestly, the clean layers look fantastic on their own.
Ingredient swaps are definitely doable! If you’re not a fan of strawberries, blueberries or even mango puree can make a delicious bottom layer. For the top layer, if raspberries are too tart for your liking, a mixed berry blend or even a simple blueberry puree works wonderfully. I’ve even experimented with adding a tiny pinch of cardamom or a whisper of ginger to the coconut layer for a little extra warmth and spice, though it’s delicious just as it is. Remember, the goal is deliciousness and fun!
Storing and Reheating Tips
These berry coconut rocket pops are best enjoyed fresh, but I totally get that sometimes you make a big batch and need to store them. The good news is, they store pretty well! For short-term storage, you can keep them in the popsicle molds in the freezer for a few days. However, if you want them to last longer or make them easier to grab individually, it’s best to unmold them first.
Once they’re out of the molds, wrap each rocket pop individually and tightly in plastic wrap, then place them in a freezer-safe bag or container. This double-wrapping helps prevent freezer burn. They should stay delicious for up to 2-3 weeks this way. Any longer and they might start to lose a bit of their optimal texture, though they’ll still be safe to eat. When you’re ready to serve them from storage, just unwrap and enjoy! You don’t need to reheat them, of course – they’re meant to be eaten frozen!
Frequently Asked Questions
Final Thoughts
Seriously, if you’re looking for a way to beat the heat and bring a smile to everyone’s face, these berry coconut rocket pops are it. They’re so much more than just a frozen treat; they’re a reminder of simpler times, a way to enjoy real, delicious fruit, and a guaranteed crowd-pleaser. I’ve lost count of how many times my kids have asked for these on a hot day, and honestly, I’m always happy to oblige because I know exactly what’s in them. They’re vibrant, they’re refreshing, and that combination of berry goodness with creamy coconut is just pure perfection.
If you loved these berry coconut rocket pops, you might also enjoy some of my other no-bake summer treats, like my No-Bake Mango Cheesecake or my refreshing Watermelon Mint Granita. They’re all about simple, fresh flavors that are perfect for warm weather! I can’t wait to hear what you think of these pops. If you give them a try, please leave a comment below and let me know how they turned out, or share your own favorite berry combinations! Happy freezing!
Berry Coconut Rocket Pops
Ingredients
Main Ingredients
- 1.5 cup mixed berries fresh or frozen
- 1 cup full-fat coconut milk
- 0.5 cup honey or maple syrup adjust to taste
- 0.25 cup lime juice
- 0.5 teaspoon vanilla extract
Instructions
Preparation Steps
- In a blender, combine the mixed berries, coconut milk, honey or maple syrup, lime juice, and vanilla extract.
- Blend until smooth and creamy. If using frozen berries, you may need to add a splash of water or more coconut milk to help it blend.
- Pour the mixture into popsicle molds, leaving a small space at the top for expansion.
- Insert popsicle sticks and freeze for at least 4-6 hours, or until solid.
- To unmold, run the molds under warm water for a few seconds before gently pulling out the popsicles.


