


Okay, can we talk about appetizers for a second? Specifically, those moments when you’re craving something a little bit special, something that feels celebratory and indulgent, but you also don’t want to spend an eternity in the kitchen? I’ve been there, my friends. So many times I’ve found myself staring into the fridge, dreaming of that glorious, crispy, golden-brown explosion of flavor that is a blooming onion. But the thought of deep frying? Forget it. It’s messy, it’s intimidating, and honestly, it’s just too much for a weeknight. That’s why I was absolutely thrilled when I finally perfected this baked blooming onion recipe. It’s like magic. You get all the visual drama, all that irresistible savory-sweetness, and none of the frying fuss. This is the one I pull out when friends are coming over, or when the kids demand something “fancy” for dinner, and it always, *always* gets rave reviews. It’s truly a lifesaver!
What is baked onion?
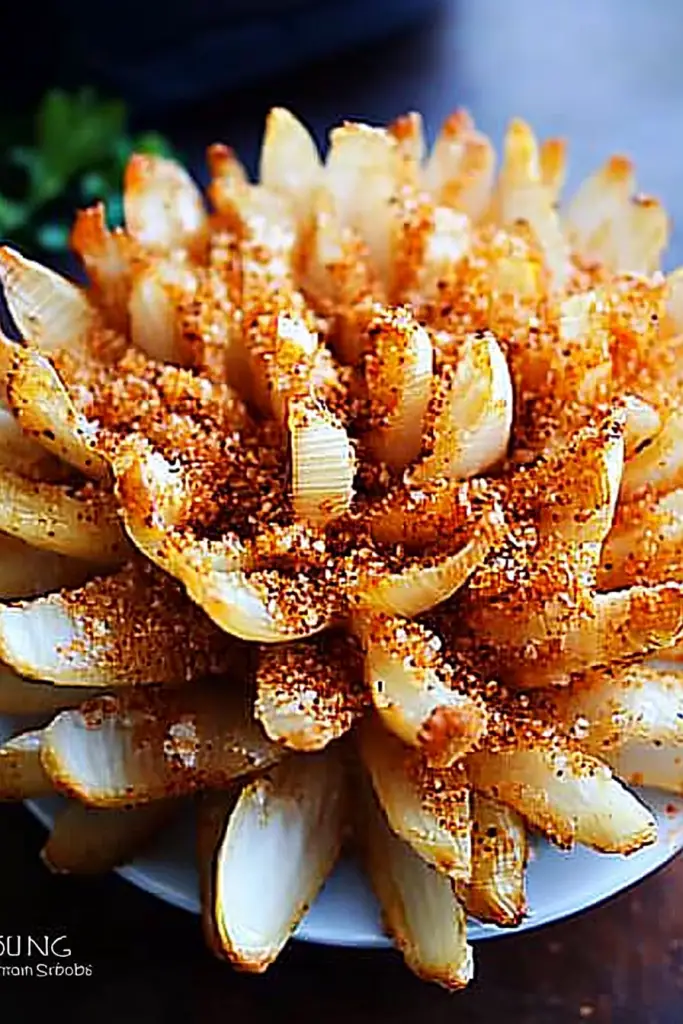
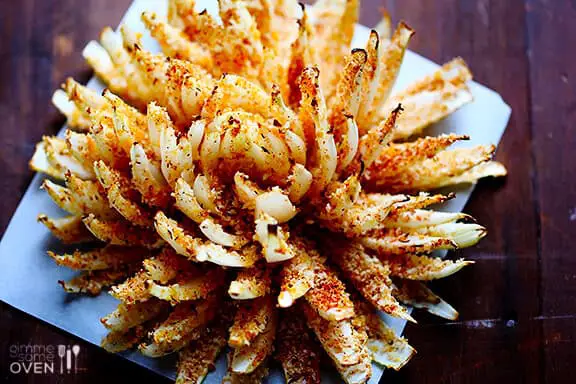
So, what exactly is this baked blooming onion marvel? Think of it as the oven-baked cousin of the famous deep-fried appetizer, but with a healthier, more approachable twist. Instead of being submerged in hot oil, we’re giving it a good brush of seasoned oil and letting the oven do all the hard work. The star of the show, of course, is a large yellow onion. We carefully cut it to create “petals” that open up beautifully as it bakes, revealing tender, sweet layers. These layers get brushed with a delicious, savory spice blend and then baked until they’re tender on the inside and wonderfully crisp and golden on the edges. It’s essentially a whole onion transformed into a shareable, edible flower of deliciousness, perfect for dipping!
Why you’ll love this recipe?
Honestly, there are so many reasons why this baked blooming onion recipe has become a staple in my kitchen. First and foremost, the flavor is just out of this world. That oniony sweetness, amplified by the bake, combined with a perfectly balanced blend of savory spices, is completely addictive. It’s got that satisfying texture contrast too – tender, juicy onion in the center with those delightfully crispy outer petals. What I love most, though, is how incredibly simple it is. You might look at the cutting step and feel a little intimidated, but trust me, once you do it once, you’ll be a pro. It’s far less fussy than you might imagine, and the results are so worth it. Plus, it’s surprisingly cost-effective! A big onion is so much cheaper than buying a pre-made appetizer, and you probably already have most of the spices in your pantry. And let’s talk versatility! While it’s fantastic on its own, this baked blooming onion is also a wonderful base for other toppings or can be served alongside so many meals. It’s the kind of dish that feels fancy enough for a special occasion but is easy enough for a Tuesday night. It’s truly the best of all worlds.
How do I make baked onions?
Quick Overview
Making this baked blooming onion is a joy because it’s all about patience and a few simple techniques. You’ll start by prepping the onion, which involves a specific cutting method to get those beautiful “blooms.” Then, we create a fantastic spice rub that coats every layer, followed by a generous brushing of oil. The magic happens in the oven, where the onion slowly cooks and crisps up. The whole process is really quite straightforward, and the visual transformation as it bakes is part of the fun. It’s a recipe that truly delivers big flavor with minimal effort, making it perfect for anyone wanting a show-stopping appetizer without the stress.
Ingredients
For the Main Onion:
1 large yellow onion (about 1 pound), firm and free of bruises. Look for one that’s not too tall, as it helps with stability.
1/2 cup all-purpose flour
1/4 cup cornstarch (this is my secret weapon for extra crispiness!)
2 teaspoons paprika (smoked paprika adds a wonderful depth)
1 teaspoon garlic powder
1 teaspoon onion powder
1/2 teaspoon dried thyme
1/2 teaspoon dried oregano
1/4 teaspoon cayenne pepper (optional, for a little kick!)
1 teaspoon salt
1/2 teaspoon Black Pepper
For the Batter/Brushing:
1/2 cup milk (any kind works, dairy or non-dairy!)
2 tablespoons unsalted butter, melted (or olive oil for a dairy-free option)
For Serving (Optional but highly recommended!):
Your favorite dipping sauce! Ranch, bloomin’ onion sauce, or even a spicy aioli are fantastic choices.
Step-by-Step Instructions
Step 1: Preheat & Prep Pan
First things first, preheat your oven to 400°F (200°C). You’ll want to grab a sturdy baking sheet and line it with parchment paper. This makes cleanup a breeze, trust me! Now, for the onion. You want to slice off the very top, just enough to create a flat surface. Then, place the onion, cut-side down, on your cutting board. Carefully slice off the root end, but be sure to leave the core intact. This is super important for keeping the onion together. You want to cut down almost to the root, about 1/2 inch from the bottom, making wedges all the way around. Aim for about 12-16 wedges. Gently spread out the wedges so the onion starts to look like a flower. If any petals look a bit stuck, you can carefully loosen them with your fingers.
Step 2: Mix Dry Ingredients
In a medium-sized bowl, whisk together the all-purpose flour, cornstarch, paprika, garlic powder, onion powder, dried thyme, dried oregano, cayenne pepper (if using), salt, and Black Pepper. Give it a good stir to make sure all those spices are evenly distributed. You want this blend to be nice and fragrant, like a little jar of savory magic! This dry mix is going to help create that delicious, crispy coating we all love.
Step 3: Mix Wet Ingredients
In a separate small bowl or a liquid measuring cup, whisk together the milk and the melted butter (or olive oil). This liquid mixture acts as a binder, helping the dry spices stick to the onion and also adding a little richness. Make sure the butter is fully incorporated and not separated.
Step 4: Combine & Coat
Now it’s time to bring it all together! Take your bloomed onion, which should be sitting prettily on your prepared baking sheet, and carefully brush the melted butter and milk mixture all over the onion, getting it into all those nooks and crannies between the petals. Don’t be shy with it! Next, take about half of your seasoned flour mixture and generously sprinkle it over the entire onion, making sure to get it down between the petals. Gently shake off any excess. Flip the onion over carefully and repeat the brushing and sprinkling process on the other side. You want to ensure every surface is well-coated for maximum flavor and crispiness.
Step 5: Prepare Filling (Optional Step for Extra Flavor)**
This step is entirely optional, but I love doing it for an extra layer of deliciousness! If you want to make a quick “filling” to nestle into the center of the onion before baking, you can mix together a couple of tablespoons of softened Cream Cheese (or vegan cream cheese) with a pinch of garlic powder and chives. Just gently press this mixture into the very center of the onion, between the innermost petals. It adds a wonderfully creamy, savory surprise.
Step 6: Bake to Perfection
Carefully place your seasoned onion onto the prepared baking sheet. Now, it’s time for the oven! Bake for 45-60 minutes, or until the onion is tender when pierced with a fork and the outer petals are beautifully golden brown and crispy. The exact baking time will depend on the size of your onion and your oven, so keep an eye on it. About halfway through the baking time, you might want to gently baste the onion with a little more melted butter or oil to ensure even crisping and browning.
Step 7: Cool Slightly & Serve
Once your baked blooming onion is golden and gorgeous, carefully remove it from the oven. Let it cool on the baking sheet for about 5-10 minutes before attempting to serve. This allows it to firm up a bit and makes it easier to handle. While it’s cooling, get your dipping sauce ready!
Step 8: Slice and Enjoy
To serve, you can either present the whole blooming onion on a platter for everyone to share, or carefully slice it into wedges, cutting from the top petals down through the root. Serve immediately with your favorite dipping sauce on the side. The aroma alone is enough to make everyone gather around!
What to Serve It With
This baked blooming onion is a superstar appetizer all on its own, but it also plays really nicely with a variety of meals. For a truly indulgent brunch spread, I love serving it alongside fluffy scrambled eggs, crispy bacon, and some fresh fruit. It adds a savory counterpoint that’s just divine. If you’re looking for a special dessert experience, though it might seem unusual, a lightly sweetened version of this can be surprisingly delightful. Imagine it served warm with a dollop of Vanilla Bean whipped cream or a drizzle of caramel – it’s a sweet and savory adventure! On cozy evenings, this is my go-to. It’s perfect paired with a hearty soup, like a creamy tomato or a robust butternut squash. Or, if we’re feeling really lazy, we’ll just have it as our main meal with a big green salad on the side. My kids, bless their hearts, think it’s the ultimate “fun food” and will happily eat it with just ranch dressing as a main course. It’s just so versatile!
Top Tips for Perfecting Your Baked Blooming Onion
Over the years, I’ve learned a few tricks that I think really elevate this baked blooming onion from good to absolutely sensational. When you’re selecting your onion, try to find one that’s firm and has a nice, round shape. A really tall, skinny onion can be a bit more challenging to handle and might not “bloom” as evenly. For the cutting, the key is to cut *almost* to the root, but not all the way through. This is what holds your beautiful onion flower together. If you’re nervous about cutting it, just go slow and steady; it’s more forgiving than you think! When it comes to the spice blend, don’t be afraid to play around. I’ve tried adding a pinch of smoked paprika for a deeper, smoky flavor, and a dash of chili powder can add a nice warmth. The cornstarch in the dry mix is my secret weapon for extra crispiness – it makes a noticeable difference! Ensure you really get that spice mixture down between all the onion layers; that’s where all the flavor is hiding. For the oil or butter brushing, make sure you get it in every crevice. This helps with browning and crisping. And when it comes to baking, ovens can be so different! Keep an eye on your onion. You’re looking for those gorgeous golden-brown edges and a tender interior. If one side seems to be browning faster than the other, you can carefully rotate the baking sheet. I’ve also found that basting with a little extra butter halfway through can help create an even more irresistible golden crust. Remember, practice makes perfect, and even if it’s not *perfectly* bloomed the first time, it will still be incredibly delicious!
Storing and Reheating Tips
While this baked blooming onion is undeniably best enjoyed fresh out of the oven, life happens, and sometimes you have leftovers. If you do find yourself with some, don’t fret! Store any leftovers in an airtight container at room temperature for up to a day. I find that it retains its crispiness best this way. If you need to store it for longer, tuck it into the refrigerator for up to 2-3 days. Just be aware that the petals will soften considerably. Reheating is where things get a little trickier. The best way to revive some of that crispiness is to pop it back into a preheated oven (around 350°F or 175°C) for about 10-15 minutes, or until heated through and slightly crisped up again. Microwaving will make it soft and mushy, so I generally avoid that if crispiness is a priority. For best results, I honestly recommend trying to eat it all in one go – it’s that good!
Frequently Asked Questions
Final Thoughts
So there you have it – a baked blooming onion that’s every bit as impressive and delicious as its fried counterpart, but so much easier to make! I really hope you give this recipe a try. It’s become such a cherished dish in my home, and I’m confident it will become a favorite in yours too. It’s perfect for when you want to impress without the fuss, or just treat yourself to something incredibly satisfying. If you love this, you might also enjoy my recipes for Crispy Baked Zucchini Fries or my Garlic Parmesan Roasted Potatoes – they’re in a similar vein of comfort food made easy! I’d absolutely love to hear what you think if you make it. Please leave a comment below to share your experience, your favorite dipping sauce, or any fun variations you tried. And if you’re feeling generous, a rating would be wonderful! Happy baking, and I can’t wait to see your gorgeous blooming onions!
Baked Blooming Onion
Ingredients
Main Ingredients
- 1 large onion Vidalia or sweet onion
- 0.5 cup all-purpose flour
- 0.25 cup cornstarch
- 1 teaspoon paprika
- 0.5 teaspoon garlic powder
- 0.5 teaspoon onion powder
- 0.25 teaspoon cayenne pepper optional
- 0.5 teaspoon salt
- 0.25 teaspoon black pepper
- 2 large eggs beaten
- 0.5 cup milk
- 1.5 cup panko breadcrumbs
Instructions
Preparation Steps
- Preheat your oven to 400°F (200°C). Line a baking sheet with parchment paper.
- Trim off the top of the onion, leaving the root end intact. Stand the onion cut-side down and make cuts from the top to about 0.5 inch from the root, dividing it into 12-16 wedges. Be careful not to cut all the way through.
- Gently spread the wedges apart to form a blooming shape.
- In a shallow bowl, whisk together the flour, cornstarch, paprika, garlic powder, onion powder, cayenne pepper (if using), salt, and black pepper.
- In another shallow bowl, whisk together the beaten eggs and milk.
- Dip the onion into the egg mixture, making sure to coat the inside of the wedges. Let any excess drip off.
- Place the panko breadcrumbs in a third shallow bowl. Press the onion into the breadcrumbs, coating it thoroughly. Gently press the breadcrumbs into the crevices to ensure good coverage.
- Place the breaded onion, cut-side down, on the prepared baking sheet.
- Bake for 30-35 minutes, or until the onion is tender and golden brown. If it starts to brown too quickly, you can loosely tent it with foil.
- Let it cool for a few minutes before serving. Serve with your favorite dipping sauce like ranch, bloomin' onion sauce, or a spicy aioli.


