


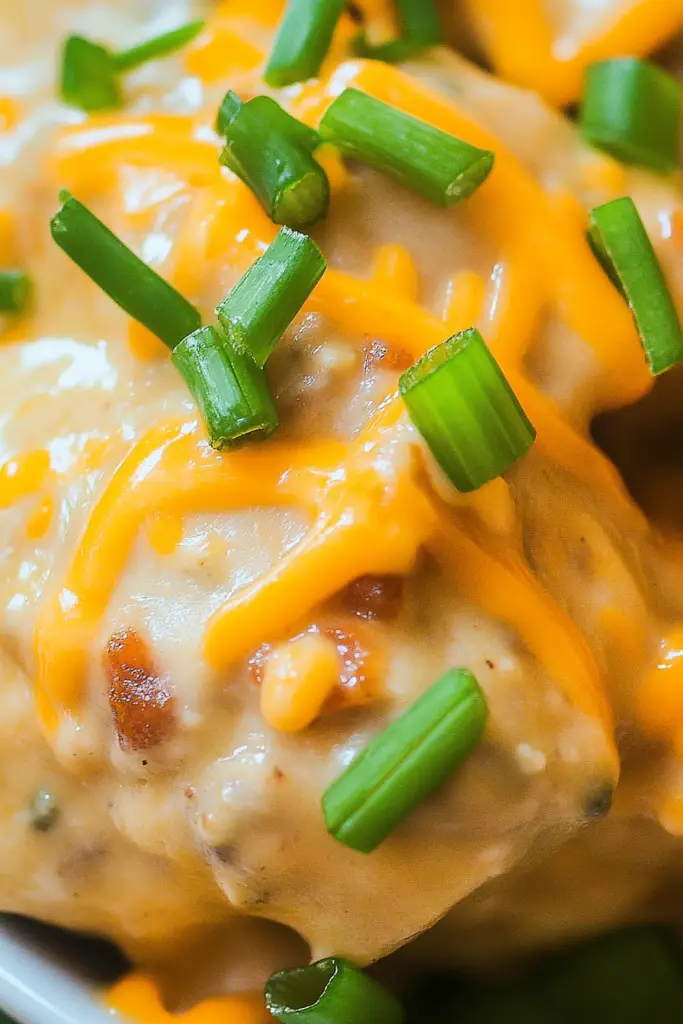
Bacon Cheeseburger pierogies are the ultimate comfort food hybrid, combining the savory goodness of a classic cheeseburger with the nostalgic taste of traditional pierogies. Whether you’re a fan of hearty meals or simply curious about experimental recipes, these pierogies add a twist to your culinary repertoire worth trying. Satisfy your cravings with this mouthwatering dish that features layers of flavor in every bite.

Growing up, my grandmother always made pierogies during family gatherings. They were a cherished staple at our table, bringing everyone together in the kitchen to indulge in their pillowy texture and delicious fillings. Recently, inspired by a backyard barbecue, I decided to merge these beloved flavors with my all-time favorite cheeseburger. The result was magical, and it instantly became a family favorite that we now serve every chance we get!
Why You’ll Love This Recipe
This recipe is perfect for anyone who loves comfort food with a twist. By combining the juicy flavors of a Bacon Cheeseburger with the creamy texture of pierogies, you get a dish that’s rich, hearty, and full of flavor. It’s practical, too — perfect for a weeknight dinner or to impress guests at a gathering. Plus, you can prepare them in advance, saving time when entertaining.
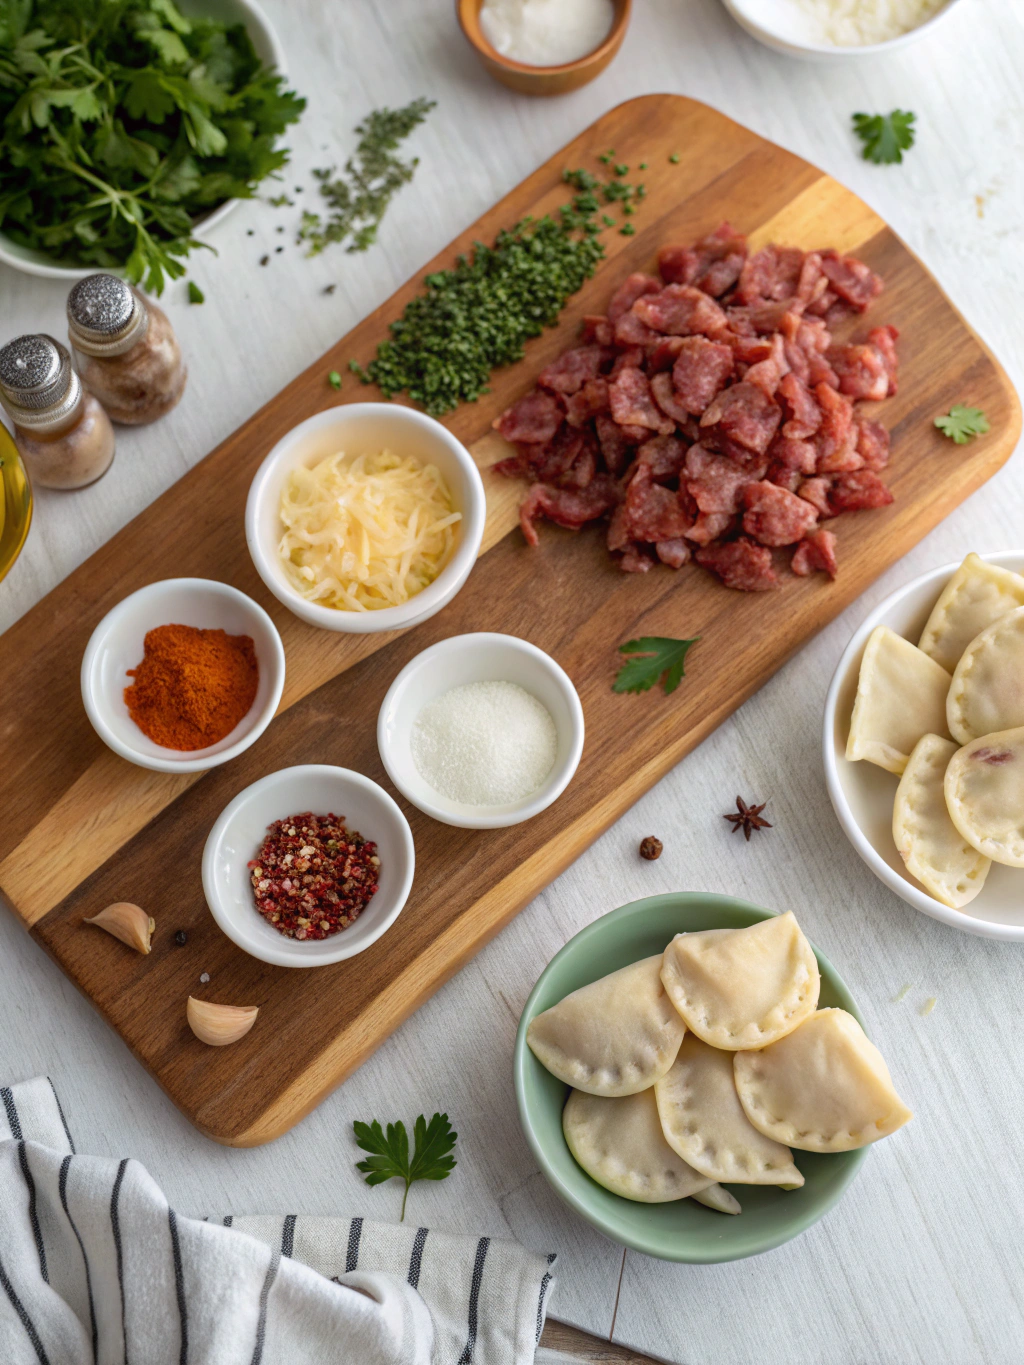
Ingredients Notes
The key to this recipe is choosing high-quality ingredients that capture the essence of both a classic cheeseburger and homemade pierogies.
- Bacon: Opt for thick-cut bacon for a substantial texture and fry until crispy for extra flavor.
- Ground Beef: Use ground beef with a bit of fat content for juicier pierogies.
- Cheese: Cheddar works best, but feel free to experiment with pepper jack for a kick.
- Pierogie Dough: Handmade dough provides the best texture but using store-bought is convenient.
Recipe Steps
Step 1
Begin by cooking the bacon until crispy, then crumble it into small pieces and set aside. In the same pan, brown the Ground Beef, seasoning with salt and pepper.
Step 2
In a mixing bowl, combine the cooked beef, crumbled bacon, and shredded cheese. Blend the mixture well to ensure that the cheese melts slightly, binding the ingredients together.
Step 3
Roll out the pierogie dough on a floured surface until it’s about 1/8 inch thick. Cut circles using a cookie cutter or a glass.
Step 4
Spoon a small amount of the filling mixture onto each dough circle. Fold them over and press the edges to seal, forming the classic pierogie shape. Use a fork to crimp the edges further, preventing any filling from leaking out.
Step 5
Cook the pierogies in a pot of boiling water until they float to the top. For an extra crispy texture, sear them in a hot pan with a bit of butter until golden brown on each side.
Storage Options
Store any leftovers in an airtight container in the refrigerator for up to three days. To freeze, place them in a single layer on a baking sheet before transferring to a freezer bag. Reheat frozen pierogies by boiling them directly from the freezer, or pan-fry them for a crispy finish.
Variations & Substitutions
Feel free to swap the Ground Beef for ground turkey for a lighter version. Plant-based eaters can use vegan bacon and cheese alternatives to enjoy a delicious meat-free dish. Adding sautéed onions or mushrooms to the filling can provide a different depth of flavor, catering to your personal taste.
Frequently Asked Questions
Can I use store-bought pierogie dough? Yes, store-bought dough is a convenient alternative and works perfectly for those who are short on time. However, homemade dough offers a fresher taste and a personalized touch.
What type of cheese is best suited for these pierogies? Cheddar cheese complements the beef and bacon flavors exceptionally well, offering a rich, tangy taste. If you’re looking to add some extra spice, try mixing in pepper jack cheese.
Are there any tips for sealing pierogies properly? Ensure the dough edges are free of filling before sealing. Using a bit of water to moisten the edges can help them stick together. Press firmly with a fork to avoid any leaking during boiling or frying.


