


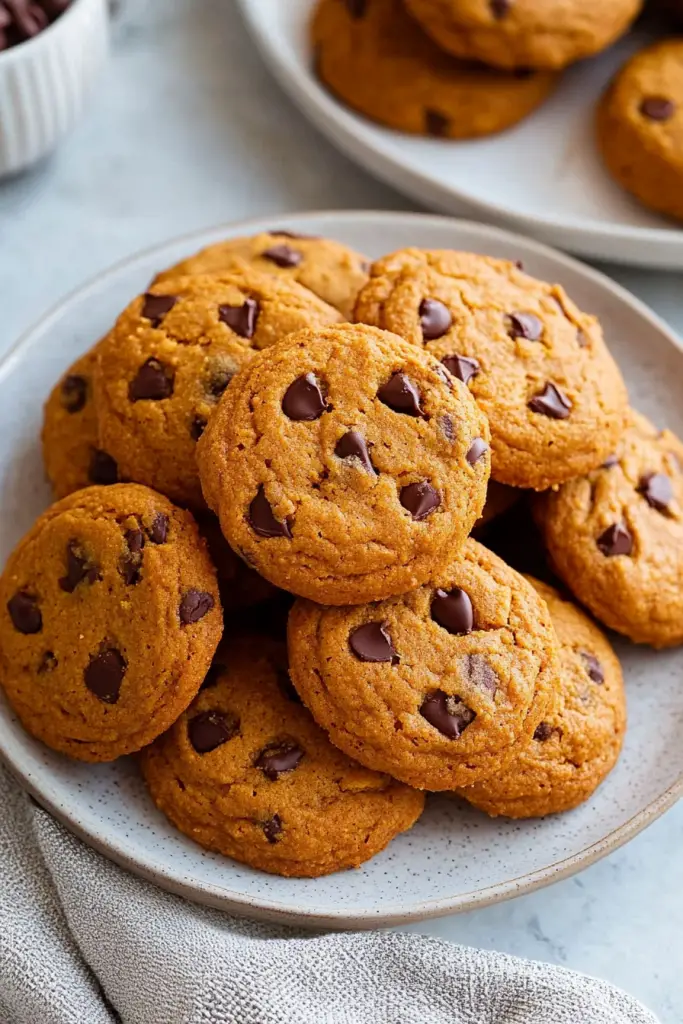
Oh, friend, let me tell you about these pumpkin cookies. There are just some recipes that mark a season for you, aren’t there? For me, it’s always been these incredibly soft, perfectly spiced pumpkin cookies. Every single autumn, as soon as the air gets that crisp, cool bite and the leaves start to whisper their golden goodbyes, my kitchen starts to smell of warm spices and sweet pumpkin. It’s like a hug from the inside out, a culinary signal that cozy sweater weather is here to stay. My grandma used to make a similar kind, but I tweaked hers over the years to get this unbelievably moist, almost cake-like texture that still holds its shape beautifully. It’s a far cry from those dry, crumbly cookies we’ve all encountered, and honestly, a million times easier than tackling a whole pumpkin pie, yet it gives you all those delightful fall flavors. If you’re anything like me, you’ll find yourself craving these the moment September rolls around, and you’ll probably have a batch baked and ready before you even finish your first pumpkin spice latte of the season. They just have that magic touch, you know? They simply disappear in minutes at my house, and I bet they will in yours too!
What are pumpkin cookies?
So, what exactly are these glorious pumpkin cookies I’m raving about? Well, imagine the softest, most tender cookie you’ve ever had, infused with the comforting essence of pumpkin puree and a symphony of warming fall spices. Think of it as a fluffy, cloud-like cookie that’s a delightful cross between a traditional sugar cookie and a slice of spiced pumpkin bread. It’s essentially a celebration of autumn in every bite! Unlike some chewier cookie varieties, these are designed to be incredibly soft and slightly pillowy, almost like a mini cake. The magic happens with the pumpkin puree, which not only provides that gorgeous orange hue and subtle earthy sweetness but also contributes to the incredible moisture and tenderness. When I say these are a taste of fall, I mean it – they embody everything cozy and comforting about the season, from the aroma that fills your home to the sweet, spiced flavor that lingers long after the last bite.
Why you’ll love this recipe?
Oh, where do I even begin with why you’ll fall head over heels for these pumpkin cookies? This recipe isn’t just another cookie on the block; it’s a game-changer for your autumn baking. What I love most about this is just how effortlessly it brings joy. Firstly, let’s talk about the flavor. It’s not just “pumpkin.” It’s a rich, deep pumpkin flavor harmoniously blended with cinnamon, nutmeg, ginger, and just a hint of cloves – truly a spice blend that sings! It reminds me of the best parts of a pumpkin pie, but in a handheld, delightfully soft package. Every bite is like a warm autumn hug. You know those cookies that are so good you just have to close your eyes and savor them? These are those cookies. My family asks for them by name! Secondly, the simplicity is unmatched. Seriously, you don’t need any fancy equipment or advanced baking degrees here. It’s a straightforward mix-and-bake process, making it incredibly approachable for even novice bakers. I’ve made these countless times after a long day when I just need a little kitchen therapy, and they never fail to deliver. No complicated steps, just pure cookie bliss. Thirdly, they’re surprisingly cost-efficient. Most of the ingredients are pantry staples you probably already have: flour, sugar, eggs, butter, pumpkin puree, and your basic spice rack. No need for a special grocery trip that breaks the bank, which is a lifesaver on busy weeks. And finally, the versatility is fantastic. While they’re perfect on their own, they absolutely shine when paired with a simple cream cheese frosting (which I’ll share how to make!), or even just a dusting of powdered sugar. They’re wonderful for breakfast with coffee, an afternoon pick-me-up, or even a cozy dessert after dinner. Unlike a fussy layer cake, you can whip these up for any occasion, big or small. This one stands out because it perfectly balances that comforting, nostalgic flavor with truly impressive ease. You’ll wonder why you ever bothered with any other pumpkin cookie recipe!
How do you make pumpkin cookies?
Quick Overview
Making these pumpkin cookies is truly a breeze, I promise! The whole process is incredibly simple, mostly involving combining a few bowls of ingredients before baking. We’re going to start by getting our wet and dry ingredients perfectly mixed in separate bowls, then bringing them together just enough to create that luscious, tender batter. The secret to their incredible softness, beyond the pumpkin itself, is in not overmixing, which I’ll guide you through. Then it’s just a matter of dropping spoonfuls onto a baking sheet, and letting your oven work its magic. Honestly, the hardest part is waiting for them to cool before you can devour them! This method ensures a consistently moist and flavorful pumpkin cookie every single time, even if you’re a beginner baker.
Ingredients
For the Main Batter:
- 1 cup (2 sticks) unsalted butter, softened – trust me, softened is key for that creamy texture!
- 1 ½ cups granulated sugar – for the perfect sweetness balance with the pumpkin.
- ½ cup packed light brown sugar – adds a deeper, molasses-y note that’s divine.
- 1 (15-ounce) can pumpkin puree (not pumpkin pie filling!) – this is the heart of our pumpkin cookies, choose a good quality one.
- 2 large eggs, room temperature – helps everything emulsify beautifully.
- 1 teaspoon vanilla extract – always a must for rounding out flavors.
- 3 cups all-purpose flour – don’t pack it, spoon and level for accuracy.
- 2 teaspoons baking powder – gives them that lovely lift.
- 1 teaspoon baking soda – ensures they spread just right.
- 2 teaspoons ground cinnamon – the star spice, a must for pumpkin cookies.
- 1 teaspoon ground nutmeg – a warm, aromatic touch.
- ½ teaspoon ground ginger – adds a little zesty kick.
- ¼ teaspoon ground cloves – just a tiny bit enhances all the other spices.
- ½ teaspoon salt – balances all the sweet flavors.
For the Cream Cheese Glaze (Optional, but highly recommended!):
- 4 ounces cream cheese, softened – full-fat works best for creaminess.
- ½ cup (1 stick) unsalted butter, softened – again, softened is non-negotiable!
- 2-3 cups powdered sugar, sifted – adjust to your desired sweetness and consistency.
- 1 teaspoon vanilla extract – ties all the flavors together.
- 1-2 tablespoons milk or cream – for thinning the glaze to a drizzly perfection.
Step-by-Step Instructions
Step 1: Preheat & Prep Pan
First things first, let’s get that oven ready! You’ll want to preheat your oven to 350°F (175°C). While it’s heating up, line a couple of baking sheets with parchment paper or silicone baking mats. This is one of my go-to tricks – it makes cleanup a breeze and ensures your pumpkin cookies won’t stick. I usually prep two pans so I can bake in batches without interruption.
Step 2: Mix Dry Ingredients
In a medium bowl, whisk together your flour, baking powder, baking soda, cinnamon, nutmeg, ginger, cloves, and salt. Give it a really good whisk, making sure all those spices are evenly distributed. This step is crucial because it ensures every single cookie gets that consistent, amazing flavor. You don’t want a pocket of just cinnamon in one cookie and none in another, right?
Step 3: Mix Wet Ingredients
Now for the good stuff! In a large bowl (or the bowl of your stand mixer), cream together the softened butter, granulated sugar, and brown sugar until the mixture is light and fluffy. This usually takes about 2-3 minutes. Then, beat in the pumpkin puree, eggs, and vanilla extract until everything is well combined and smooth. It might look a little curdled at first, but keep beating, and it will come together into a beautiful, creamy pumpkin base. I always make sure my eggs are at room temperature; it really helps them incorporate better into the batter.
Step 4: Combine
It’s time to bring it all together! Gradually add your dry ingredient mixture to the wet ingredients, mixing on low speed (if using a stand mixer) or by hand with a spatula, just until combined. This is where you need to be gentle! Overmixing is the enemy of tender pumpkin cookies. Stop as soon as you no longer see streaks of dry flour. A few lumps are totally fine, promise!
Step 5: Prepare Cream Cheese Glaze (If using)
While your oven is preheating or your cookies are baking, let’s get that glaze ready if you’re going for it (and you should!). In a medium bowl, beat the softened cream cheese and softened butter together until smooth and creamy. This can take a couple of minutes. Then, gradually beat in the sifted powdered sugar, one cup at a time, until it’s smooth and lump-free. Stir in the vanilla extract. Finally, add milk or cream, 1 tablespoon at a time, until you reach your desired drizzly consistency. I like mine thick enough to coat, but thin enough to drip a little.
Step 6: Drop & Bake
Now, scoop your cookie dough onto the prepared baking sheets. I usually use a cookie scoop (about 1.5 tablespoons) to ensure uniform sizes, which helps them bake evenly. Leave about 2 inches between each cookie, as they will spread a bit. No need to flatten them; they’ll puff up beautifully on their own. Pop them into your preheated oven.
Step 7: Bake
Bake for 10-15 minutes, or until the edges are just set and the tops look lightly puffed and no longer wet. The key here is not to overbake, which will dry out your precious pumpkin cookies. They might still look a little soft in the center, and that’s exactly what you want! A quick peek at the bottom will show you a very light golden-brown. My oven usually takes about 12 minutes, but every oven is a little different, so keep an eye on them starting around the 10-minute mark.
Step 8: Cool & Glaze
Once baked, remove the cookies from the oven and let them cool on the baking sheet for about 5 minutes. This helps them set up and prevents them from breaking when you transfer them. After 5 minutes, carefully transfer the pumpkin cookies to a wire rack to cool completely. This is critical before glazing! If you glaze them while they’re warm, the glaze will just melt right off. Once they’re completely cool, drizzle or spread your prepared cream cheese glaze over the tops. Oh, the anticipation! I like to use a small spoon or even a piping bag for a neater look.
Step 9: Slice & Serve
If you used the glaze, let it set up a bit (about 15-20 minutes) before stacking or serving. These pumpkin cookies are best enjoyed at room temperature, perhaps with a cup of coffee or a tall glass of milk. There’s no fancy slicing involved, just pick one up and enjoy that perfectly soft, spiced bite!
For an extra festive touch, sprinkle a tiny pinch of cinnamon or nutmeg over the glazed pumpkin cookies before the glaze sets!

What to Serve It With
These soft, spiced pumpkin cookies are so incredibly versatile, they truly fit into almost any part of your day! My family has their own little rituals around them. Here are a few ways we love to enjoy them:
For Breakfast: Honestly, a pumpkin cookie (or two, don’t judge!) with your morning coffee is pure bliss. The warm spices in the cookie perfectly complement a robust dark roast or even a creamy latte. Sometimes, I’ll skip the glaze if I’m having them first thing; the natural sweetness is just right. They’re such a comforting start to a crisp autumn day, much better than a boring muffin!
For Brunch: If you’re hosting a fall brunch, these pumpkin cookies make a gorgeous addition to a dessert spread. Arrange them beautifully on a platter next to some fresh fruit, perhaps a quiche, and mimosas or a spiced cider. They look elegant with that creamy glaze, and they’re so much easier to handle than a slice of cake. My sister always makes sure they’re on the table when she comes over for brunch.
As Dessert: While they shine on their own, these pumpkin cookies can be elevated for an after-dinner treat. Serve them slightly warm (a quick 10-second zap in the microwave does the trick!) with a scoop of vanilla bean ice cream. The contrast of the warm, soft cookie and cold, creamy ice cream is just divine. A sprinkle of toasted pecans or a drizzle of caramel sauce can take it to the next level. It’s an unexpectedly delightful alternative to a heavier dessert.
For Cozy Snacks: This is probably their most frequent role in my household! A batch of these pumpkin cookies is perfect for an afternoon snack with a glass of milk for the kids, or a cozy tea for me. My kids actually ask for these specifically in their lunchboxes, and they disappear every time. They’re also ideal for bringing to a potluck or sharing with neighbors – everyone appreciates a homemade treat, especially one that tastes like autumn.

Top Tips for Perfecting Your Pumpkin Cookies
I’ve made these pumpkin cookies countless times, and believe me, I’ve learned a few tricks (and made a few mistakes!) along the way. Here are my absolute best tips to ensure your pumpkin cookies turn out perfectly every single time, just like mine:
Pumpkin Puree Prep: Always, always, always use pure pumpkin puree, not pumpkin pie filling! They’re different, and the pie filling has added sugar and spices that will throw off the balance of this recipe. Another crucial tip: blot your pumpkin puree with a paper towel if it seems overly wet. Sometimes canned pumpkin can vary in moisture content, and a little less liquid ensures your cookies aren’t too cakey or overly soft. I always do this when I open a new can.
Mixing Advice: The golden rule for soft pumpkin cookies? Do NOT overmix the batter once you’ve added the flour. Mix only until the dry ingredients are just combined and you no longer see streaks of flour. Overmixing develops the gluten too much, leading to tough, chewy cookies instead of the tender, melt-in-your-mouth texture we’re after. Trust me on this one; a few lumps are far better than a tough cookie.
Spice Customization: While I’ve given you my favorite spice blend, feel free to play around a bit! If you adore ginger, add an extra pinch. Not a fan of cloves? Reduce them or omit them entirely. You can even add a tiny dash of allspice for an extra layer of warmth. I sometimes add a tablespoon of finely chopped candied ginger for a little zing if I’m feeling adventurous.
Ingredient Swaps: Want to make them a bit healthier? You can swap up to half of the all-purpose flour for whole wheat pastry flour for a little extra fiber without sacrificing too much tenderness. For the glaze, you can use a dairy-free cream cheese and butter substitute if needed, and almond milk works perfectly for thinning. I tested this with almond milk and it actually made it even creamier!
Baking Tips: Keep a close eye on your oven! Every oven is a little different, and temperature fluctuations can impact your bake. I always recommend rotating your baking sheets halfway through the baking time for an even bake. And remember, these pumpkin cookies are meant to be soft, so err on the side of underbaking rather than overbaking. They should look slightly underdone in the center when you pull them out; they’ll continue to set up on the hot baking sheet.
Glaze Consistency: The perfect glaze consistency is key. If it’s too thick, it won’t spread smoothly; too thin, and it’ll run right off. Add the powdered sugar gradually and then the milk/cream just a tablespoon at a time until you get a thick but drizzly consistency. If it gets too thin, just whisk in a little more powdered sugar. If too thick, a few drops more milk. It’s a delicate balance, but worth it for that perfect finish!

Storing and Reheating Tips
When you’ve put all that love into baking these amazing pumpkin cookies, you want them to stay fresh and delicious for as long as possible, right? Here’s how I store mine to keep them tasting their best:
Room Temperature: If your cookies are glazed, they’re best stored in an airtight container at room temperature for up to 2-3 days. If it’s particularly warm or humid in your kitchen, I’d lean towards refrigerating them. Make sure the glaze has fully set before stacking them to prevent sticking. If they’re unglazed, they’ll stay fresh and soft for up to 3-4 days in an airtight container on the counter. I usually place a piece of parchment paper between layers if I have a lot of them.
Refrigerator Storage: For extended freshness, especially with the cream cheese glaze, I highly recommend storing your pumpkin cookies in an airtight container in the refrigerator for up to a week. They might firm up a little when cold, so I always let them come back to room temperature for about 15-20 minutes before serving. This really brings back their tender texture and full flavor. Trust me, it’s worth the wait!
Freezer Instructions: Yes, you can absolutely freeze these! This is a lifesaver on busy nights when you need a quick treat. If glazed, flash freeze the cookies on a baking sheet until the glaze is firm (about an hour), then transfer them to a freezer-safe airtight container or freezer bag. Separate layers with parchment paper. If unglazed, simply place them directly into a freezer-safe container. They’ll keep wonderfully in the freezer for up to 3 months. When you’re ready for a treat, just pull one out and let it thaw at room temperature for about an hour, or zap it in the microwave for 15-20 seconds for a warm, soft cookie.
Glaze Timing Advice: If you plan on freezing a whole batch, I’d suggest freezing the unglazed cookies. Then, you can whip up a fresh batch of glaze right before serving or when you take them out of the freezer. The glaze will always taste best freshly made. However, if you’re like me and sometimes just need a quick grab-and-go from the freezer, freezing them already glazed works just fine; just be prepared for the glaze texture to be a touch softer after thawing.
Frequently Asked Questions
Final Thoughts
Well, there you have it, my friend! My absolute favorite recipe for these wonderfully soft, perfectly spiced pumpkin cookies. I truly hope you give them a try this autumn. There’s just something so comforting and heartwarming about the smell of cinnamon and pumpkin wafting through your home, and these cookies deliver that cozy feeling in spades. They’re not just a recipe; they’re an experience, a little bite of pure autumn joy that my family and I look forward to every year. Whether you’re making them for a quiet evening at home, a bustling holiday gathering, or just because you’re craving something sweet and seasonal, I promise you won’t be disappointed. They disappear in minutes at my house, and I bet they will in yours too!
I can’t wait to hear how yours turn out! Please leave a comment below with your thoughts, any little tweaks you made, or how your family enjoyed them. Happy baking!
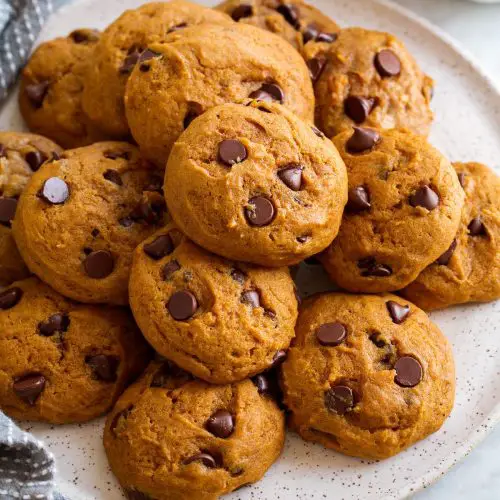
Pumpkin Chocolate Chip Cookies
Ingredients
Main Ingredients
- 2 cups all-purpose flour (spoon and level to measure flour)
- 2 tsp baking powder
- 0.75 tsp baking soda
- 1.5 tsp ground cinnamon
- 0.5 tsp ground ginger
- 0.5 tsp ground nutmeg
- 0.125 tsp ground cloves
- 0.5 tsp salt
- 0.5 cup granulated sugar
- 0.5 cup packed light-brown sugar
- 0.5 cup vegetable oil
- 1 large egg
- 1 tsp vanilla extract
- 1 cup canned pumpkin puree
- 1.5 cups semi-sweet chocolate chips
Instructions
Preparation Steps
- Preheat oven to 350 degrees F. Line baking sheets with silicone baking mats or parchment paper.
- In a mixing bowl, whisk together flour, baking powder, baking soda, cinnamon, nutmeg, ginger, cloves, and salt for 20 seconds; set aside.
- In the bowl of an electric stand mixer fitted with the paddle attachment, blend together granulated sugar, brown sugar, and vegetable oil until combined.
- Mix in the egg and vanilla extract, then blend in the pumpkin puree.
- With the mixer on low speed, slowly add in the flour mixture and mix just until nearly combined, scraping down the sides of the bowl as needed (the batter will be pretty wet).
- With a rubber spatula, fold in the chocolate chips while folding the batter to evenly combine.
- Drop dough in 2 Tbsp portions (either using a medium cookie dough scoop or two spoons) onto baking sheets lined with silicone liners or parchment paper, spacing cookies two inches apart.
- Bake in the preheated oven until cookies are nearly set, about 11-13 minutes.
- Allow to cool for several minutes before transferring to a wire rack to cool completely.
- Store in a single layer in an airtight container (these are best once they've rested in an airtight container for a few hours, as they soften throughout).


